What is GamePanel.exe and Should I Remove It?
Several Windows users have been reaching us with questions after having issues associated with GamePanel.exe. While some users are experiencing startup errors related to this executable or they see an error related to it when they try to start a game or the Xbox app, others report that they constantly see this executable taking a lot of system resources in Task Manager. As it turns out, the GamePanel executable can be found on Windows 10, Windows 8.1 and Windows 7.
After seeing constant errors associated with this executable or discovering that it’s using a considerable amount of resources, some users are wondering whether they are dealing with a security threat or not.
What is GamePanel.exe?
After looking at this executable and analyzing various user reports, we can conclude that the genuine GamePanel.exe is part of the legitimate of about 600 of legitimate executables that are part of the most recent Windows versions.
GamePanel.exe is tasked with providing the required information for games that have integration with the Xbox app. If this executable is missing, you might encounter errors when launching certain applications that rely on the Xbox Game components to facilitate the multiplayer components.
Is GamePanel.exe safe?
While the genuine GamePanel.exe file doesn’t pose any security risk and any errors associated with it should not be regarded as malware infections. But before you can come to this conclusion, you should start by confirming that the file is genuine.
Nowadays, most malware is designed with cloaking capabilities – They are capable of camouflaging themselves as a genuine system file or process and find their way in a protected folder to avoid being picked up by security scanners.
Since the default location of GamePanel.exe is in C:\Windows\System32\, some viruses will deliberately target it to avoid detection.
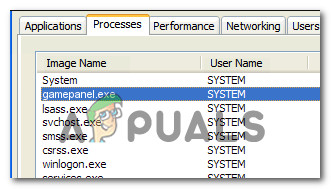
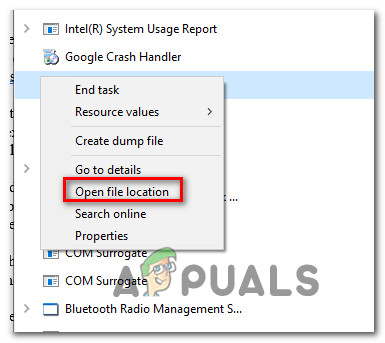
To investigate whether the file you’re dealing with is genuine or not, you should start by looking at the location. If you’re actively seeing the file inside Task Manager, press Ctrl + Shift + Esc to open the utility. Once you get there, select the Processes tab and scroll through the list of active processes until you locate GamePanel.exe.
Once you see it, right-click on it and choose Open File Location from the newly appeared context menu.
Note: If you only get startup errors associated with the GamePanel.exe executable but you can’t see it inside Task Manager or it’s default location, move directly to the ‘How to resolve GamePanel.exe errors?” section for steps of getting rid of the annoying errors.
If the operation above takes you to a different location than C:\Windows\System32\, there’s a high chance that you’re dealing with a virus infection. If that’s the case, your next step would be to confirm the virus infection by uploading the suspected malware to a virus signature analysis tool like VirusTotal. This web-app will analyze the file against dozens of popular virus databases and determined whether the file is infected or not.
To upload the file to VirusTotal, visit this link (here), upload GamePanel.exe and hit Submit/Upload. Then, wait for the results to be generated.
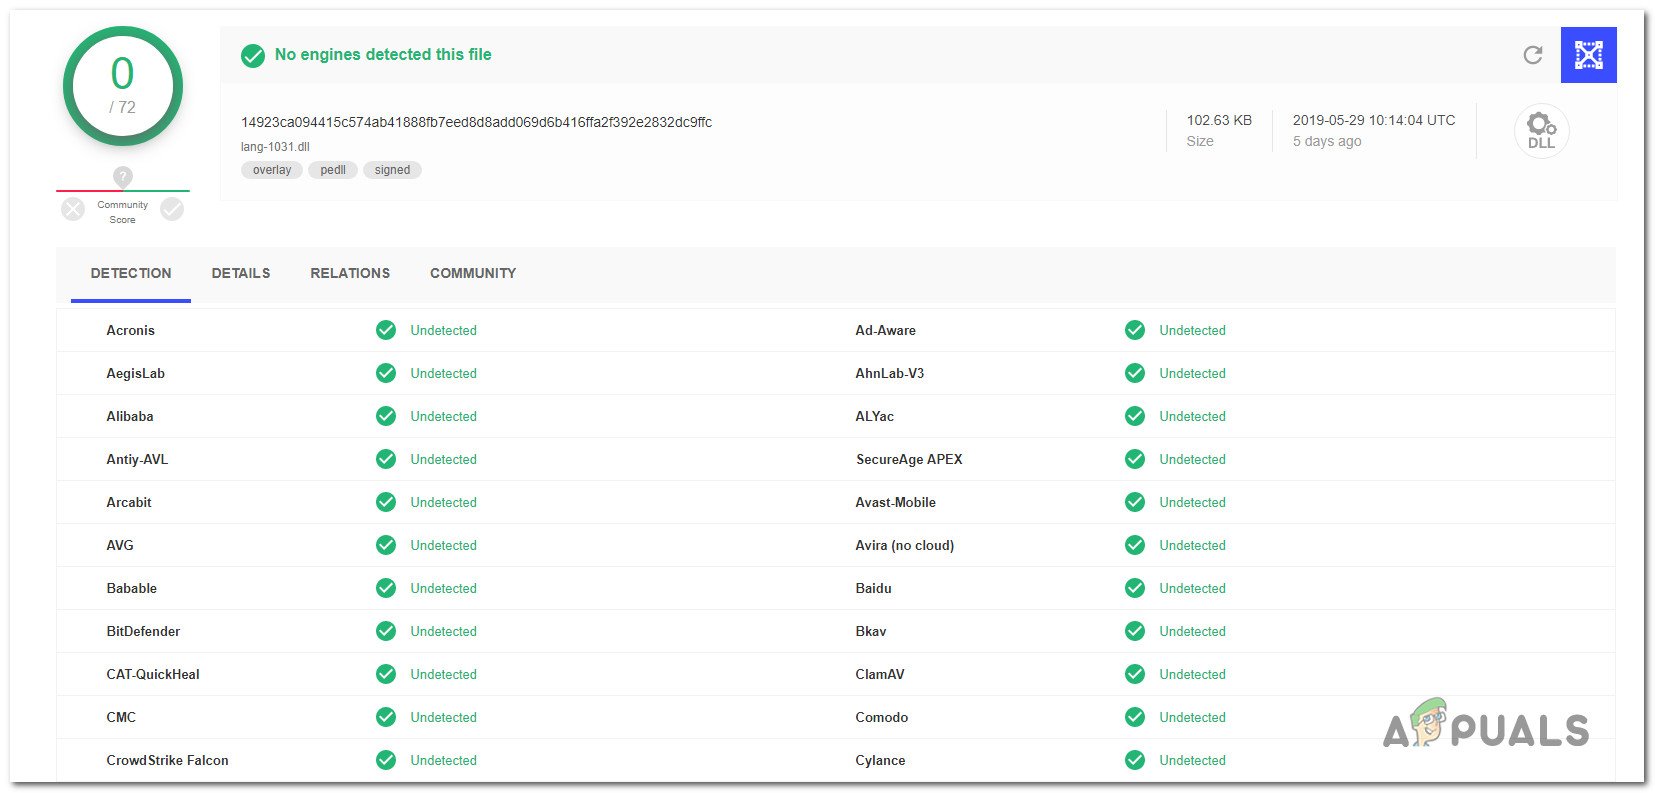
Note: If the analysis is all green (no virus threat has been identified), jump straight to the ‘How to resolve GamePanel.exe errors?’ section to deal with errors associated with this executable.
If the analysis reveals a potential malware, follow the next section below where we discuss an efficient virus removal strategy.
Should I Remove GamePanel.exe?
If the investigation above revealed that GamePanel.exe is not located in a genuine executable or the virus analysis is signaling a virus infection, you need to do a system-wide scan that will contain and remove the virus infection.
If you’re not looking to spend any money on paid security scanners capable of doing this effectively, we recommend doing a deep scan using Malwarebytes. We’ve used this tool successfully on a wide array of security threats such as this one. This procedure will identify the vast majority of security threats with cloaking capabilities and remove them from your system.
If you didn’t use this tool before, follow the instructions in this article (here) for step-by-step instructions on using the free version to perform a deep scan and get rid of the infection.
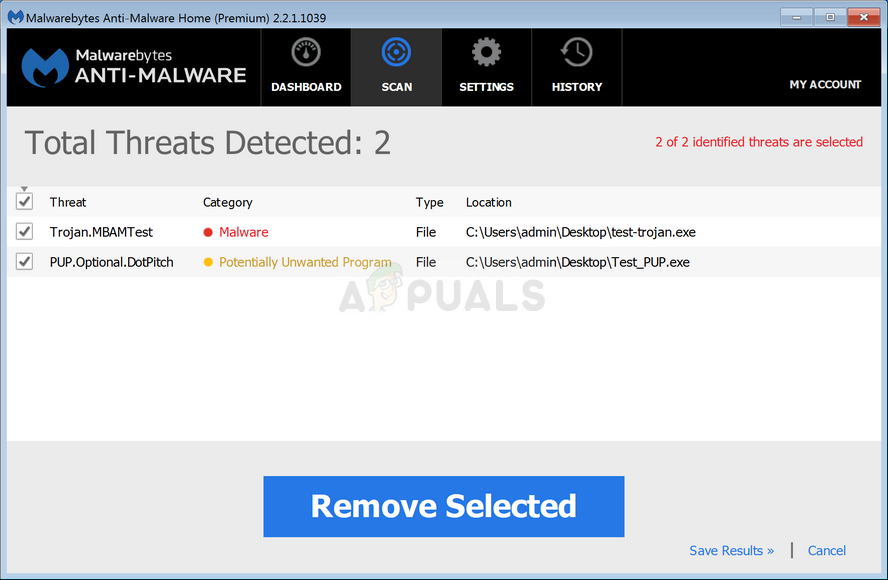
If the utility identifies and removes some items with a potential security risk, restart your computer and see if the startup errors (or high-resource usage) that you’re previously encountered are now resolved.
If you’re still having issues or the utility didn’t find any security threats, move down to the next section below for some troubleshooting guides that will remove errors associated with the GamePanel.exe file.
How to Resolve GamePanel.exe errors?
If you did all the verifications above to confirm that you’re not dealing with a security threat, let’s get to the part where we pinpoint and resolve the problem that’s causing errors associated with the GamePanel executable.
Down below, you’ll find several different fixes that affected users have successfully used to resolve startup errors (or application-specific errors) that appeared whenever the GamePanel.exe needed to be used). Each of the potential fixes featured below is confirmed to be effective by at least one affected users.
Regardless of the type of issue that you’re having, we recommend that you follow the methods below in the same order that we arranged them in. Eventually, you should stumble upon a fix that should fix the problem regardless of the culprit that’s causing the issue.
Let’s begin!
Method 1: Running DISM and SFC scans
Several users that we’re encountering this issue while trying to launch a particular game or app have reported that they managed to resolve the issue by using a couple of utilities capable of resolving system file corruption.
As it turns out, the main cause that will trigger errors of this kind is some degree of system file corruption.
Note: If you followed the instructions above to get rid of the infection, we highly recommend that you follow the instructions below. If the GamePanel.exe file was removed due to an infection, chances your system is now missing the genuine executable. This will end up causing additional error messages until you regenerate that file (using this procedure).
When it comes to resolving system file errors, the best way to do it is by relying on two built-in utilities –DISM (Deployment Image Servicing and Management) and SFC (System File Checker).
While DISM relies on WU (Windows Update) to replace corrupted files with healthy copies, SFC uses a locally stored archive to replace files waiting to be replaced. But since DISM is better with corrupted WU components and SFC is focused on fixing logical errors, the ideal approach is to run both utilities to maximize your chance of resolving the issue.
Here’s a quick guide on running both a DISM and SFC scan from an elevated command prompt:
- Press Windows key + R to open up a Run dialog box. Once you’re inside the Run box, type “cmd” inside the text box and press Ctrl + Shift + Enter to open up a Command Prompt with admin access. When you’re prompted by the UAC (User Account Control) prompt, click Yes to grant administrative privileges.
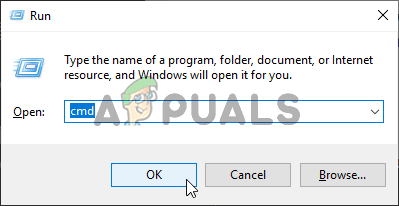
Running Command Prompt - Once you’re inside the elevated Command Prompt, type the following command and press Enter to initiate a System File Checker scan:
sfc /scannow
Note: Once you start this scan, do not interrupt it (by closing the window or by restarting your computer) until the process is complete. Doing so will likely create additional logical errors that could cause other problems with your OS.
- After the scan is complete, restart your computer and wait for the next startup to complete. Once the OS is fully loaded, follow step 1 again to open up another elevated Command Prompt.
- After you manage to open up another elevated CMD window, type the following command to initiate a DISM scan:
Dism.exe /online /cleanup-image /scanhealth
Dism.exe /online /cleanup-image /restorehealth
Note: Make sure you have a stable internet connection before initiating this DISM scan. The first command will make the utility scan the system for any inconsistencies while the second will start the restoring process.
- Once the DISM repairing process is finished, restart your computer and see if the errors associated with GamePanel.exe are now resolved.
If you’re still encountering startup or application-specific errors associated with GamePanel.exe, move down to the next method below.
Method 2: Using System Restore
If the method above didn’t help you to resolve the issue, chances are you’re dealing with a serious case of system file corruption that cannot be resolved conventionally. In situations like this, you should start with the damage-control approach.
System restore is capable of resolving the vast majority of issues caused by system corruption by restoring the machine to a healthy state in which the circumstances that are currently causing the issue didn’t exist.
Of course, in order for this method to be successful, you need to have previously created a restore snapshot that can be used to restore the operating system to the previous point in time. But unless you made changes to the default System Restore behavior, the utility should create snapshots constantly (after every important system change).
But keep in mind that restoring your machine state to a previous point in time means that any change you made during that time will be lost. This includes app installation, user settings and installed Windows update.
If you are prepared to go through with this procedure, follow the instructions below:
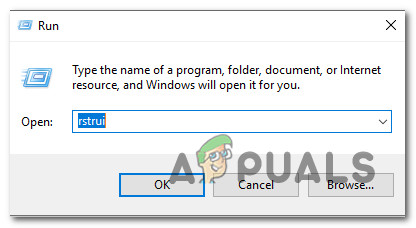
- Press Windows key + R to open up a Run dialog box. Next, type “rstrui” inside the newly appeared text box and press Enter to open up the System Restore menu.
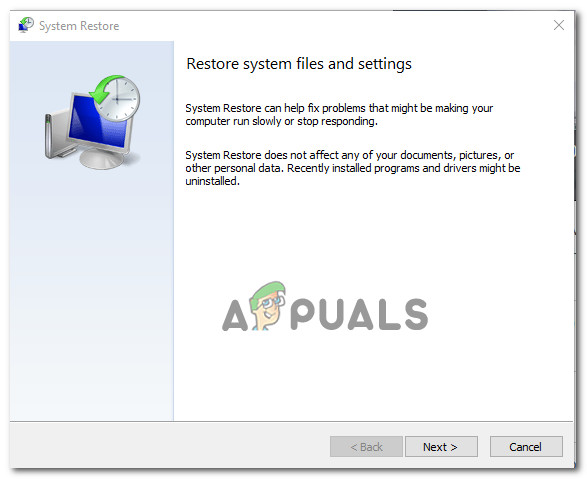
Opening the System Restore wizard via Run box - Once you arrive at the initial window of System Restore, click Next to advance to the next screen.
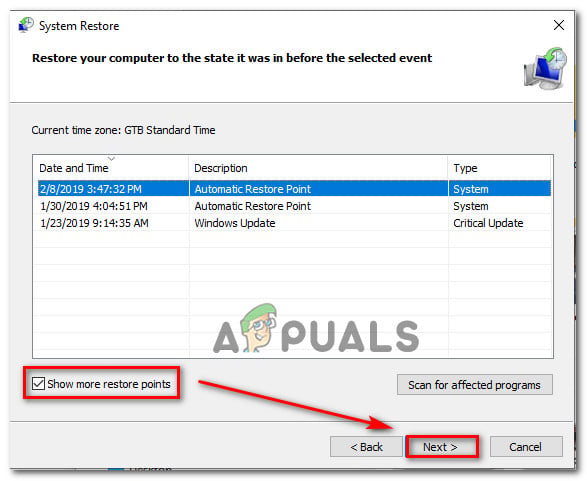
Using System Restore - Once you get to the next screen, start by enabling the box associated with Show more restore points. After you do this, look at the dates carefully and look for a restore snapshot that is dated before the apparition of the GamePanel.exe errors. After you find an appropriate snapshot, click on it once to select it, then click Next to advance to the next menu.
Restoring your system to a previous point in time - Now that the utility is ready to go, click Finish to initiate the restoring process. Several seconds after you click that button, your computer will restart and the old machine state will be mounted.
- At the next startup sequence, repeat the action that was causing the GamePanel.exe errors and see if the problem has been dealt with.
If you’re still encountering errors associated with the GamePanel executable, move down to the next method below.
Method 3: Performing a repair install or clean install
If none of the methods above have allowed you to resolve the issue, chances are you’re dealing with a severe system file corruption scenario that cannot be resolved conventionally. if this scenario is applicable, you should be able to resolve the issue by resetting every Windows component that might be what’s causing the GamePanel.exe error.
To fix this problem at this point, you only have two options: a clean install (here) or a repair install (here).
A clean install is arguably a little more efficient, but one major downside is that it will also remove any personal data including installed applications, games, personal data, and user preferences.
A repair install, on the other hand, will also reset all Windows components, but it will allow you to keep all personal belongings including games, applications, personal media, and any previously established Windows settings.