How to Fix ‘UPnP Not Successful’ on Xbox One / Xbox Series X
After dealing with some issues when playing multiplayer games on their Xbox consoles, some users are reporting that they see the ‘UPnP Not Succesfull‘ error when going to the Network settings tab to investigate the issue. This problem is confirmed to occur on both Xbox One and Xbox Series.
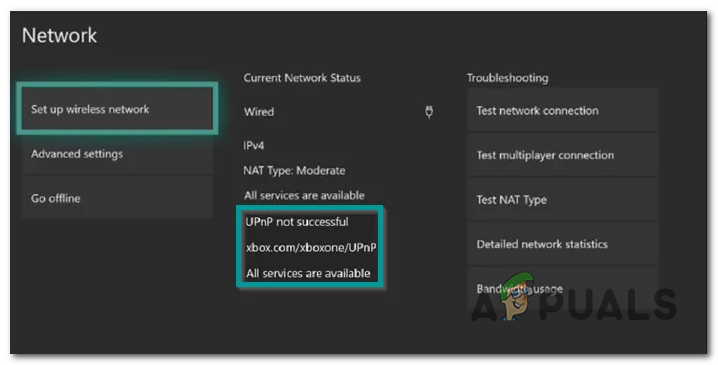
Note: Universal Plug and Play (UPnP) is the protocol that your Xbox console is designed to use by default when having to set up your router for multiplayer gaming and chat.
After investigating this issue and attempting to replicate the issue on our machine, it turns out that several different scenarios might be responsible for the apparition of this error code. Here’s a shortlist of potential culprits that you might want to investigate:
- UPnP is Disabled in your Router Settings – More often than not, your console will throw this error because Universal Plug and Play is actually disabled from your router settings. If this scenario is applicable, you should be able to fix the problem by accessing your router settings and enabling UPnP from the advanced settings menu.
- TCP or IP Network Inconsistency – If you confirmed that UPnP is already enabled in your router settings and you’re still dealing with this issue, the next thing you should do is troubleshoot for a potential network inconsistency. Restarting or resetting your router will troubleshoot the majority of TCP and IP issues that will cause this problem.
- Corrupted persistent storage – If you’re only experiencing this issue while playing a game from physical media, chances are the issue is related to the persistent Blu-Ray cache present on both Xbox One and Xbox Series S / X. A lot of affected users dealing with this problem have reported that the problem was fixed once they cleared the persistent storage cache from the Settings menu.
- ‘Shadow-banned’ MAC address – According to a lot of affected users that we’re experiencing this issue on Xbox Series X, several MAC address ranges have a tendency of being rejected by Microsoft. If you find yourself in this particular scenario, all you need to do si clear the current Alternate MAC address and reboot your console.
Now that you are familiar with every scenario that might force your console to throw the ‘UPnP Not Succesfull‘ error, move down below for a series of troubleshooting guides that other users have successfully used to resolve the problem:
Ensure that UPnP is Enabled in your Router settings
Before exploring other troubleshooting guides, you should start by ensuring that UPnP (Universal Plug and Play) is enabled on your router.
Note: UPnP has become an industry standard for years now, so if your router is newer than 4-5 years, this network feature should be available for you.
In most cases, this issue will occur because the Network Address Translation (NAT) is not opened for the network that your console is connected to. Xbox One and Xbox Series X users who also dealt with this problem have reported that they finally managed to fix the issue and play the game normally after accessing the Settings page of their router and manually enabled UPnP from the advanced menu.
After doing this and restarting their router, you should see the issue resolved and the ‘UPnP Not Succesfull‘ should no longer appear when you access the Network menu on your Xbox console.
If you find yourself in this scenario, follow the instructions below to enable the UPnP (Universal Plug and Play) option on your router/modem.
Note: In case your router doesn’t support UPnP, the instructions below won’t work for you.
Here’s what you need to do to enable UPnP from your router settings:
- First, make sure that your console is connected to the same router you’re about to access.
- Next, type 192.168.0.1 or 192.168.1.1 in your default proser and press Enter to open up your router’s Settings page.
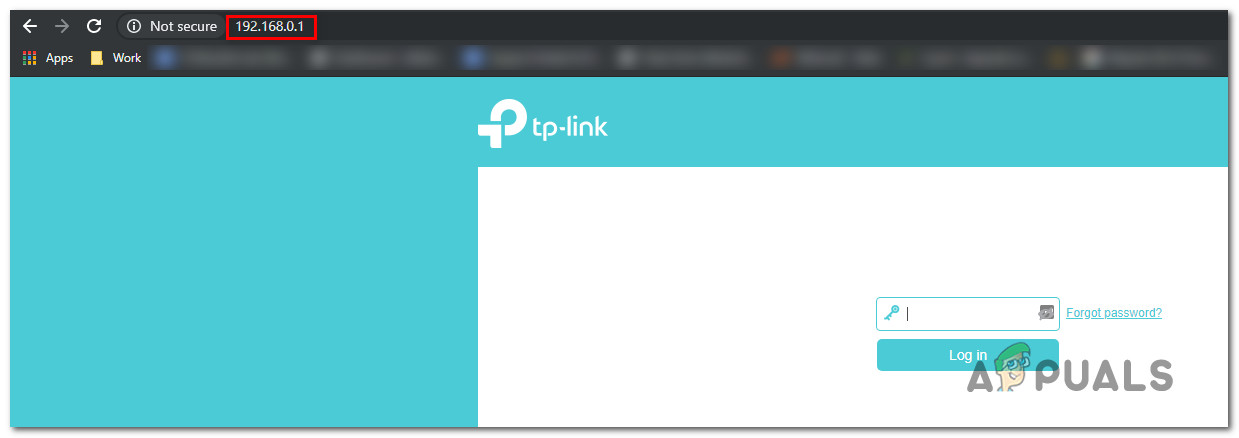
Accessing the router page Note: It’s possible that none of these default IP router addresses will work for some router models or if you previously manually adjusted the default router gateway address. In this case, search online for specific steps on accessing your router settings.
- Once you arrive at the initial login page, insert the credentials of your router (not the network credentials). If you haven’t changed the default login, the default login username and password should be ‘admin’ and ‘1234’.
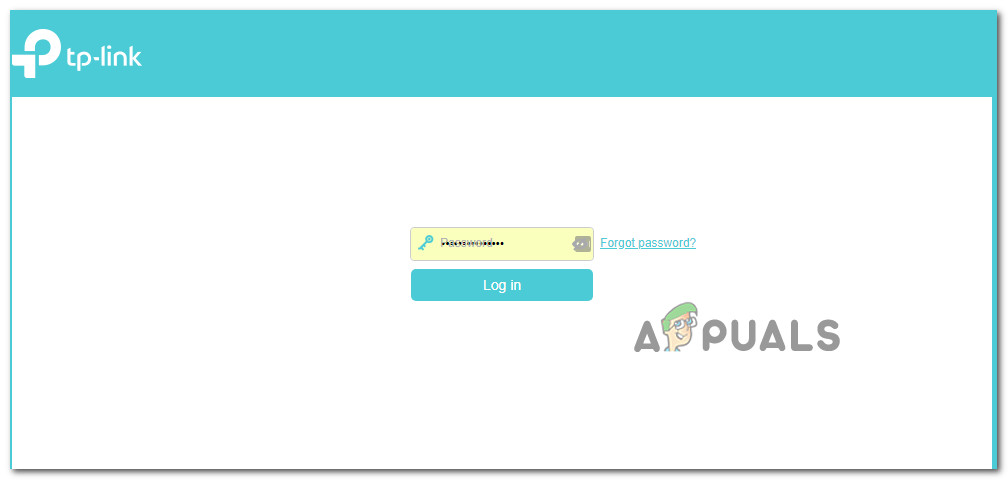
Accessing the router page Note: If the default credentials don’t work in your case, search online for the default login credentials of your router. Or, use the custom ones in case you’ve previously modified them.
- Inside your router settings, look for and access the Advanced menu. Once inside, go to the Nat forwarding tab and scroll down until you get to the UPnP sub-menu.

Enabling UPnP Note: Depending on your router manufacturer, the menus might look widely different than the instructions above. But generally, if your router is newer than 5 years, UPnP should be available in your router settings.
- After you’ve enabled UPnP, restart your router first and then your console to ensure that the necessary ports are opened.
- After the next startup is complete, launch the game again and see if the issue is now resolved.
If you’re still encountering the same ‘UPnP Not successful network error message when accessing the Settings menu of your Xbox console, move down to the next potential fix below.
Restart or Reset your router
If you previously made sure that UPnP is enabled in your router settings and your console is still unable to utilize this technology when it has to facilitate multiplayer games, the next most likely culprit is a TCP or IP issue facilitated by a problem with your router.
In this scenario, you have 2 different ways of fixing this problem:
- Restart your router – This will successfully refresh your current IP and TCP data that your router is using without making any persisting changes that might ultimately affect your network interaction. However, if the problem is not related to TCP and IP cached data, this method will not do much for you.
- Resetting your router – If the simple restart procedure doesn’t work for you, resetting your currently saved router settings will revert the device to the factory state in addition to clearing the cached data. However, keep in mind that if your ISP is using PPPoE, this operation will also reset the currently saved credentials.
Restarting your router
If you wish to start with something that doesn’t run the risk of affecting your immediate access to the Internet, a simple router reboot is an ideal way to start. This operation will clear the currently saved Internet Protocol data and Transmission Control Protocol data.
To perform a reset on your network device, start by identifying the power/switch button (typically located on the back of the device) and press it once to cut off the power. As soon as you do this, go ahead and disconnect the power cable from the power outlet and wait for 1 full minute or more.
Note: Keep in mind that disconnecting the power after you turn your router off is essential since it allows the power capacitors enough time to drain and clear any temp data that they currently might be maintaining in between restarts.
If restarting didn’t fix the problem, move down to resetting your network restart.
Reset your router
In case a simple reset didn’t do the trick for you, the next step is to go for a complete router reset to ensure that no setting or network-related cached data is currently causing the UPnP issue.
Important: Before you go ahead and reset your network device, it’s crucial to understand what this operation will do to your current network setup. It will reset your router back to its factory resets, which means that any forwarded ports, blocked items, and any other custom settings. Additionally, if your ISP is using PPPoE, a router reset will mean that the currently saved credentials will be ‘forgotten‘. So once you go through with the reset procedure, you’ll need to recreate the PPPoE connection.
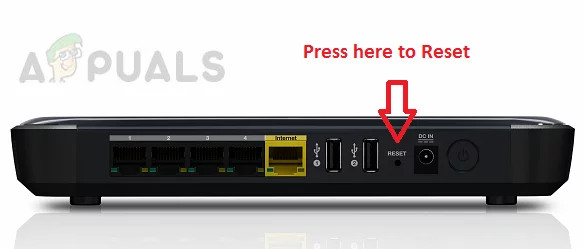
Now that you understand the consequences of this operation, you can initiate a router reset by finding the reset button (typically located on the rear of your router). Once you see it, pressing it and keeping it pressed until you see all the front LEDs flashing at the same time.
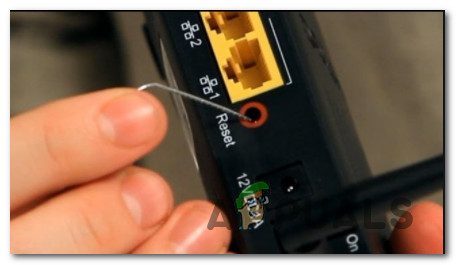
After the router is reset, re-establish the internet connection by reinserting the PPPoE credentials supplied by your ISP (if necessary) and see if your Xbox console is now capable of handling multiplayer games without displaying the same ‘UPnP is unsuccessful’ message.
If the problem is still not fixed even after you rebooted or reset your router, move down to the next potential fix below.
Clear the persistent storage cache
If you’re encountering this issue while playing a game from a game disk (physical media), you may be dealing with an inconsistency affecting the persistent Blu-Ray cache that Xbox One and Xbox Series X / S maintain.
Several affected users that we’re dealing with the same issue have confirmed that they managed to fix the ‘UPnP is unsuccessful; error message by reinstalling the Blu-Ray app and then clearing the persistent Blu-Ray cache storage before repeating the action that ultimately triggers the error code.
Immediately after you do this, your console should prompt you to install from the Xbox store (since the Blu-Ray infrastructure is missing). When this happens, all you have to do is click Install and follow the on-screen instruction.
If you’re looking for a guide through the whole process, follow the instructions below:
- On the main dashboard of your console, press the Xbox button on your controller to bring up the guide menu.
- When the guide menu is visible, access the Games & Apps menu.
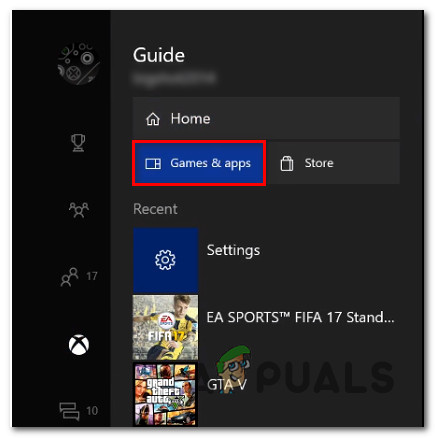
Accessing the My games & Apps menu - Once you’re inside the Game & apps menu, scroll down through the list of installed apps & games and locate the Blu-ray app.
- With the Blu-ray app highlighted, press the Start menu on your controller and choose to Manage app / Manage game from the newly appeared context menu.
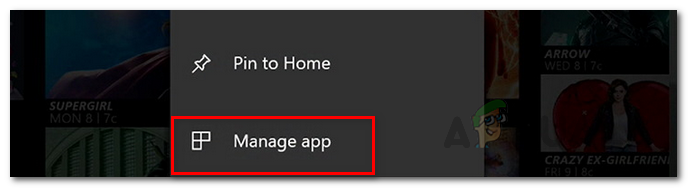
Managing the App - Once you’re inside the manage menu, move over to the right pane and click on Uninstall all to ensure that every add-in or update is also removed.
- At the confirmation prompt, select Uninstall all to ensure that you remove every remnant of the Blu-Ray app.
- After the Blu-ray app is completely uninstalled, return to the main dashboard menu and bring up the guide menu once again by pressing the Xbox button on your controller once again.
- From the guide menu, access the Settings menu (gear icon).

Accessing the Settings menu - Once you’re in the Settings menu, access the Console settings menu and then choose the Disc & Blu-Ray option from the right-hand side menu.
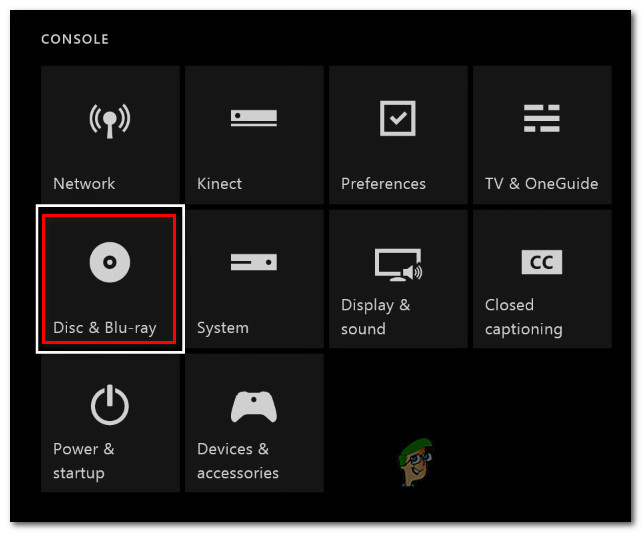
Accessing the Disk and Blu-ray menu - Once you’re inside the Disc & Blu-Ray menu, access the Persistent storage menu (under Blu-Ray).
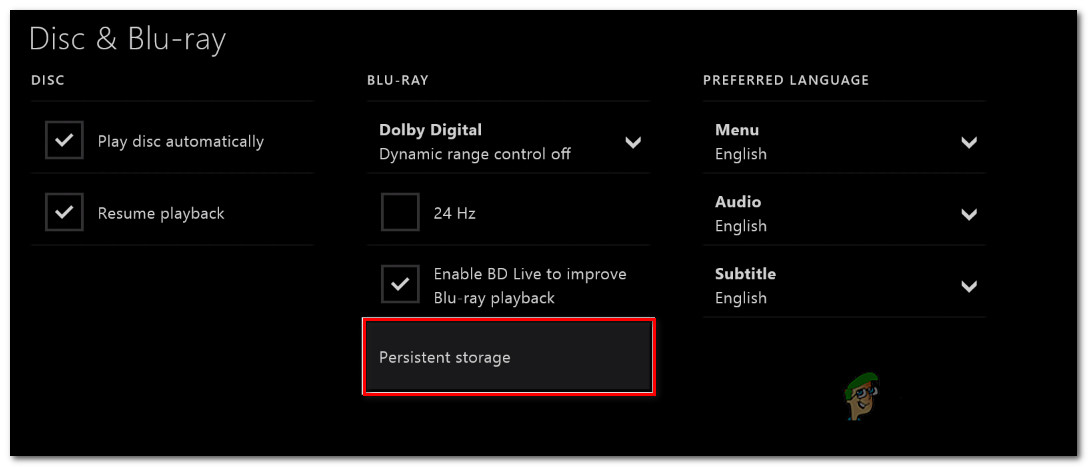
Accessing the persistent storage menu - When you arrive at the confirmation menu, use the Clear Persistent Storage menu to start the operation, then wait for the process to complete.
- After the process is complete, restart your console and wait for the next startup to complete.
- Once your console boots back up, return to Settings > Network and see if the UPnP issue is fixed.
In case this problem is still not resolved, move down to the next potential fix below.
Clear the alternate MAC address
If you’re encountering the Unknown Network Error on an Xbox One console after you’ve manually set up a MAC address in the past (or brought a used console), a MAC address may be inhibiting your console’s ability to connect to the Internet.
In case this scenario looks like it could be applicable, you should be able to fix the problem by accessing the Settings menu on your Xbox One console and clearing the Alternate MAC address that’s currently saved.
Note: This Alternate MAC address was put in place by Microsoft to allow users to utilize network features on restricted networks like hotels, public WI-Fis, hospitals, schools, etc.
If you suspect that an improper Alternate MAC address is causing the problem, follow the instructions below to clear this address from your computer:
- At the main dashboard menu of your Xbox One console, press the guide menu on your controller, then go to Settings > All Settings.
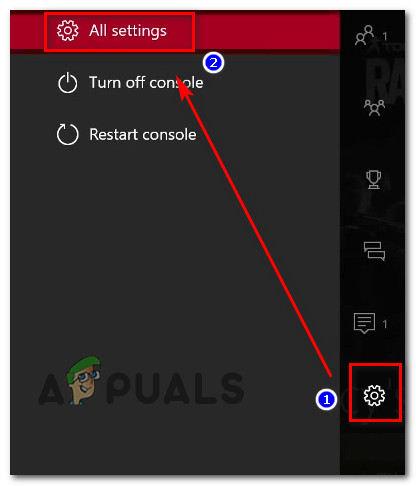
Accessing the All Settings menu - Inside the Settings menu, navigate to the Network tab from the menu on the left, then click on Network Settings.
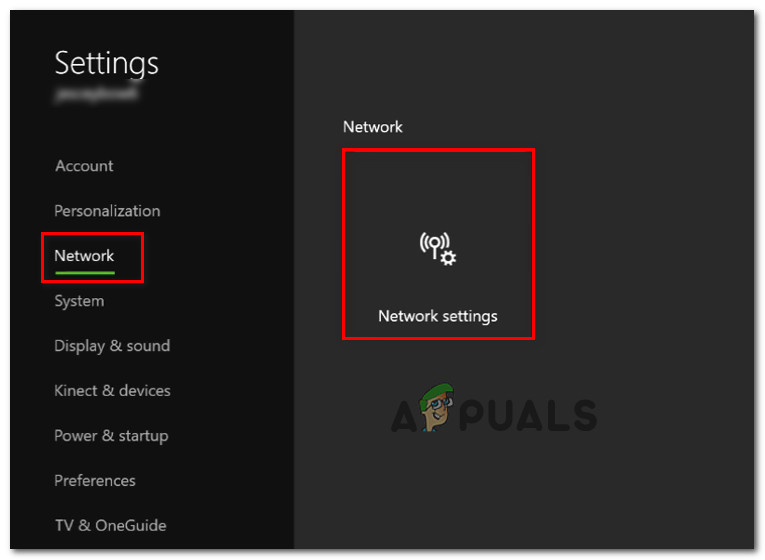
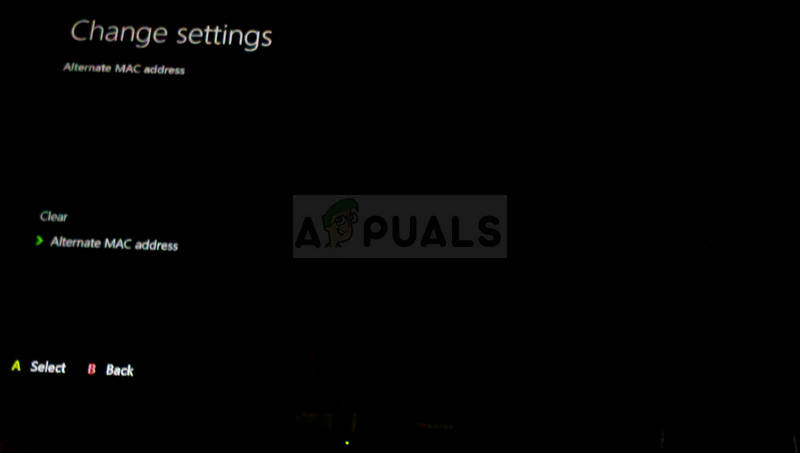
Accessing the Network settings - Next, access the Advanced Settings menu, then access the Alternate MAC address menu from the submenu that just appeared.
- From the Alternate MAC address that just appeared, choose Alternate Wired MAC or Alternate Wireless MAC (depending on which configuration you’re using) and hit Clear to confirm that you remove the cached data.
Clearing the alternate Mac address - Restart your console and return to Settings > Network to see if your Xbox console is still signaling an underlying issue with the UPnP protocol.
If the same problem is still occurring, move down to the next potential fix below.