Prevent Access to Shut Down, Restart, Sleep, and Hibernate
Some personal computers or servers should be running all the time for specific tasks. Servers are commonly used to deliver services that are constantly required, which is why they are never turned off. Similarly, some personal computers will be running certain processes that take a long time and the computer should be running for it.
By not shutting down the computer, users can also access it through remote access, even when away from it. However, someone can accidentally click on one of the power options which results in terminating the processes on your system. If used by multiple users, then another user can also use the power option without knowing that it should be running.
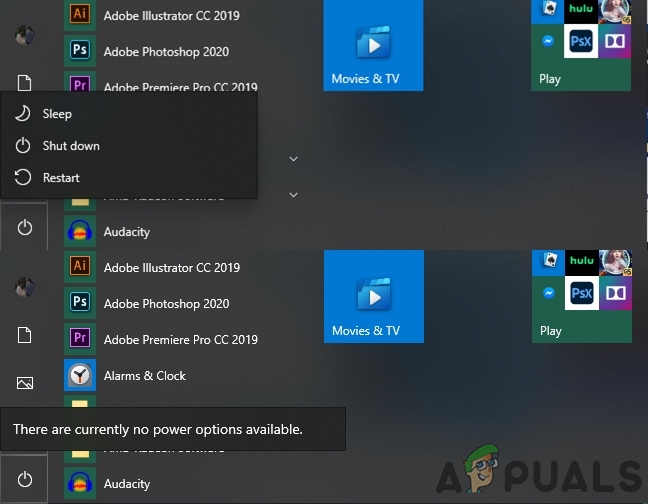
In this article, we will provide some methods through which you can disable the power options from the start menu. It will prevent users from restarting or turning off the computer. However, if the power options are already removed from your system, then you can use the below methods to enable it back. Sometimes “there are currently no power options available” can be caused by other culprits.
Removing Power Options through the Local Group Policy Editor
The Local Group Policy Editor is a Windows tool that allows users to control the working of the computer accounts and user accounts. There are thousands of policy settings in the Group Policy Editor. It has been improved with each Windows version and now finding a setting is easier because each setting has a folder for it. However, some of the settings will only work for the specific operating system and may not work on every Windows version.
The Local Group Policy Editor is only available for the Windows professional and enterprise editions. If you are using any other Windows Editions (Windows Home), then skip this method and try the other one.
Note: The setting can be found under both categories; Computer Configuration and User Configuration. The path for the policy setting will be the same, but the categories will be different.
- Open a Run dialog by pressing the Windows + R keys together. You can also open it by searching it through the Windows search feature. Type “gpedit.msc” and press the Enter key to open the Local Group Policy Editor.

Opening the Local Group Policy Editor - Navigate to the setting in Computer Configuration or User Configuration:
User Configuration\ Administrative Templates\ Start Menu and Taskbar\
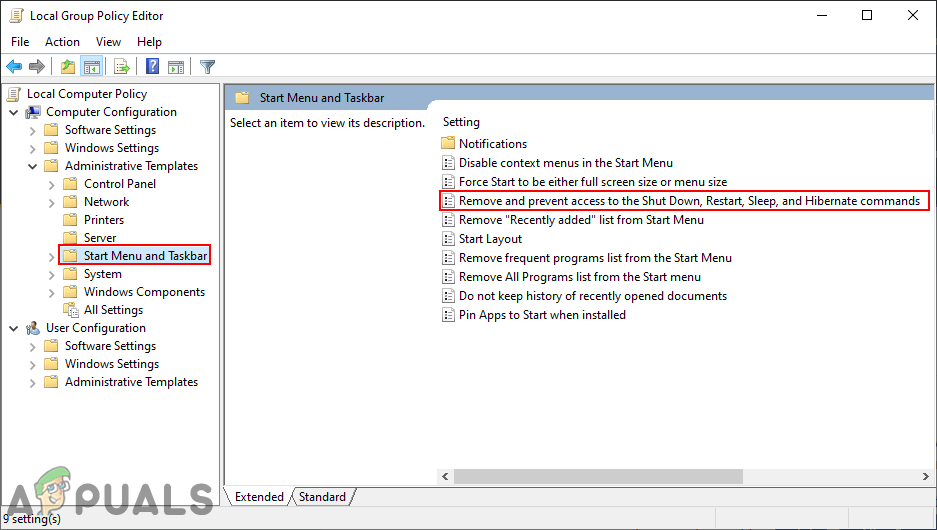
Navigating to the setting in the Group Policy - Open a setting named “Remove and prevent access to the Shut Down, Restart, Sleep, and Hibernate commands” by double-clicking on it. It will open another window, now change the toggle option from Not Configured to Enabled.

Enabling the setting - Click on the Apply and Ok buttons to save the changes made. This will disable the power options from the start menu and some other places.
- To enable it back, you will need to change the toggle option in step 3 back to Not Configured or Disabled.
Removing Power Options through the Registry Editor
If you used the above method, then the values will automatically be updated for your Registry. However, if you are using this without using the above method, then you will need to create the missing key/value for the setting. Just to be safe, we recommend you to create a backup of your registry before making any new changes. It is a bit technical method but you can easily do it by following the below steps.
Note: The value can be created for both the Current Machine and the Current User. The path for the value will be the same for both, but only the hives will be different.
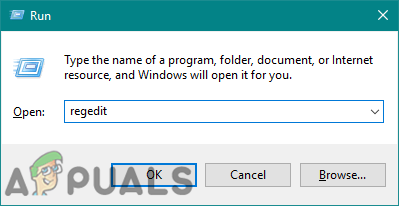
- Open a Run dialog by pressing the Windows + R keys together. Type “regedit” in it and press the Enter key to open the Registry Editor. If prompted by UAC (User Account Control), then click on the Yes button.
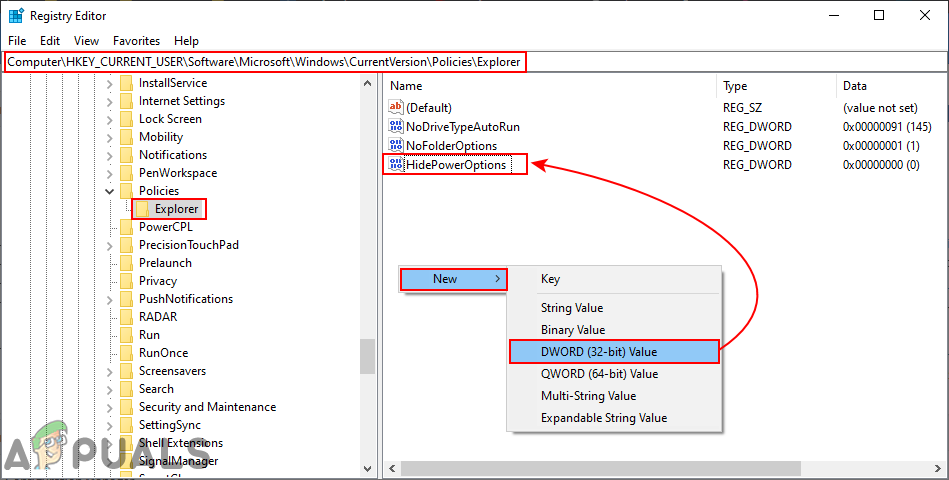
Opening the Registry Editor - In the Registry Editor, navigate to this key below:
HKEY_CURRENT_USER\Software\Microsoft\Windows\CurrentVersion\Policies\Explorer
Note: We are adding the value in Current User, you can add it to the Current Machine too.
- To create a new value, right-click on the right pane and choose the New > DWORD (32-bit) Value option. Name the value as “HidePowerOptions“.
Creating a new value in Explorer key - Double-click on the HidePowerOptions value to open it and then change the value data to 1.
Note: Value data 1 will enable the value and value data 0 will disable the value.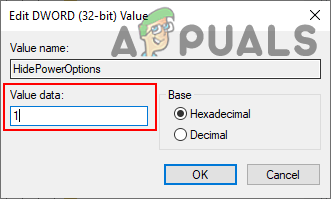
Enabling the value - Finally, after all the configurations, make sure to restart the computer to apply the changes.
- To enable the power options back on your system, you need to change the value data to 0 in step 4 or you can delete the value from the Registry Editor.