How to Remove Password from Windows 10
Generally, you need a combination of a username (or email address, if you have a Microsoft account) and a password to log in to a Windows 10 computer. Having to provide a password to log in to Windows 10 ensures the integrity and security of your user account. Windows 10 has brought with it a ton of alternatives to the alphanumeric character string passwords we all know oh so well. Users can log in to Windows 10 using their fingerprints (provided that their computer has a fingerprint sensor), using an interactive picture password or using a numeric PIN instead of an alphanumeric password.
However, some Windows 10 users find any level of security on their user accounts overkill, and would much rather log in to Windows 10 without having to provide any password of any kind. Having no password on your user account is the least secure option you have – anyone and everyone with access to your computer will be able to log in to your user account without your consent. If you are okay with having absolutely no security on your user account, however, you can certainly make it so that you can log in to Windows 10 without providing a password of any kind. The following are the two different ways you can go about removing the requirement for a password when you attempt to log in to Windows 10:
Method 1: Remove the requirement for a password for all users
Windows 10 allows you to make it so that no users on your computer have to type in a password of any sort to log in to their respective user accounts. With this option enabled, users can simply boot their computers up, select the user account they want to log in to and Windows 10 will log them in to the selected user account – no password or PIN of any kind required. To remove the requirement for a password for all users, all you need to do is:
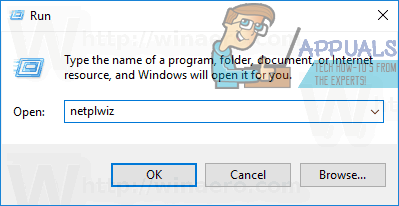
- Press the Windows Logo key + R to open a Run dialog.
- Type netplwiz into the Run dialog and press Enter to launch the User Accounts utility.
- Uncheck the checkbox located directly next to the Users must enter a user name and password to use this computer option to disable it.

- Click on Apply.

- You will be asked to enter the password for the user account you are currently signed in to, and then enter it once more for confirmation. Type in your password twice and then click on OK.

- Click on OK in the User Accounts window.

- Restart your computer.
When the computer boots up, provided that everything went as planned, you will be able to log in to your user account by simply selecting it on the login screen – you will not have to provide any kind of a password, there will be no biometric security and you won’t even be asked to confirm that the selected account is the actual account you want Windows 10 to log you in to.
Method 2: Remove your user account’s password
If Method 1 doesn’t work for you or if you only want to remove the password from your own user account without affecting the account protection preferences of the other user accounts on your computer in any way, have no fear – you can simply remove your user account’s password without interfering with the affairs of any other user accounts. However, be warned – you cannot remove the password from a Microsoft account. You are going to have to type in a password every time you log in to a Microsoft account on a Windows 10 computer – there’s no way around it, that’s just how it’s designed to work.
You can, however, remove the password from a local user account on a Windows 10 computer. In addition, you can also convert a Microsoft account on your computer into a local account and then remove the password from it. To convert a Microsoft account on Windows 10 into a local user account, you need to:
- Open the Start Menu.
- Click on Settings.

- Click on Accounts.

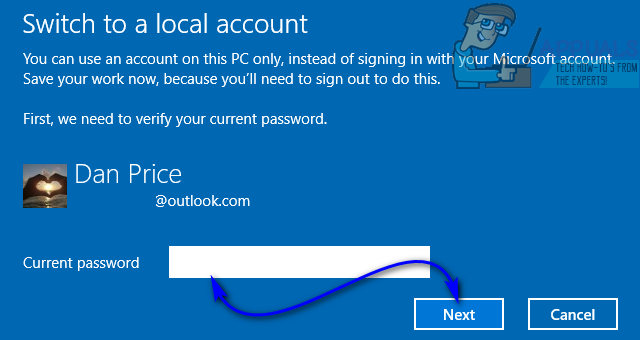
- Locate and click on Sign in with a local account instead in the right pane of the window.

- Type in your password, click on Next and follow the rest of the onscreen instructions to convert the Microsoft account into a local user account.
- Repeat steps 1–3.
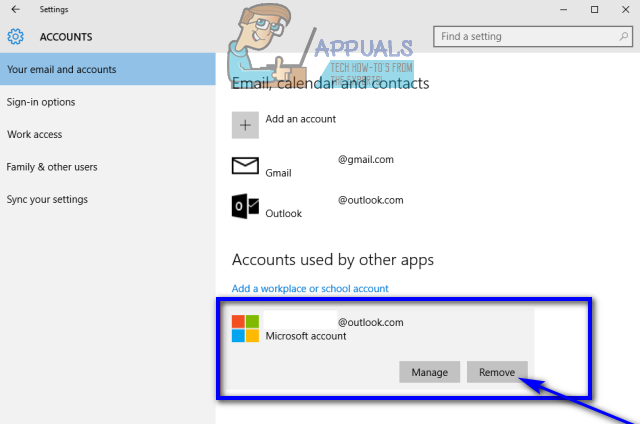
- In the right pane of the window, scroll down to the Other accounts you use section and locate and click on the Microsoft account you want to remove from your computer to select it.
- Click on Remove.
- Follow the onscreen instructions and prompts to remove the Microsoft account from your computer.
Here’s what you need to do in order to remove the password from a local user account on a Windows 10 computer:
- Open the Start Menu.
- Click on Settings.
- Click on Accounts.
- In the left pane of the window, click on Sign-in options.
- In the right pane of the window, click on Change under the Password section.
- Type the current password for your user account into the Current password field and click on Next.

- Leave all three fields on the next page empty, and click on Next.

- Click on Finish.

- Once done, you can close the Settings utility.
As soon as you have completed all of the steps listed and described below, the password for your local user account will be removed. This means that the next time you log in to this specific user account on your computer, you will not be asked to type in a password of any kind.