How to Fix VIDEO_DXGKRNL_FATAL_ERROR (0x00000113) on Windows 10
Several users have reported that their PC is frequently crashing with the Blue Screen error code VIDEO_DXGKRNL_FATAL_ERROR. This particular error appears very infrequently and has the bug check value of 0x00000113 which is indicative of a violation in the Microsoft DirectX graphics kernel subsystem. Typically, this error occurs whenever there’s a corrupt driver that interferes with the normal functionality of the GPU.

The VIDEO_DXGKRNL_FATAL_ERROR is only reported to occur on Windows 10. Almost unanimously, the error code is reported to occur after a large Windows Update (like the Creators Update or the Anniversary Update) or after the user finishes the upgrading process to Windows 10 from an older Windows version.
What is causing the VIDEO_DXGKRNL_FATAL_ERROR issue
After investigating the issue and looking at various user reports, we managed to identify several potential causes that will trigger this particular error. Below you have a list of potential culprits that might trigger the VIDEO_DXGKRNL_FATAL_ERROR BSOD crash:
- DirectX graphics kernel subsystem violation – This particular issue is often triggered by a bad DirectX install or by several corrupted DLL (dynamic link library) files. In this particular case, the fix would be to reinstall the entire DirectX library.
- Nvidia graphics driver is crashing the DXGKRNL – There is an extremely old Nvidia driver February 2015 that is known to cause VIDEO_DXGKRNL_FATAL_ERROR BSOD crashes.
- The crash is facilitated by intermittent power supply – The issue is complete to occur on laptops with a defective power supply. Apparently, continuous switches between the main supply and battery can trigger this error.
- The issue is caused by outdated BIOS version – Several users reports state that the issue was resolved as soon as they updated their BIOS version to the latest.
- A third-party security suite is causing the crash – There are a few user reports pointing towards a 3rd party antivirus as the culprit that triggers the VIDEO_DXGKRNL_FATAL_ERROR BSOD crash.
How to fix the IDEO_DXGKRNL_FATAL_ERROR issue
If you’re currently struggling to fix this particular issue, the following guide will provide you with several quality troubleshooting guides. Below you have a collection of methods that other users trying to resolve the very same error have used successfully.
For the best results, start with the first method and follow the rest of them in order until you stumble upon a fix that allows you to fix or circumvent the issue. Let’s begin!
Method 1: Update Nvidia Driver to the latest version (if applicable)
If you have an Nvidia dedicated graphics card, there’s a small chance that the issue is caused by a problematic driver that Nvidia released in February 2015. Of course, this is not applicable if you updated your graphics driver to the latest version. But if you didn’t, start by navigating to Nvidia’s Download page and installing the latest available driver according to your GPU model. This way we’ll make sure that the issue is not caused by a graphics card driver.
Here’s a quick guide on how to do this:
- Visit this link (here) and select your Product and the Operating System that you’re using.

Download the latest Nvidia driver according to your GPU model Note: Keep in mind that if you open the link above with Internet Explorer or Edge browser, you will automatically be redirected to the most recent (stable) GPU driver available for your dedicated graphics card.
- Once the driver is downloaded, open the installation executable and follow the on-screen prompts to bring your graphics driver to the latest version.
- When the driver installation is complete, restart your computer. At the next startup, try to replicate the same behavior that previously produced the VIDEO_DXGKRNL_FATAL_ERROR BSOD crash.
If the error is still occurring, continue down with the next method below.
Method 2: Update or Uninstall 3rd-party security suite
Some users have reported that the issue was permanently fixed as soon as they decided to uninstall their third-party security suite. MC Afee is commonly reported as the culprit that causes the VIDEO_DXGKRNL_FATAL_ERROR BSOD.
However, this is only confirmed to happen to outdated 3rd party security clients, so before making the decision of uninstalling the security software permanently, maybe try updating the client to the latest version first.
If updating the client didn’t make any difference, you can follow the steps below to uninstall the security client completely. As of now, there are no user reports confirming that this issue occurs with the built-in security solution (Windows Defender) – consider using this if the issue is resolved once the third party client is uninstalled.
Here’s a quick guide on uninstalling your third-party client:
- Press Windows key + R to open up a Run dialog box. Then, type “appwiz.cpl” and press Enter to open the Programs and Features window.
Run dialog: appwiz.cpl - Inside the Programs and Features window, scroll down through the application list to locate your third-party antivirus client. Once you do so, right-click on the entry and choose Uninstall.
- Follow the on-screen prompts to uninstall the third-party antivirus client from your system.
- To ensure that the security suite hasn’t left any leftover files that might cause further interference, use this article (here) to ensure e complete uninstallation.
- Restart your computer. At the next startup, Windows Defender will automatically kick in and act as your security protection suite. See if the issue has been resolved by replicating the same behavior that triggered the VIDEO_DXGKRNL_FATAL_ERROR BSOD.
If the issue is still occuring, continue down with the next method below.
Method 3: Checking the power supply for inconsistencies
There are several confirmed cases on laptops and notebooks where the issue was caused by a faulty power supply. If you notice frequent screen dimmings (similar to when you remove the power) the issue might occur due to continuous bad contact on your supply to the charger.
Apparently, intermittent changes between the main supply and the battery power might lead in time to VIDEO_DXGKRNL_FATAL_ERROR BSOD crashes.
To test whether this scenario is applicable to you, monitor your computer for any frequent changes between the power supply and battery power. If you see that the supply is supplying power On and Off, see whether the issue repeats while the power supply is disconnected. If it doesn’t occur, you might need to buy a new power adapter cable or replace the power supply port.
Method 4: Reinstall Graphics card drivers
If all the methods above have proven to be unsuccessful, let’s see if a graphics driver reinstall will take care of the problem. Several users have reported that the issue was resolved after they used Device Manager and Programs and Features to uninstall anything related to their GPU and then redownloaded them through the official channels.
Here’s a quick guide on doing this:
- Press Windows key + R to open up a Run dialog box. Then, type “devmgmt.msc” and press Enter to open up Device Manager. If prompted by the UAC, choose Yes.
Run dialog: devmgmt.msc - Inside Device Manager, expand the Display adapters menu and uninstall all graphics driver by right-clicking them and choosing Uninstall device. If you also have an integrated graphics card solution, uninstall both drivers.
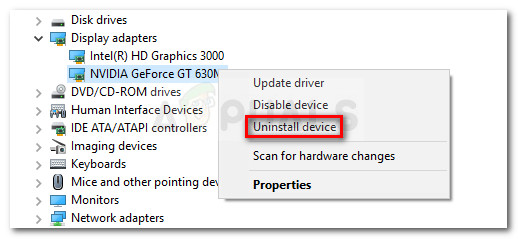
Right-click on driver and choose Uninstall - Once the GPU driver/s have been uninstalled from Device Manager, close the utility.
- Press Windows key + R again to open another Run dialog box. This time, type “appwiz.cpl” and press Enter to open up the Programs and Features screen.
Run dialog: appwiz.cpl - Scroll through the application list and uninstall anything related to your GPU manufacturer (Nvidia, AMD or Intel). You can make it easier for yourself by organizing them via the Publisher column. Right-click on every GPU-related entry and click Uninstall, then follow the on-screen prompts to uninstall the software.
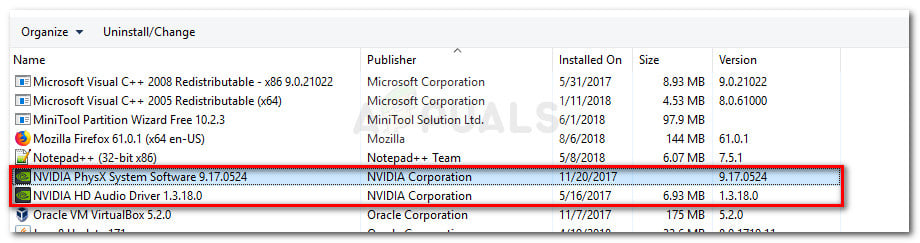
Uninstall all GPU related software - Once every driver has been uninstalled, reboot your computer manually if not prompted to do so automatically.
- At the next startup, visit the download page associated with your GPU manufacturer and download the latest driver version available for your particular graphics card model. Here’s a list with link according to manufacturers:
Nvidia’s Download Page
AMD’s Download Page
Intel Graphics Download Page - Download and install the appropriate driver according to your GPU model and operating system.
- Reboot your computer and see if the issue has been resolved at the next startup.
If the issue is still occurring, continue down with the next method below.
Method 5: Update BIOS version to the latest
Several users struggling to resolve the same error have reported that the VIDEO_DXGKRNL_FATAL_ERROR BSOD crashes have stopped as soon as they updated their BIOS version to the latest version. This is mostly reported to be effective on Lenovo laptops.
But since the steps of updating the BIOS are vastly different depending on your motherboard manufacturer, we can’t really provide you with a step-by-step guide. However, you should be able to get specific instructions if you do a search query on “motherboard model + BIOS Update” or if you visit the manufacturer official documentation from their official website.
Keep in mind that the process of updating the BIOS version has been seriously simplified by the majority of manufacturers in these last years. Most of them will only require you to download an installation executable.
If updating the BIOS version didn’t resolve the problem or you were already using the latest version, continue down with the next method below.
Method 6: Using a System Restore Point
If the VIDEO-DXGKRNL-FATAL-ERROR issue only started occurring immediately after a Windows update was installed, you should be able to fix it by using a previous System Restore point. System Restore is a built-in Windows utility that allows users to revert their machine to a previous state.
If you’re lucky enough to have a previous System Restore point that was created before the update responsible for the error was installed, you should be able to resolve the error. Here’s a quick guide on how to do this:
- Press Windows key + R to open up a Run dialog box. Next, type “rstrui” and press Enter to open the System Restore wizard.
Run dialog: rstrui - Click Next at the initial System Restore screen.
- At the next screen, tick the box associated with Show more restore points . Then, choose a restore point that is dated prior to the apparition of the VIDEO_DXGKRNL_FATAL_ERROR BSOD crashes and hit the Next button again.
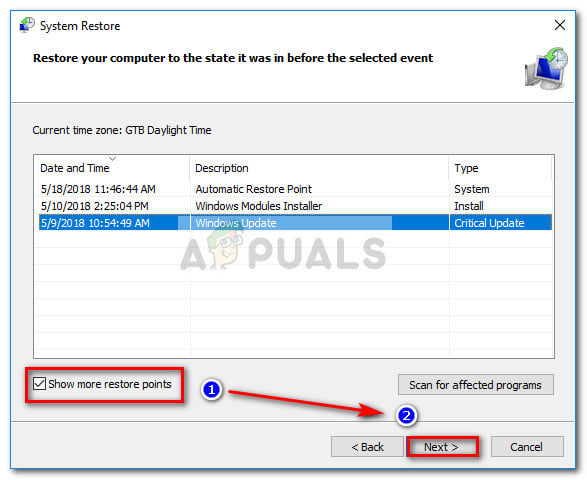
Enable Show more restore points and click Next - Click Finish and then confirm by clicking Yes to kickstart the restoring process. During this process, your computer will restart and the older machine state will be restored.
- You can prevent the same update from creating the issue all over again by following this article (here) to use Windows Update Diagnostics to hide the update from WU.


