How to Edit Gameplay Videos with SHAREfactory on PS4
If you’re a gamer, I’m willing to bet you have at least one gameplay moment that you’re extremely proud of. But if none of your friends were there to witness your spark of genius, how on earth can you brag about achieving something this amazing? Well, you can use something called SHAREfactory.
SHAREfactory is PS4’s native video editing app. It’s available for free on the PlayStation Store. It offers gamers the ability to manipulate their gameplay footage and produce quality videos fit for sharing on YouTube, Facebook, and other social network channels. Fortunately, SHAREfactory has some in-depth usage features with advanced sharing capabilities that are extremely easy to master. You will be able to manipulate video clips and photos, in order to produce GIFS and action-packed videos without the need of using an expensive PC editing software.
Below you have a series of guides that will go over all the basics and help you understand how to use SHAREfactory to transform raw gaming footage into something truly entertaining.
Using SHAREfactory to Edit Gameplay Footage on PS4
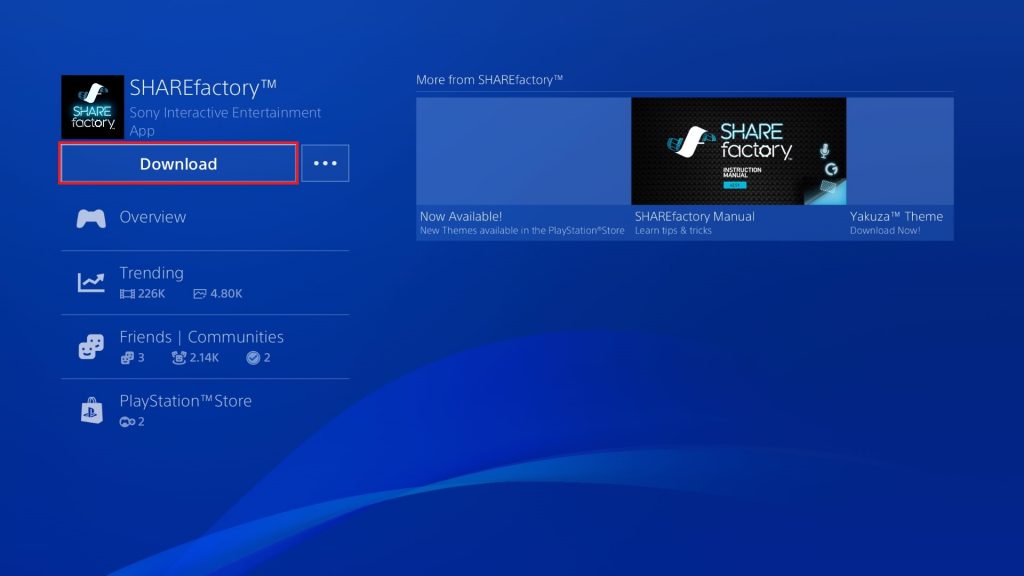
Before you dive into this guide, make sure you download the latest version of SHAREfactory from the PlayStation Store. You can do this easily by accessing your Library from the Dashboard. From there, select Sharefactory and hit the Download button.
Step 1: Recording your Gameplay
If you already have the necessary gameplay material, you can skip this step. For those of you who haven’t recorded on their PS4 yet, you’d be pleased to know it’s extremely easy.
By default, your PS4 console is programmed to record and store the last 15 minutes of your gameplay. When you end up doing something amazing, just hit the Share button on your PS4 controller. If you select Video Clip, your PS4 will automatically create a video with the last 15 minutes of your gaming session. You can also produce a simple screenshot by selecting the Screenshot button.

Note: You can expand the default recording length by hitting the Share button and selecting Sharing and Broadcasts Settings. From there, select Length of Video Clip and select another option from the drop-down menu.

To make things even easier, you can use the default shortcuts to produce gameplay footage. If you long-press the Share button, a screenshot will be automatically created. If you double-press the Share button, your PS4 will begin recording the gameplay video – you can close the recording by double-pressing the Share button again.
Step 2: Creating a New Project and choosing a Theme
Once you got the raw footage ready, it’s time to forge it into something truly great. Open up SHAREfactory and select Videos > New Project. You can also create projects from screenshots (Photos), but you don’t have that many customizing options.
Next, you should see a list of SHAREFactory themes. Aside from the preloaded list, you can download additional themes from the PlayStation Store by selecting New Themes. In SHAREFactory, each theme comes with its own custom transitions screens, unique screenshots, original soundtrack pieces and a lot of other goodies. If you want to make a video with a certain game in mind, make sure to select the appropriate theme.
When you name your project, you are presented with all the saved clips from your PS4. You can add a video clip to your project by highlighting it and hitting the X button. Oh, and don’t worry about missing out on some recordings. You can always go back and add more.
Step 3: Trimming the gameplay videos
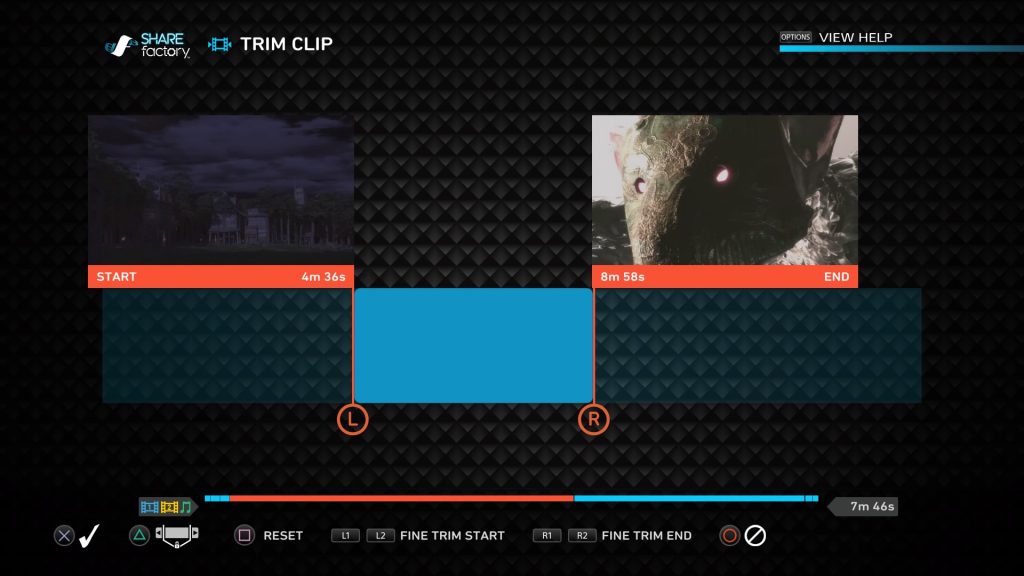
Depending on your gameplay recordings, chances are your raw footage contains a lot of stuff you don’t want to include in the final video. Luckily, you can trim the excess footage fairly easily. Select the video clip in question and press the square button to open the Edit Menu.

From there, select Trim Clip and use the left and right sticks to remove the excess parts you don’t want. Once you’re happy with your trimming, hit the X button to confirm.
Step 4: Adding Transitions
If you’re making a video from multiple different clips, you’ll notice that the default way of jumping from one clip to another seems very abrupt. The good thing is, you can make it look a lot better by adding transitions in between your clips. Most transitions are shorter than 3 seconds and will do a good job of passing across the screen to the next clip.
![]()
In order to be able to select from various transition animations, you need to position the cursor in between the two clips. Once the cursor is in place, press the X button and select Add Transition. Next, you’ll be presented with a list of transitions orders in 3 main categories. Keep in mind that this list will get considerably bigger if you already downloaded a lot of custom themes. In any case, highlight a theme and use the X button to select it. In the event that you don’t end up linking the transition, you can select it with the cursor, press the square button and select Edit Transition.
Step 5: Adding Overlay Elements & Splitting Clips
FX elements can be the difference between an ordinary gameplay video and an instant classic. To add FX elements, position the cursor on a clip and tap the X button, then navigate to Add Overlay. Now you’ll have a list of overlay elements to choose from. You can also import your own images and use them as FX elements or insert custom text.

By default, when you add an overlay element, it will keep displaying until the clip ends. If you want to delete the element at some point before the clip ends, you need to use a feature called splitting clips. To do this, you need to close the overlay menu and press the square button. Now, select Split Screen from the newly opened menu. Use the cursor to signal where you want the clip to split. After you hit the X button, the clip will be automatically split into two halves, making the second half free of any overlay elements.
Step 6: Adding Commentaries
First of all, you’ll need a Headset or a PS Camera to be able to record commentaries. You can either record audio-only, or you can opt to go for both audio & video. Audio only is best used when you want to record on top of your gameplay. Audio & video will record your voice and your face on top of your gameplay – you’ll then be able to select which corner of the screen you’ll like to position yourself.

To include commentary, tap the X button to open the Add menu and select Add Track 2. Now, position the cursor where you want the commentary to start and hit the X button once again. Select which type of commentary you want and begin recording after the countdown. If you’re not happy with how it turned out, you can hit the square button and edit it even further.

Step 7: Adding Music
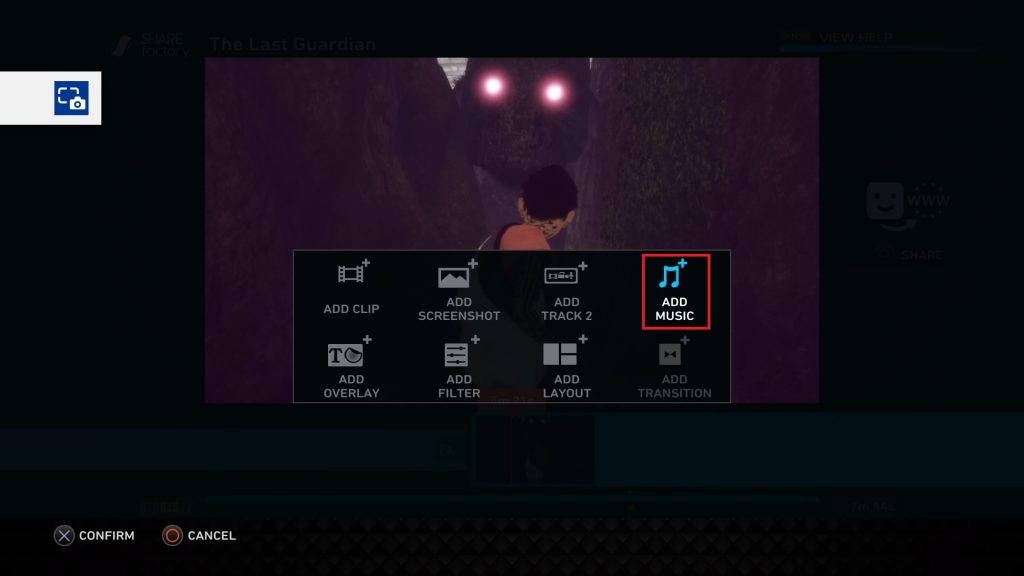
Adding music to your gameplay is pretty straightforward in SHAREfactory. Just like we did before, press the X button to open the Add menu and select Add Music. The default selection of SHAREfactory’s music is quite impressive, but you can add even more by using the Import from USB feature.
Same as with the other features, you can press the square button to get access to various editing possibilities. You can use this menu to move the music, trim it, split it and even create fade effects.
Important: The default lineup of SHAREfactory tracks is not copyrighted, so you can use it however you want. But if you upload your own music via USB, chances are you’ll need special permission to use them. If you plan on uploading your video on YouTube and other social media channels, you might want to stick with the default music line up.

Step 8: Using Time Benders
Time Benders are one of SHAREFactory’s latest additions. In essence, they allow you to slow down or speed up the video playback speed. Trust me, it will help you immensely in capturing that awesome gameplay in super slow-mo.

You can insert a time bender by pressing the square button and selecting Time Bender. Next, you’ll be directed to a screen in which you get to decide the speed of the clip. The speeds on the left will slow the clip down and the ones on the right will speed it up.

You can also choose from two styles of time-bending. The Step mode will preserve the normal effect and won’t tamper with the clip’s style at all. However, the Smooth mode adds a cool touch to your clip, making it look more detailed and focused. The same as before, you can split a clip into multiple entries apply the time-bending effect only on some portions.

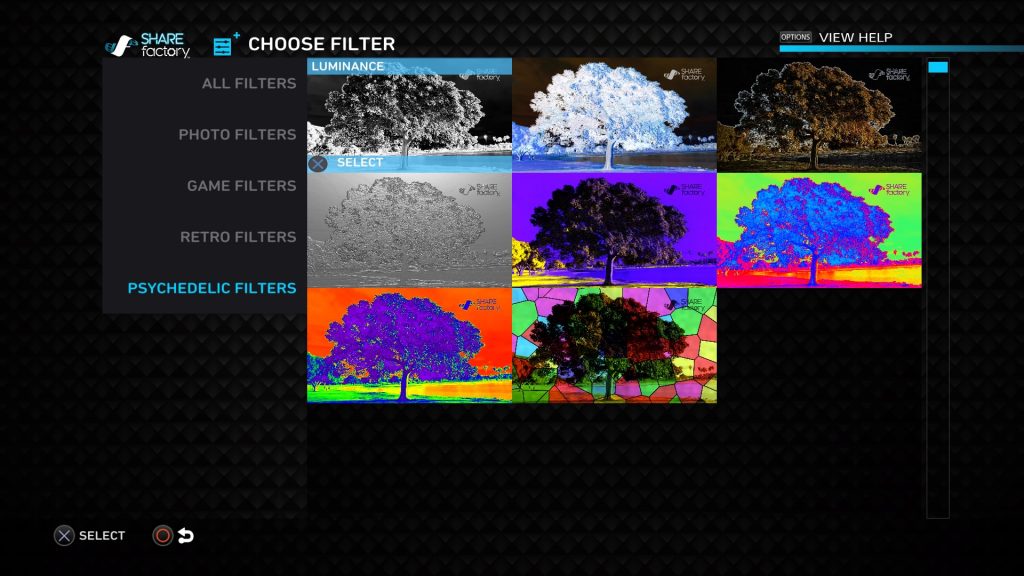
Step 9: Using Filters & Layouts
Filters provide a unique way to alter the look of your videos. To add a filter, tap the x button and select Add Filter. Now, you’ll have a pretty big collection of filters neatly organized into 5 categories. Highlight a filter and use the X button to insert it in your clip.
Once you insert a filter, you can edit it even further by hitting the square button and accessing Filter Settings. Keep in mind that while most filters can be edited after you insert them, some of them will have the Filter Settings option grayed out. As usual, you can restrict the reach of a filter by splitting the clip into multiple segments.

If you want to achieve a truly unique effect, you can couple the filter you’ve just inserted with a custom layout. Layouts will help you alter the appearance of the video even further, but be careful not to take it too far. You can add a layout by hitting the x button and selecting Add Layout. Now, select a custom layout from the list.

Some combinations of filters and layouts are a perfect fit, but I’ll let you discover them for yourself.
Step 10: Rendering & uploading your Video
Once all the pieces are in place, all that’s left to do is render the video. So, double-check everything again and hit the triangle button on your DualShock 4 Controller when you’re ready. Before you get to decide what to do with it, you’ll be forced to wait until it fully renders. Depending on the length and quality of your final edit, you might or might not wait over 10 minutes.

When the rendering is done, you will be asked if you want to share the video. If you decide to upload on YouTube, you will be prompted to insert your account credentials. In my experience, the upload on YouTube will fail if the video is fairly large. If that happens, follow the steps below:
- Wait for the video to render fully.
- Go to Dashboard > Settings > System Storage Management and select Capture Gallery.
- Now look for your video and plug in a USB storage stick in your PS4.
- With the video selected, press the Options button and select Copy to USB Storage.
- Plug the USB on your computer, go on YouTube and upload it from there.
Bonus Step: Creating GIFs
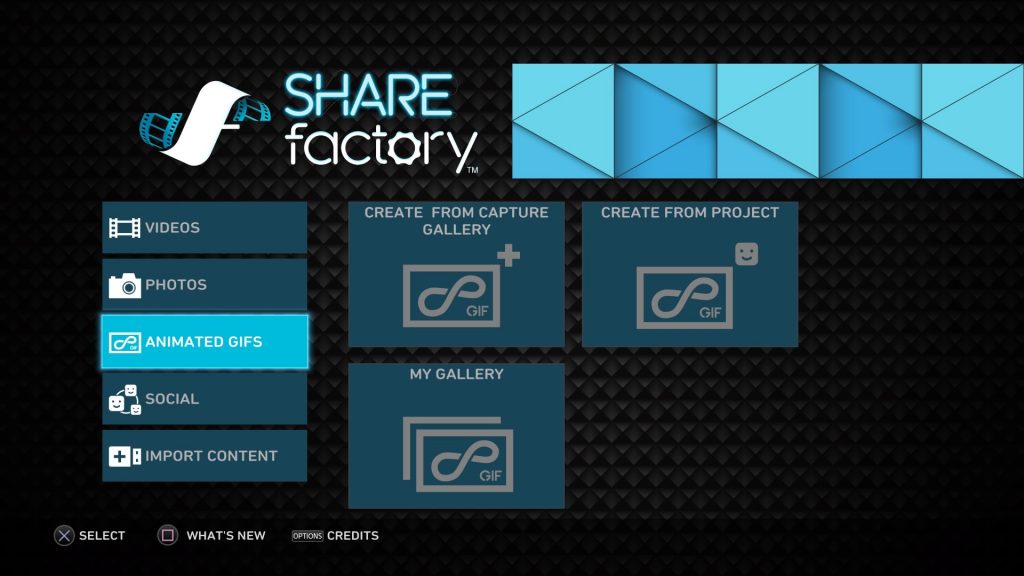
The ability to create GIFs from gameplay footage is the latest addition to SHAREFactory. Now you can turn your gaming clips into animated GIFs and share them on Twitter or another social media platform that works with this format.

Keep in mind that you won’t be able to create GIFs with SHAREFactory unless you update to the latest version. When you get that going for you, open SHAREfactory and highlight the Animated GIFS tab. Now select an option that suits you better from the list, but I recommend creating it directly from the capture gallery. Next, select a clip from your gallery.

Once you’re into the GIF editor, position the cursor to where you want the GIF to start. Now press the X button to prepare the GIF. The app will automatically grab a 9-second loop capture from your starting point. You can then use the left and right sticks to trim from both ends until you’re satisfied with the results. At this point, all that’s left to do is hit the triangle button to render your GIF. Once that’s over, you will be prompted to share it – even if you decide to share it later, it will be saved in your gallery as a GIF.
Wrap Up
Now that you know how to maneuver SHAREfactory, there’s no reason why you won’t spam all your friends with legendary gameplay footage. Instead of uploading a long video and pointing your buddies at the minute where the magic happens, why not create a streamlined edit of your gaming capabilities?
Even if you’re not comfortable with all its features, SHAREfactory is an incredibly powerful tool. But what makes it even greater is the fact that it’s incredibly intuitive once you get the hang of it.
SHAREfactory is available on PS4 phat, PS4 Slim and PS4 PRo. Regardless of your Sony console, be sure to pick it up and create awesome videos with it.