Windows Won’t Use Full RAM? Try these Fixes
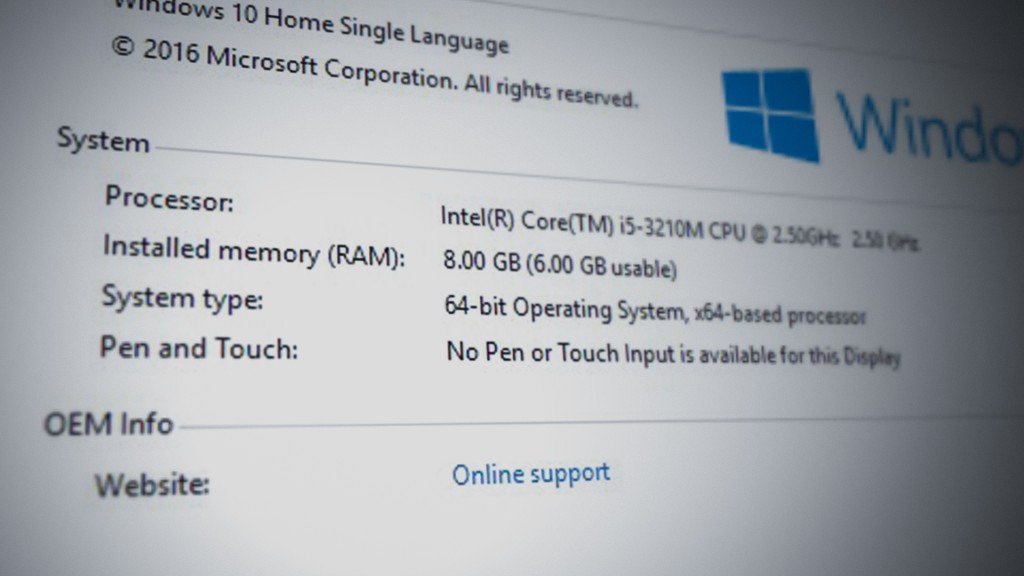
If your Windows is not utilizing the maximum amount of RAM, you should be aware of several factors that might be contributing to this issue. If your Windows is on a 32-bit architecture, it will not be able to use RAM to its full capacity, as a 32-bit Windows system can only utilize approximately 3.2 GB to 4 GB. Other potential contributors include an outdated BIOS, an integrated GPU that reserves system memory, enabling RAM virtualization, and a possibility of damaged RAM.
Below we have explained in more detail:
- Having a 32-bit Windows Version – If your computer is running a 32-bit version of Windows, you won’t be able to take full advantage of your RAM capacity. You will need to reinstall Windows as a 64-bit version, which supports significantly more memory, allowing your system to make use of additional RAM for various tasks.
- Virtual Memory – By default, Windows uses a virtual memory system, which can include a paging file on the hard drive to supplement physical RAM. It is not recommended to turn off this feature, as doing so could cause system instability and performance issues, especially if you exceed your physical RAM capacity.
- Defective or Incompatible RAM – If your RAM is damaged or incompatible with your motherboard, it may not be recognized fully by the system. In such cases, replacing the faulty RAM with compatible modules is necessary.
- Outdated System BIOS – Occasionally, an outdated BIOS may limit the amount of accessible RAM. However, this is less common with modern systems. It’s a good practice to update your BIOS to the latest version, especially if the update addresses known issues.
- Having an Integrated GPU – Integrated GPUs allocate a portion of system RAM for graphics processing, which can reduce the total available memory for other uses. While it won’t prevent the system from using all available RAM, it does reserve some memory exclusively for the GPU. Upgrading to a dedicated graphics card with its own memory can free up system RAM.
1. Upgrade to Windows 64-Bit (Windows 32-bit)
If you currently have a 32-bit version of Windows installed, you will need to upgrade to a 64-bit version to use more RAM. Here are the steps for upgrading:
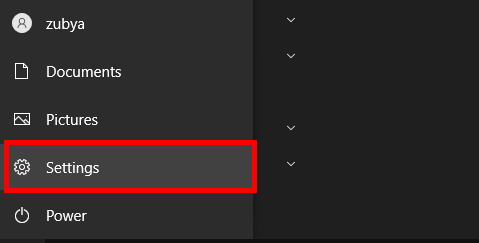
- Click the Start Menu and type Settings.
- Open Settings and navigate to System > About.
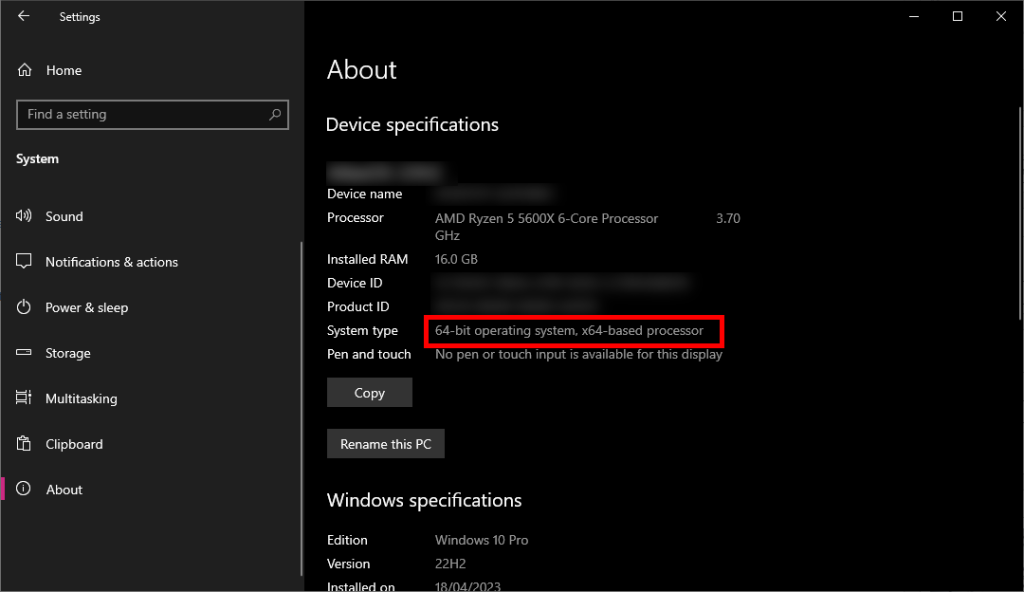
- Check your system type. If it’s 32-bit, follow the steps outlined in this article on How to install Windows.
2. Uncheck Maximum Memory
Another possible solution to increase RAM usage is to ensure that the ‘Maximum memory’ option in the System Configuration settings is unchecked:
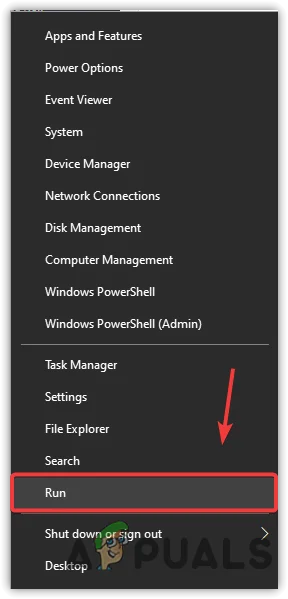
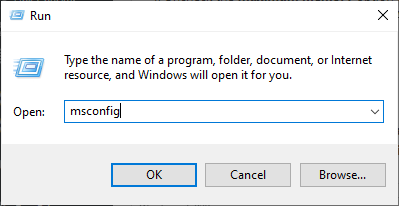
- Right-click the Windows icon in the bottom left and select Run.
- Type MSConfig and click OK.
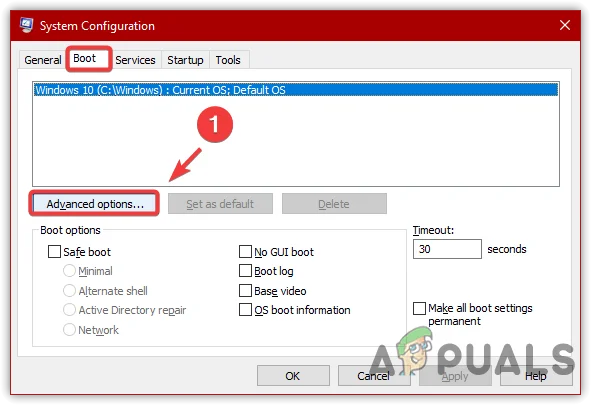
- Navigate to the Boot tab and click Advanced options.
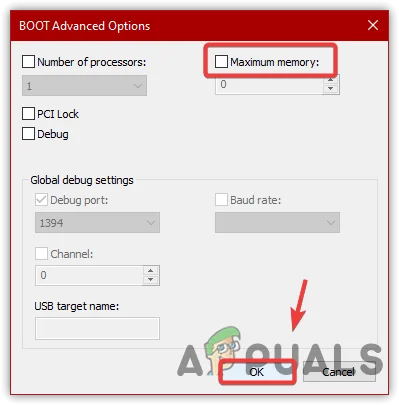
- Uncheck the Maximum memory option and click OK.
- Restart your computer and check if the RAM usage has improved.
3. Manage Virtual Memory
Windows uses virtual memory to extend the available physical memory on your system:
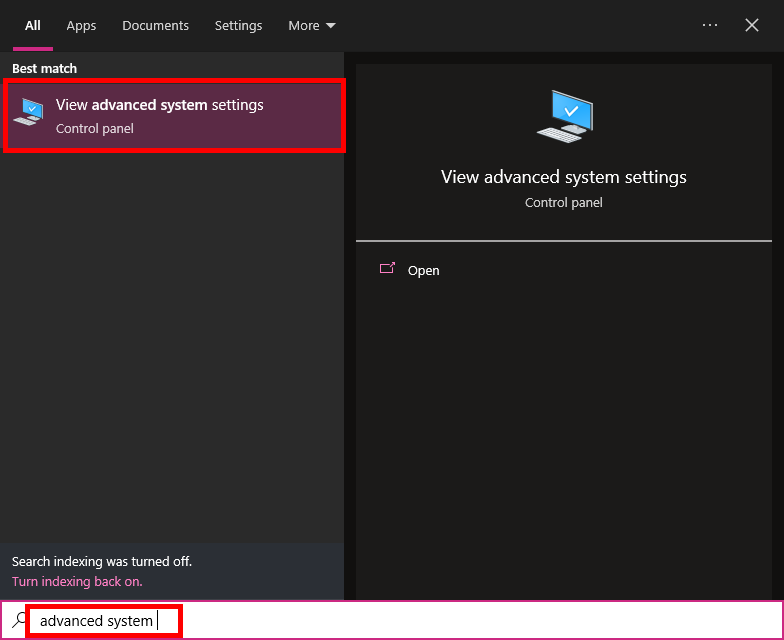
- Open the Start Menu and search for Advanced System Settings.
- Under the Performance section, click Settings.
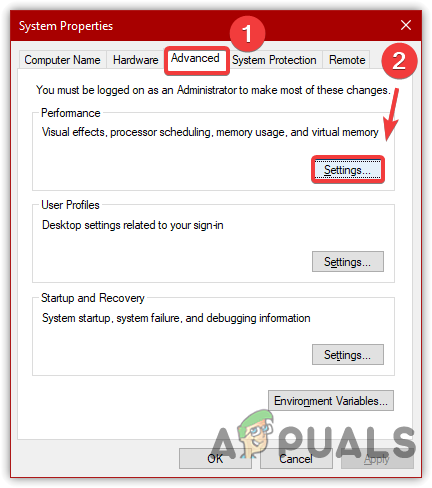
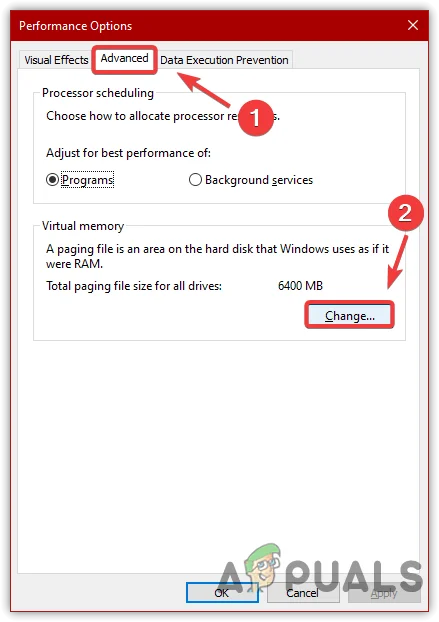
- Select the Advanced tab.
- Click Change under Virtual Memory.
- Unselect the option to Automatically manage paging file size for all drives.
- Choose the appropriate settings for your system.
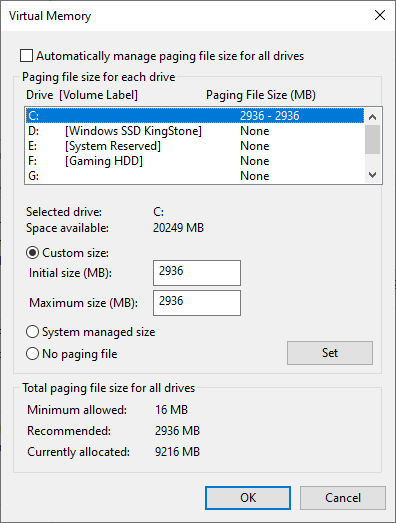 Note: Disabling the paging file is generally not recommended unless you have a specific reason and understand the potential consequences.
 - Click OK and restart your computer.
4. Consider Upgrading to a Dedicated Graphics Card
If you have an integrated GPU that uses shared system memory, consider upgrading to a dedicated GPU with its own VRAM to free up system RAM for other tasks.
5. Check Your RAM
If your system is still not using the full capacity of your RAM, inspect the hardware. Ensure that the RAM is correctly installed and compatible with your system. Check for any damage to the RAM modules or slots.
6. Update Your BIOS
While it’s generally a good idea to keep your BIOS updated, understand that it’s relatively rare for an outdated BIOS to limit RAM usage on modern systems. Check for BIOS updates by following the steps provided in this guide on How to Update BIOS.
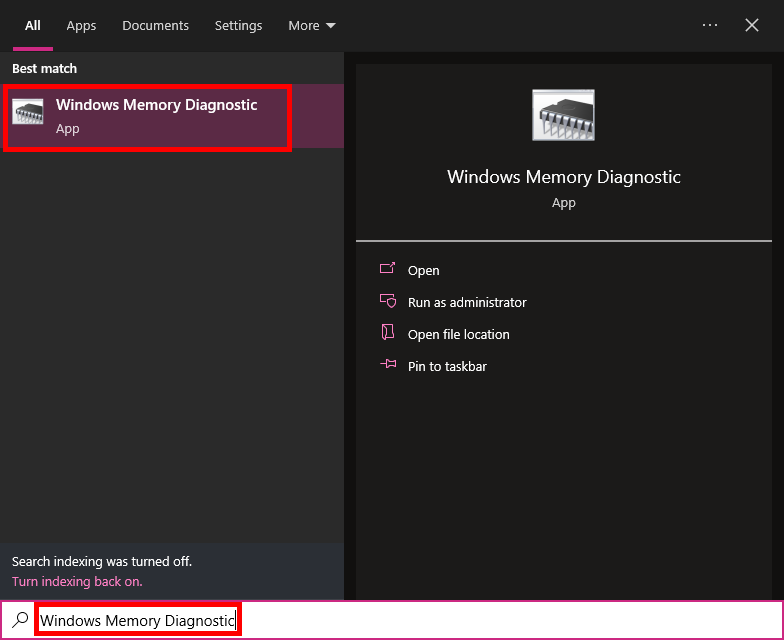
7. Perform a Memory Diagnostic
Run the Windows Memory Diagnostic tool to check for RAM errors.
- Type ‘Windows Memory Diagnostic’ in the Start menu and open the tool.
- Choose to restart your computer and check for problems immediately.
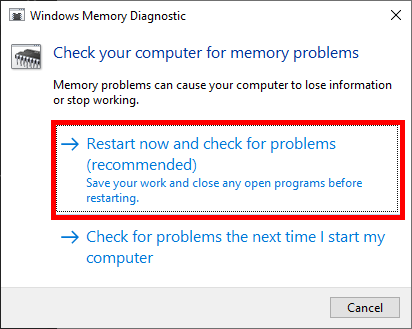
- After the test, Windows will restart and report if any memory errors were detected.
8. Consider RAM Compatibility with Your CPU and Motherboard
While checking RAM, also verify that the memory is compatible with your CPU and motherboard. Refer to the motherboard’s manual or manufacturer’s website for compatibility information.
9. Inspect for Physical Damage and Clean RAM Slots
Dust or debris in the RAM slots can cause poor contact and prevent your system from recognizing the full amount of installed RAM.
- Turn off your computer and unplug all cables.
- Open the case and carefully remove the RAM sticks.
- Use a can of compressed air to clean out the RAM slots.
- Reinstall the RAM sticks, ensuring they click into place.