Fix: Windows 10 Creators Update No Internet Connection
The Windows 10 Creators Update has been plagued with a wide variety of different problems and issues ever since its release, and among these numerous issues are a plethora of different network and internet connection problems. Countless Windows 10 users who have chosen to upgrade their computers to the Creators Update (or users whose computers automatically downloaded and installed the Creators Update) have been complaining of internet issues.
Evidence suggests that chief among the internet connection issues being experienced by Windows 10 Creators Update users is an issue where affected users are told by their computers that they are not connected to the internet, and they are unable to access the internet using any and all apps (of both the stock and third-party variety), and an issue where affected users are told by their computers that they are not connected to the internet, but they are able to successfully access the internet using third-party apps whereas stock Windows 10 apps such as Store and News are unable to connect to the internet.
Thankfully, though, if you are experiencing any network or internet connection-related issues after upgrading your Windows 10 computer to the Creators Update, there is a lot you can do to try and resolve the issue(s) on your own. The following are the absolute most effective solutions that can be used to try and fix post-Creators Update internet connection problems:
Solution 1: Disable or uninstall any and all third-party security programs
Third-party antivirus, antimalware and firewall applications can sometimes interfere with a Windows 10 computer’s ability to communicate with the internet, creating internet connection problems. If your problem is being caused by a third-party security program, simply disable – or better yet, uninstall – any and all third-party security programs installed on your computer. Once that’s done, check to see whether or not the solution worked.
Solution 2: Try and fix the issue using some networking commands
Many Windows 10 Creators Update users have been able to resolve their internet connection problems post-update by simply resetting their computer’s Winsock catalog and TCP/IP stack, releasing and renewing its IP address and flushing and resetting its DNS client resolver cache by running the appropriate networking commands. In order to apply this solution, you need to:
- Right-click on the Start Menu button or press the Windows Logo key + X to open the WinX Menu, and click on Windows PowerShell (Admin) to launch an elevated instance of Windows PowerShell that has administrative privileges.

Open Windows PowerShell (Admin) from Start menu - One by one, type the following commands Windows PowerShell, pressing Enter after typing in each one and waiting for one command to be fully executed before typing in the next:
netsh winsock reset
netsh int ipv4 reset reset.log
netsh int ip reset
ipconfig /release
ipconfig /renew
ipconfig /flushdns
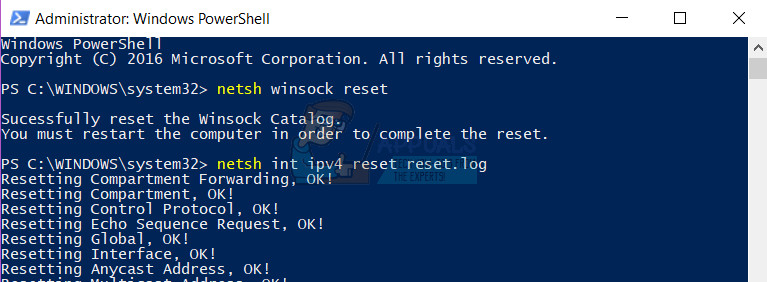
- Once all of the commands have been successfully executed, close the elevated instance of Windows PowerShell.
- Restart your computer. When the computer boots up, test your internet connection to see whether or not the fix worked.
Solution 3: Disable and then Enable your network connection
In many cases, fixing an internet connection on a Windows 10 computer that the Creators Update has been installed on is as simple as disabling and then enabling the computer’s active network connection. In order to do so, you need to:
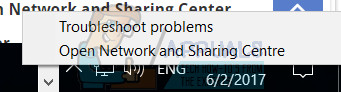
- Right-click on the Network icon in your computer’s notification area and click on Open Network and Sharing Center.
- Click on Change adapter settings in the left pane of the Network and Sharing Center.

- Locate your computer’s active network connection, right-click on it and click on Disable in the context menu.
- Wait for the network connection to be disabled.
- Once the network connection has been successfully disabled, right-click on it once again, but this time click on Enable.

- Restart your computer. Check to see whether or not the problem persists once the computer boots up.
Solution 4: Disable and then Enable your computer’s network adapter
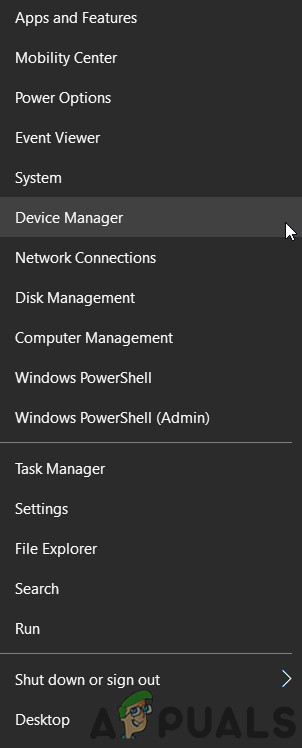
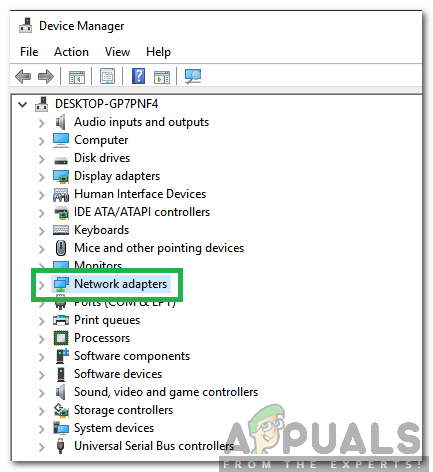
- Right-click on the Start Menu button or press the Windows Logo key + X to open the WinX Menu, and click on Device Manager.
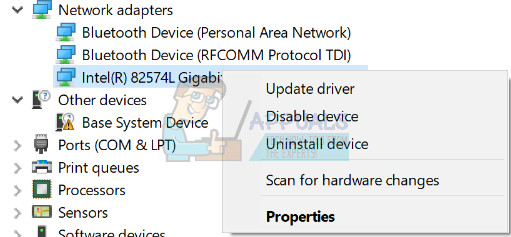
- In the Device Manager, double-click on the Network adapters section to expand it.
- Locate your computer’s active network adapter under the Network adapters section, right-click on it and click on Disable in the context menu.
- In the resulting popup, click on Yes to confirm the action.
- Once your computer’s network adapter has been disabled, wait for a couple of minutes, right-click on it once again in Device Manager, and click on Enable.
- Close the Device Manager and restart your computer. Check to see whether or not the fix worked when the computer boots up.
Solution 5: Update your network adapter’s driver software
- Right-click on the Start Menu button or press the Windows logo key + X to open the WinX Menu, and click on Device Manager.
Open Device Manager - In the Device Manager, double-click on the Network adapters section to expand it.
- Locate your computer’s active network adapter under the Network adapters section, right-click on it and click on Update Driver Software….
- Click on Search automatically for updated driver software, and wait for Windows to conduct the search.
- If Windows finds new driver software for your computer’s network adapter, it will be automatically downloaded and installed. If Windows does download and install new drivers, restart your computer once it’s done and test your internet connection when it boots up. If Windows does not find any updated driver software, however, make your way to the Downloads section of the official website of the manufacturer of your computer’s network adapter and search for the driver software for your network adapter and Operating System combo just to be sure that you have the latest drivers available.
Solution 6: Uninstall (and then reinstall) your network adapter
- Right-click on the Start Menu button or press the Windows Logo key + X to open the WinX Menu, and click on Device Manager.
- In the Device Manager, double-click on the Network adapters section to expand it.
double-clicking on the Network Adapters Option - Locate your computer’s active network adapter under the Network adapters section, right-click on it and click on Uninstall.
- Enable the Delete the driver software for this device option by checking the checkbox beside it, and click on OK.
- Wait for the network adapter to be successfully uninstalled.
- Once the network adapter has been uninstalled, click on Action > Scan for hardware changes. When you do so, Windows will automatically detect and reinstall the network adapter and its drivers.
- Wait for the network adapter and its drivers to be reinstalled, and then restart the computer. Be sure to check whether or not the issue has been fixed when the computer boots up.
Solution 7: Run the Windows Network Diagnostics troubleshooter
- Open the Start Menu
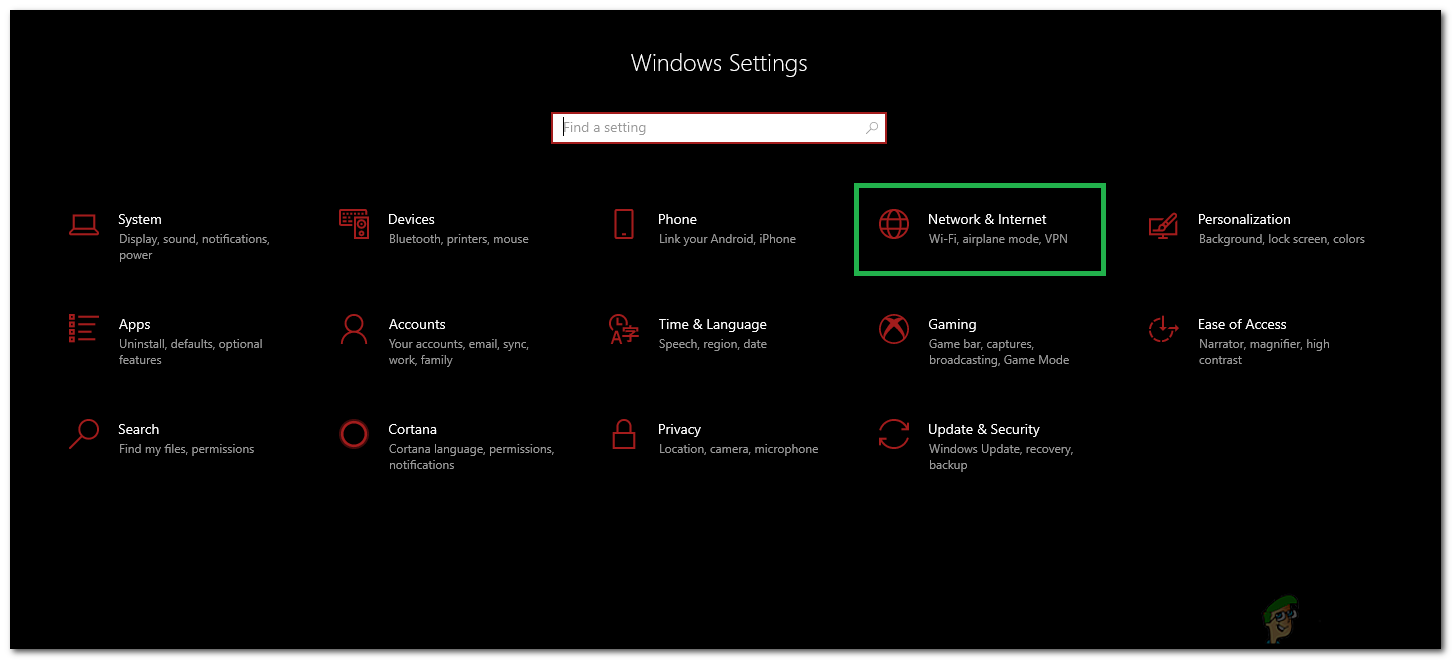
- Click on Settings.
- Click on Network & Internet.
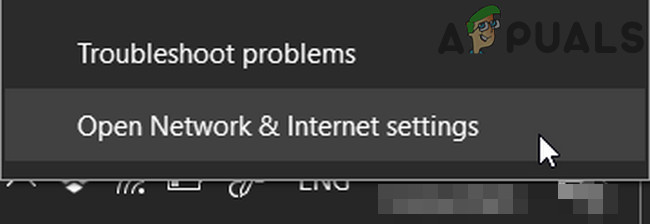
Open Network and Internet Settings - Click on Status in the left pane.
- In the right pane, your computer should say No internet access under the Network status section if you are experiencing an internet connection problem post-Creators Update. If that’s the case, you will see a Troubleshoot button under the No internet access Click on the Troubleshoot button – doing so will launch the Windows Network Diagnostics troubleshooter.
- Allow the Windows Network Diagnostics troubleshooter to run and do its thing.
- Once the Windows Network Diagnostics troubleshooter is done, it will let you know what issue(s) it found and what it did to resolve them. When that happens, read through the troubleshooter’s report, close it and check to see whether or not your internet connection problem has been resolved.
Solution 8: Use Windows 10’s Network Reset feature to try and fix the problem
The Windows 10 Anniversary Update introduced an extremely handy little feature known as Network Reset that can be found in Settings and allows users to reset their networks in order to resolve internet connectivity problems. The Network Reset feature might just be the answer to your internet connection issue(s) post-Creators Update. To use the Network Reset feature on a Windows 10 computer that has been updated to the Creators Update, you need to:
- Open the Start Menu.
- Click on Settings.
- Click on Network & Internet.
Selecting “Network and Internet” Options - In the left pane of the window, click on Status.
- In the right pane, scroll down to the very bottom, locate the Network reset option and click on it.
- Click on Reset now in the resulting window.
- If asked to confirm the action, click on Yes.
- The feature will remove and then reinstall all of your computer’s network adapters and also reset all of its networking components to their original settings and default values and will restart your computer at the very end. Wait for it to do so.
When the Network Reset feature is done working its magic and your computer boots up, check to see whether or your internet connection problem has been resolved.
Solution 9: Rollback to the Windows 10 build you were previously using
If all else fails, fear not – you can simply rid yourself of the Windows 10 Creators Update and all the problem that it brings with it by rolling back to the Windows 10 build that you were previously using, provided that it hasn’t been 30 days since you installed the Creators Update. If you are past the 30-day mark, your computer will have deleted the installation files required for the rollback and you will have to clean install an older build of Windows 10 from scratch to downgrade from the Creators Update. In order to roll back to the Windows 10 build that you were previously using, you need to:
- To do this, at the login screen HOLD the SHIFT key and click the Power (icon) located on the lower right corner. Whilst still holding the SHIFT key choose Restart.
- Once the system boots into the Advanced Mode, choose Troubleshoot and then choose Advanced Options. From Advanced Options, choose the option titled Go back to the previous build.
- After a few seconds, you will be asked to choose your User Account. Click on the User Account, key in your password and choose Continue. Once done, choose the option Go Back to the Previous Build again.
Solution 10: Disabling Power Saving
In some cases, if your adapter has been configured to save power when a particular internet adapter is idle, it might also disable it during normal use. Therefore, in this step, we will be disabling the power saving feature of the adapter driver and then check if that fixes our issue.
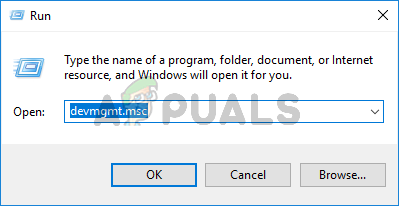
- Press “Windows” + “R” to open the Run prompt.
- Type in “devmgmt.msc” and press “Enter” to open the device manager.
Type devmgmt.msc and Press Enter to Open Device Manager - Expand the “Network Adapters” tab and right-click on the adapter driver that is currently being used.
- Select “Properties” and select the “Power management” tab in the new window that opens up.
- Uncheck the “Allow the Computer to Turn Off this Device” option.
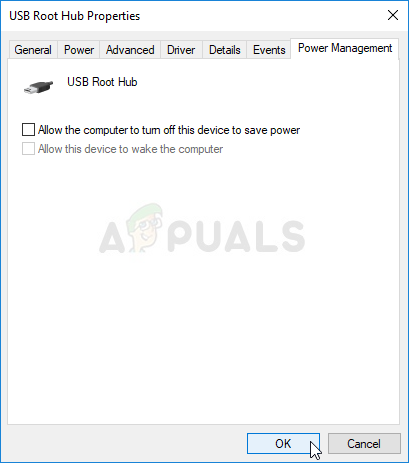
Allow the computer to turn off this device Disable - Click on “Apply” and then on “OK”.
- Check to see if the issue persists.