SOLVED: Unexpected Store Exception in Windows 10
With the update to Windows 10, you got a fancy set of additional features and improve aesthetics but they didn’t come without the unwanted exceptions and errors that we could have lived without. One such example is the “unexpected store exception” that forces you to restart every time it shows up.
The unexpected store exception has troubled many users after they updated from previous versions of Windows 10. It is normally accompanied by the dreaded BSOD or the blue screen of death. Most of the time this exception has been raised because of an anti-virus program. We will discuss removing the anti-virus to stop the blue screen of death from reoccurring. If you want to confirm that it’s actually the anti-virus being the guilty party, you can do that by going through your bug details. In there, you should be able to see the “raw stack” which contains the traces that have been produced by the operating system. In there, you should be able to find errors that might correspond to the drivers that are used by your anti-virus or malware-protection programs. (We will be sharing two other methods along with this so if the anti-virus removal method doesn’t work for you, don’t worry, we have still got you covered)

Method 1: Uninstall Anti Virus Program
Windows 10 has “Microsoft Defender” as a default and powerful virus protection application, so even if you remove your anti-virus, don’t worry, your PC will be guarded. To be more specific, users running McAfee reported that McAfee was the culprit.
Perform the following steps to uninstall:
Press the “Windows key + X” to pull up the pop-up menu above the start button appear.
Select “Control panel” from the list.
In the control panel, you should be able to see a section that goes by the name “Programs”. Click on it.
Here you will find a list of programs installed on your computer. From the list, go ahead and find your anti-virus software. If you have installed multiple versions of protection software then you should ideally uninstall all of them. To do so, right click on your selection and click on “Uninstall”.
You will be asked whether you really want to proceed with the uninstallation; say yes.
Follow the onscreen steps to complete the uninstallation.
Restart your computer.
Once you perform the above mentioned steps, the chances of this error to come become very low. If however you are still facing this issue, then there are two other methods that we are going to discuss so get your bug-fixing hats on and continue reading.
Method 2: Check Hard Disk Health
Some users also reported having this issue appear after they found some issues with their hard drive’s health. There were some important files that were present in a bad sector of the hard drive and that was the primary cause of the issue; some users also reported that a dying hard drive was the cause. If the above method didn’t fix the error for you, then it’s probably your hard drive that’s the guilty party. We will be running a health diagnostic test using a third-party tool to prove more. Follow these steps:
For the health diagnosis, we will be using Crystal Disk info which is a small tool that can let you know about the status of your hard drive. Download it from this link.
The downloaded file will be an executable one. Double click on it and follow the on-screen instructions to install it.
The tool should install pretty quickly. Once it does, launch it and the main window should be able to give you the status of your hard drive. On normal hard drives, it says “Good”, but if you are having some issues, it will have scarier things to say like “Bad” for example.
If the tool diagnoses your hard drive to be “bad” then that’s the cause of your problem. We recommend replacing the hard drive to solve the issue. If however you got a “Good” status report and this method too didn’t work for you, then we have one last method to recommend.
Method 3: Check Driver Issues
If you have the same issue and have a Lenovo machine, then you can follow these steps to remove the exception:
As a first step, we will be disabling the automated installation of drivers. For this, type “gpedit.msc” in the start menu search. If you don’t have the global policy editor installed then you can follow this comprehensive guide to install it first click (here)
In the left-hand side of the window, you should see “Computer Configuration”. Expand that.
Expand “Administrative Templates”, then expand “System” and follow that by expanding “Device Installation”.
Click on “Device installation”.
In the window on the right-hand side, you should see “Prevent installation of devices not described by other policy settings”. Double click on it.
In the window that appears, select “Enabled” and click “Ok”.
Restart your computer now.
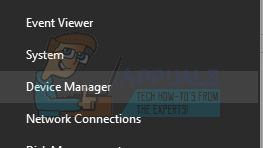
Invoke the start menu pop-up by pressing “Windows key + X” and select “Device manager”.
Now from the device manager window, go to “Sound video and game controllers” and right click on “Conexant SmartAudio” or “IDT High Definition Audio”. Click on uninstall from the list and ensure that “Delete the driver software for the device” checkbox is checked.
Now press “Windows key + X” again and select “Programs and Features”. From the list of apps, uninstall everything that you can find related to “Conexant/IDT and Dolby”.
Reboot the computer.
Once you have rebooted, you have to download the following driver for the Dolby and audio component from this link:
Audio driver (Conexant) for 64 bit Windows- Lenovo G410, G510
Install the downloaded driver and restart your machine.
Once you have reinstalled the latest driver, you should no longer face the unexpected store exception on Windows 10 again.
Solution 4: Turning off Fast Startup
Windows 10’s Fast Startup (also called fast boot) works similarly to the hybrid sleep modes of previous versions of windows. It combines the elements of a cold shutdown and the hibernate feature. When you shut down your computer, Windows logs off all users and closes all applications similar to the cold boot. At this point, Window’s state is similar to when it is freshly booted up (as all users are logged off and applications are closed). However, the system session is running and the kernel is already loaded up.
Then Windows sends a notification to devise drivers to prepare for hibernation and saves the current system state to hibernation and turns off the computer. When you restart the computer, Windows doesn’t have to reload the kernel, system state or the drivers. It just refreshes your RAM with the loaded image in the hibernation file and navigates you to the startup screen.
This feature makes Windows boot faster so you don’t have to wait the traditional time. However, this feature is also known to cause problems by not loading the required drivers properly each time. As it doesn’t reload the drivers, some drivers might not be already be loaded. Due to this, we might be experiencing the problem.
- Press Windows + R to launch the Run application. In the dialogue box type “control panel” and hit Enter. This will launch your computer’s control panel.
- Once in the control panel, click on Power Options.

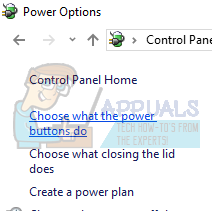
- Once in the Power Options, click on “Choose what the power buttons do” present at the left side of the screen.
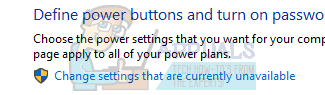
- Now you will see an option which requires administrative privileges named as “Change Settings that are currently unavailable”. Click it.
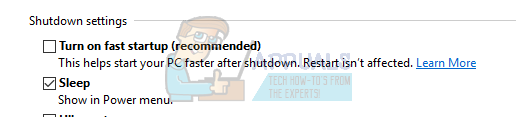
- Now head to the bottom of the screen and uncheck the box which says “Turn on fast startup”. Save changes and exit.
- You might need to restart your computer. Check if the problem at hand got fixed.
Solution 5: Updating your Display Drivers
We will start your computer in Safe Mode and delete the currently installed drivers for your display card. Upon the restart, the default display drivers would automatically be installed upon the detection of your display hardware.
- Follow the instructions in our article on how to boot your computer into safe mode.
- Once booted in the safe mode, right click on Windows key and select Device Manager from the list of options available.
Another way to launch the device manager is by pressing Windows + R to launch the Run application and typing “devmgmt.msc”.
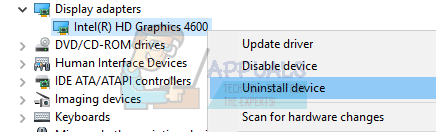
- Once in the device manager, expand the Display adapters section and right click on your display hardware. Select the option of Uninstall device. Windows will pop a dialogue box to confirm your actions, press Ok and proceed.
- Restart your PC. Press Windows + S button to launch your start menu’s search bar. In the dialogue box type “Windows update”. Click the first search result which comes forward.

- Once in the update settings, click on the button which says “Check for updates”. Now Windows will automatically check for updates available and install them. It may even prompt you for a restart.
- After updating, check if your issue got fixed.
Windows Update always tries its best to deliver the latest drivers available for your hardware. But it also doesn’t mean that they are the latest ones available. Alternatively to the Windows Update, you can also head over to your graphics card’s manufacturer website and download the latest drivers manually.
If the latest drivers also don’t solve the problem in question, you can try downloading and installing an older driver for your hardware. Manufacturers have all the drivers listed according to date and you can try installing them manually. Follow the instructions below to install the drivers manually.
- Open your Device manager as explained above in the solution and right click on your driver and select “Update Driver”.

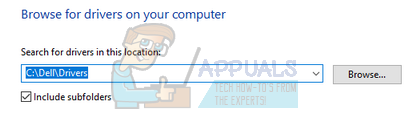
- Now a new window will pop up asking you to whether update the driver manually or automatically. Select “Browse my computer for driver software”.

- Now browse through the folders to where you downloaded the drivers. Select it and Windows will install the required drivers. Restart your computer and check if the problem got solved.
Note: You should also check each of the devices connected to your computer via the device manager and update their drivers one by one. The error could be generated due to any one of them; you have to do hit and trial until you find the badly configured driver.
Solution 6: Running System File Checker
System File Checker (SFC) is a utility present in Microsoft Windows which allows the users to scan their computers for corrupt files in their operating system. This tool has been there in Microsoft Windows since Windows 98. It is a very useful tool for diagnosing the problem and checking if any problem is due to corrupt files in windows.
We can try running SFC and see if our problem gets solved. You will get one of the three responses when running SFC.
- Windows didn’t find any integrity violations
- Windows Resource Protection found corrupt files and repaired them
- Windows Resource Protection found corrupt files but was unable to fix some (or all) of them
- Press Windows + R to launch the Run application. Type “taskmgr” in the dialogue box and hit Enter to launch your computer’s task manager.
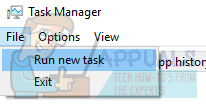
- Now click on File option present at the top left side of the window and select “Run new task” from the list of options available.
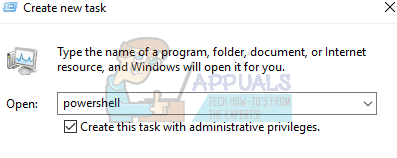
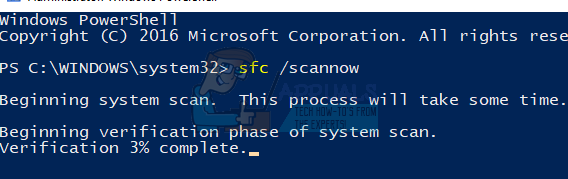
- Now type “powershell” in the dialogue box and check the option underneath which states “Create this task with administrative privileges”.
- Once in the Windows Powershell, type “sfc /scannow” and hit Enter. This process may take some time as your entire Windows files are being scanned by the computer and being checked for corrupt phases.
- If you encounter an error where Windows states that it found some error but was unable to fix them, you should type “DISM /Online /Cleanup-Image /RestoreHealth” in the PowerShell. This will download the corrupt files from the Windows update servers and replace the corrupt ones. Do note that this process can also consume some time according to your internet connection. Don’t cancel at any stage and let it run.
If an error was detected and was fixed using the above methods, restart your computer and check if the process started working normally.
Solution 7: Turning off Sleep Mode
Another fix which worked for the majority of the users was disabling sleep mode. The error seems to be related to the computer sleeping or saving predefined data (as in fast startup). We can try disabling the sleep mode completely and check if this fixes the problem. Do note that if this doesn’t make a difference, you can always revert the changes.
- Right click on the battery icon present at the bottom right of your screen and click “Power Options”.
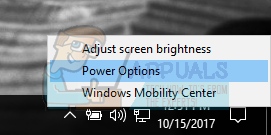
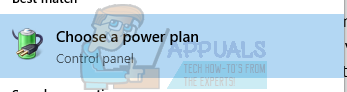
If you own a PC and don’t see this option, press Windows + S and type “choose a power plan”. Click on the most relevant result.
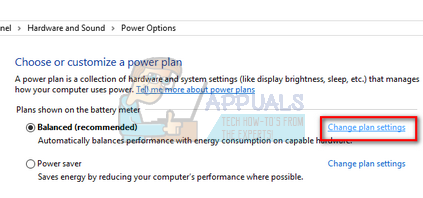
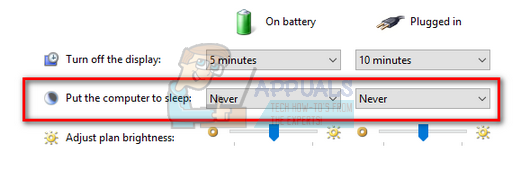
- There will be many plans listed in the window. Click on “Change plan settings” in front of the power plan which is currently active on your computer.
- On this window, you will see an option “Put the computer to sleep”. Make sure that the option is set to as “Never” in both conditions (on battery and plugged in). Click “Save changes” and exit.
- Now reboot your computer and check if the problem went away.
Solution 8: Reconnecting your hard drive (only for towers)
You can also try reconnecting your hard drive and check if this solves the problem. Many users reported that the problem was with their hard drive. If you own a tower, turn off your computer, unplug the power, then carefully take off the lid and disconnect the black and white wires going to your motherboard from your hard drive. Wait for a couple of minutes before plugging them back in. After rebooting your computer, check if the issue got fixed.
If you have already installed Windows again and the problem still persists, we recommend having your hard drive checked. It is possible that the problem lies with the hard drive and prompts the error even though you installed a fresh copy of Windows on your machine.