FIX: Reconnect Your Drive Notification on Windows 8/10
File history is a Windows 10 functionality that allows the user to save versions of his or her files and store them on an external hard drive. It is an additional method for recovering files only alongside system restore as compared to system restore only in the older versions of windows. ‘Reconnect your drive‘ notification is a Windows 8/10 error that occurs if the file history backup drive has been disconnected for too long. This could be due to the file history being turned off, or if the external drive that is supposed to be used for backup is disconnected. The solutions to this error notification are described below.

Turn On File History
- Open the Settings app and go to Update & Security > Backup.
- Connect the external hard drive to the PC
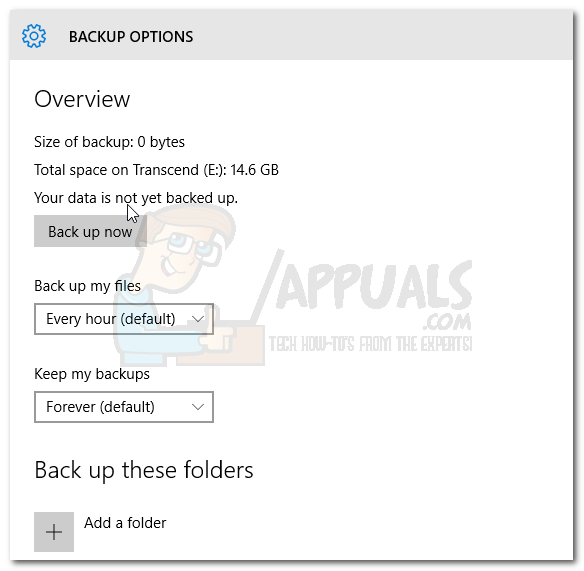
- In the Settings app click the “+” next to Add a drive. You’ll see a prompt to choose an external drive, choose the one you want. File History is now archiving the data.
- An on/off slider will appear under a new heading called “Automatically back up my files.”
- If the drive for backup of the file versions is not detected, disconnect the drive then reconnect again.
- After confirming that the PC has reconnected to the related drive the user could choose to wait for the next scheduled backup or start the manual backup. Manual backup is initiated as follows;
Settings> Update & Security> Backup> More Options> Backup Now
- After the re-connection, files will automatically backup after the scheduled time.
NOTE: There is an option for you to revert to previous versions of a created file.
Now; depending on the origin of the error message above, there are some additional actions you can take to avoid any future mishaps.
Choosing a different drive for your file history
This is an important activity especially when you detect that the location where you kept file history is prone to errors or is about to crash. It is also a necessary step when the said drive is almost full. You can relocate your existing history file to another drive with adequate space or simply use a whole new drive.
Starting over/choosing a new drive
- Go to Control Panel -> System and Security -> File History
- Choose Select drive and then click on the new drive that you prefer. Done.
Moving files into a new drive
IMPORTANT NOTE: When selecting a new drive, make sure it has adequate space to accommodate all the previous file versions as well as the incoming new files.
- Go to File History and Select Drive
- Identify the instructions “Change your File History drive” and on that page do as follows:
- If you want to use an external hard drive or USB flash disk, connect it to your computer. Refresh the active window/page and say OK.
- If you need the history file to be in a network location, select “Add network location” and then browse the directory up to the location in the network. You can also just type in the path to the desired location.
- You will be prompted whether you want to copy the file versions into the new drive. Click yes to start copying.
- Changing the duration for keeping files in File History
Most of the time, you may realize that you no longer need the very old versions of File History but they still occupy a considerable amount of space on your system. Instead of fretting over new drives in which to store file history, you can notify Windows to initiate a standard maximum length of time in which to hold onto file history. To do that, follow these steps
Go to the Control Panel -> System and Security -> File History and then tap Advanced settings.
When you see the “Versions” item there are two options that state “Save copies of files” and “Keep saved versions”. Click on each and select a time interval of your liking. Save the changes.

The above steps are simply a guideline for how Windows handles your older file versions. They will not automatically be deleted except when the drive starts becoming full. More space will be created for backing up newer versions.
Check for errors in the File History drive
Various factors can cause your drive to malfunction. The computer switching off unexpectedly e.g. due to power outage is a major cause of faults on system drives. It is important to check your drives for errors and fix the reparable ones.
In Action Center, Repair the drive in question.
Resign into the network
The network may become “unavailable” briefly while you are still connected to it. Whether this is due to scheduled maintenance or a network error, normal system operation will still be interrupted. The same applies to the process of copying files to the File History drive. You have to reenter your sign-in credentials to allow for backup to proceed.
- Search for File History settings via the Windows Search box and then select “Enter network credentials”. Next, key in your user name and password in the Windows Security pop up box. You can also ask Windows to remember your credentials if you so wish.
- Click OK