How to Manage Network Configs using Network Configuration Manager
Network performance monitoring has become one of the most fundamental things. Large enterprises keep their networks in check in order to avoid any sudden network outage and thus ensure an all-time operational system. One of the key things that have been quite a hassle for a long time is the network configuration. Networks operate as per their configuration, and therefore, the config is the party responsible for the behavior or act of the network. That means network admins have to monitor and keep in check the config files of the network at all times. It might not sound vast or colossal, but it actually is. It is not only the configuration of the server, rather the different devices present on the network, also known as nodes, are to be monitored as well to seek out any configuration difference. This helps in many ways, a few of which we will be discussing below.
Now, one cannot possibly imagine keeping track of all these config files manually. Checking a single configuration at all times of any anomalies is quite the task and when it comes down to a whole network, there are multiple config files that need to be monitored and managed for config changes. Thus, network configuration management tools have been developed by several companies to help network engineers with this very task. Network Configuration Managers help you keep track of all the config files present in your network, spot any mismatched lines, and ultimately, entire network compliance is ensured which is of great importance.
Network Configuration Manager
Solarwinds Network Configuration Manager (download here) is a perfect tool for network configuration management and network automation. With Solarwinds NCM, you can keep track of your network configuration changes in real-time i.e. real-time change detection which results in pinpointing unauthorized changes, create a baseline template to which device configurations in the network are compared which helps in network compliance.
Network Configuration Manager offers many key features such as you to make network configuration backups and Orion NCM unites with the Network Performance Monitor. Solarwinds is an industry-favorite in the field of system and network management and thus their products are always top-notch. There are tons of network configuration tools available but we will be using Solarwinds NCM due to the new features that come with it such as a better network insight feature as well the compatibility of the multi-vendor networks.
The installation process of the tool is pretty straight forward and easy, courtesy of the Orion Platform. Just download the tool from the link provided above, you can try a free trial if you wish to test the product and then run the downloaded executable file. Follow the on-screen prompts that are explained thoroughly by Solarwinds and you will have it running in no time.
Discovering your Network
Now that you have successfully deployed Network Configuration Manager in your network, you will have to discover your network via the Orion web console. Once you have discovered your network via the Network Sonar Wizard, you will have to populate the Orion platform with the nodes. Finally, you will have to populate the Network Configuration Manager with the discovered devices.
If you have previously used the Orion platform or any of their products, say Network Performance Monitor, you probably have added the nodes to the Orion platform already so you can just skip this and jump to the Adding the Devices to NCM heading below. Otherwise, just follow through as we will taking you on this journey via step-by-step instructions. To discover your network in the web console, follow the below instructions:
- Once you login to the web console for the first time, you will be automatically taken to the Network Sonar Wizard. In case it doesn’t start automatically, you can access it by going to Settings > Network Discovery. Click the Add New Discovery button to start discovering your network.
- Provide a range of IP addresses, individual IP addresses or if you wish to add a whole subnet, you can provide that as well and then click Next.
- If you are taken to an Agents page, this means you have enabled Quality of Experience (QoE) during the installation. If you have any nodes in your network that use agents, make sure to tick the Check all existing nodes check box.
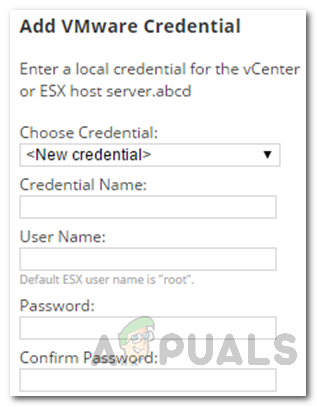
- If you wish to add any virtual machines i.e. VMware vCenter or ESX hosts, you can do so on the Virtualization page.
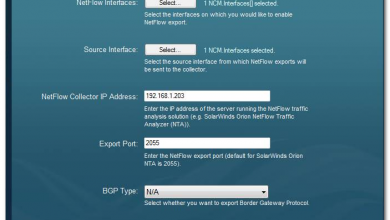
VMware Credentials - Now, on the SNMP panel, if you have devices on your network that use a community string other than the private and public, or if you wish to use an SNMPv3 credential, hit the Add New Credential button and provide the required fields.
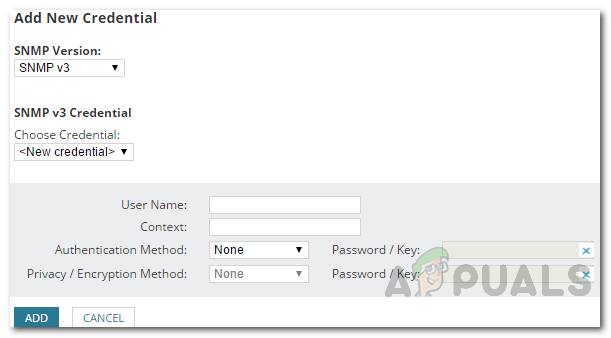
SNMPv3 Credentials - You can discover Windows devices on the Windows page. If you are going to do so, it is recommended that you monitor them with WMI instead of SNMP.
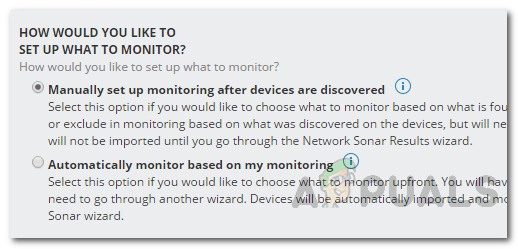
- Leave the Manually set up monitoring after devices are discovered option checked on the Monitoring Settings page and hit Next.
Monitoring Settings - Hit Next on the Discovery Settings page as well.
- If you wish to discover your devices now, leave the Discovery Scheduling as is and click the Discover button to start the discovery.
- The discovery can take a while depending on the number of the nodes in the network, so make sure to let it run.
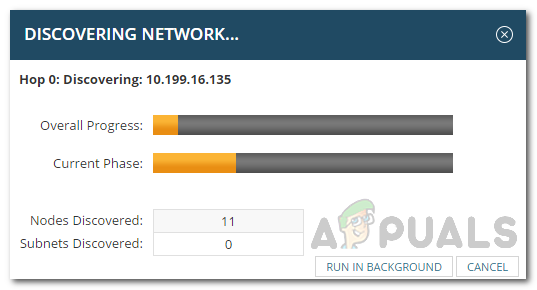
Discovering Network
Adding Discovered Devices to the Orion Platform
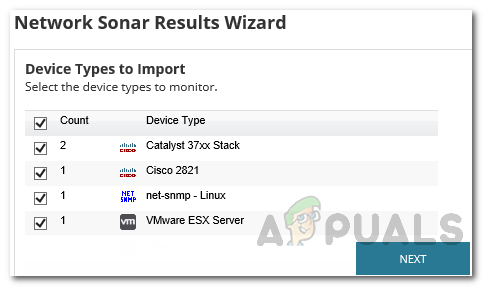
Once the device discovery has finished finding all of your nodes in the network, it is time you add them to the Orion platform via the Network Sonar Results Wizard. Here’s how to do it:
- Upon completion, you will be automatically taken to the Network Sonar Results Wizard. Select the nodes that you wish to monitor and then click the Next button.
Network Discovery Results - Select the interfaces you wish to monitor and then hit the Next button again.
- After that, you will have to choose the volume types you want to monitor and then hit the Next button again.
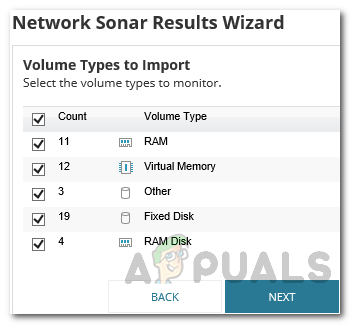
Volume Types - Finally, review the list that is to be imported and then click the Import button.
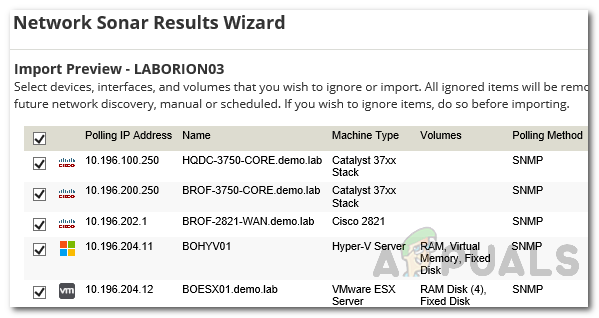
Import Preview - Once the import completes, click the Finish button to get out of the wizard.
Adding the Devices to NCM
With that, you have successfully populated your Orion platform with your network devices. Now, as a final step and to be able to manage your network configs, you will have to add the imported devices to NCM. This is pretty easy and here’s how to do it:
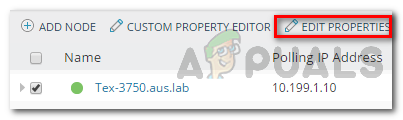
- First of all, you will have to access the discovered devices. To do this, go to Settings > Manage Nodes.
- A list of the available nodes will be shown that you had imported earlier. Choose the devices that you want to add to NCM and then click the Edit Properties option.
Managing Nodes - Choose Yes from the Manage node(s) with NCM drop-down menu.
- This will show you the NCM properties heading. The connection profile will be filled with default values. Enter the connection credentials and then hit the Test button at the bottom to verify the credentials.
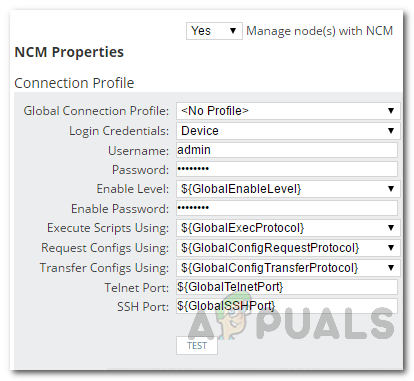
Connection Profile - If the test is successful, click the Submit button to add the devices to NCM.
- You will be able to verify the addition via a Yes in the NCM – Licensed column in front of the node name.
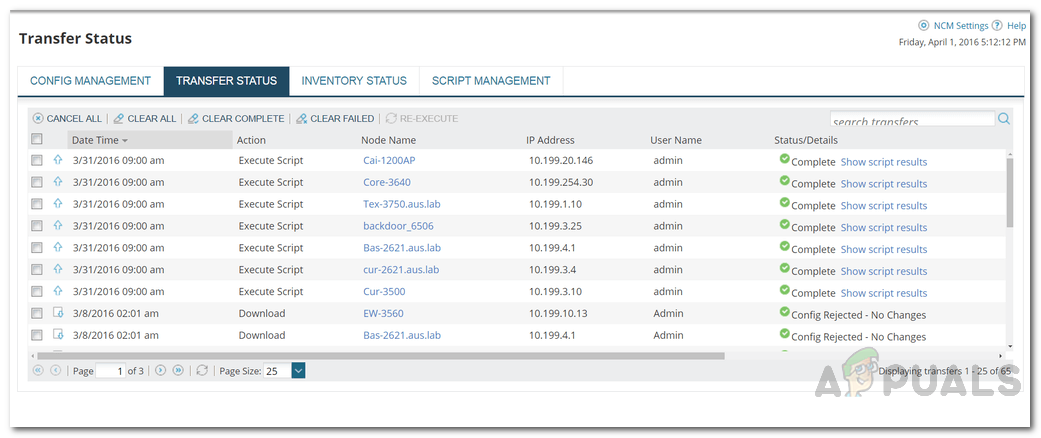
Managing Network Configs
Now that you have added the devices that you wish to monitor with NCM to NCM, you can manage their network configuration files. To be able to manage the config files, just head to the Configuration Management tab. This can be accessed through My Dashboards > Network Configuration > Configuration Management. From there, you will be able to keep track of your nodes and their config files and detect any anomalies should there be any.