PC Mouse Getting Stuck on Corners in Windows? Try this Fix!
 Reviewed by Huzaifa Haroon
Mouse is a primary input device of a PC, and if it gets stuck in a corner, using the PC can be extremely difficult. Sometimes, this can happen in a game or a particular app, especially in full-screen mode. It is reported in all Windows versions 11, 10, 8, 7, etc. In some cases, the issue occurs in a multiple-display setup.

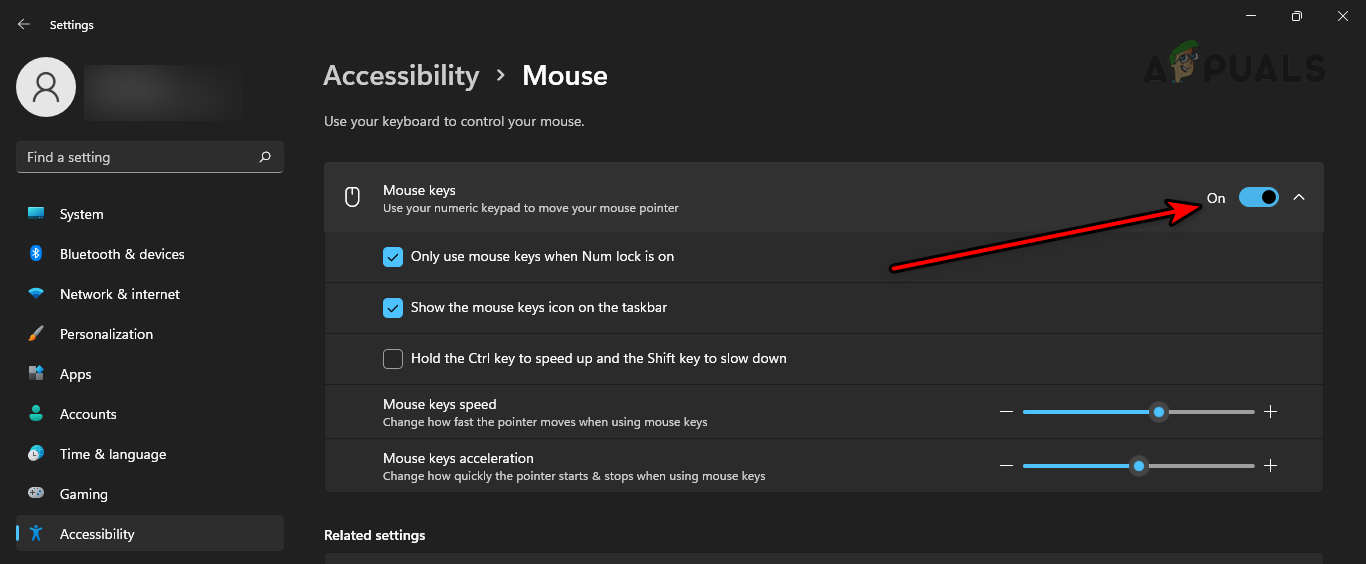
Before proceeding, enable the Mouse Keys in Settings > Accessibility > Mouse. This will help in performing troubleshooting methods.
How to Fix a Mouse That is Stuck in a Corner
First, we will list down some generic workarounds to make the mouse work and you can use these workarounds to try further methods.
1. Open the Task Manager
You won’t be able to use the mouse if a background app is locking the mouse in a specific corner. To resolve this issue, open the Task Manager and terminate tasks of non-essential apps.
- Press the Ctrl + Shift + Esc keys to launch the Task Manager and check if the mouse is working correctly.
- If not, use the arrow keys to select any of the following and press Alt + E to end it.
Siege

Ubisoft

R6

Windows Input Experience
- See if the problem is solved.
- If this does not work, use the arrow keys to select Windows Explorer and press Shift + F10 keys.

Restart Windows Explorer in the Task Manager - In the menu shown, select Restart and check if the mouse is operating correctly.
2. Restart the Device
A malfunction in the input modules of the device will not allow the mouse to work correctly, and its cursor will get stuck in a corner. In this case, resetting the device will solve the problem.
- Power off the device and unplug its power cable.

Disconnect the Power Cable of the PC and Other Peripherals - Disconnect all the peripherals except essentials (such as keyboard and mouse).
- Plug back the device’s power cable and power it on. See if the issue is resolved.
If you have to restart the system every time the issue occurs, locking (Windows + L) and unlocking or logging out and logging it might be a faster solution.
3. Update the Device’s OS to the Latest Build
You will get a stuck mouse in the corner of the screen if the device’s OS is outdated. This will make the mouse incompatible with the OS, and to fix this, update the device’s OS to the latest build. Additionally, if the issue is occurring due to an OS bug, updating it will also patch the bug.
- Press Windows + X keys and go to Settings.
- Select Windows Update and click on Check for Updates.
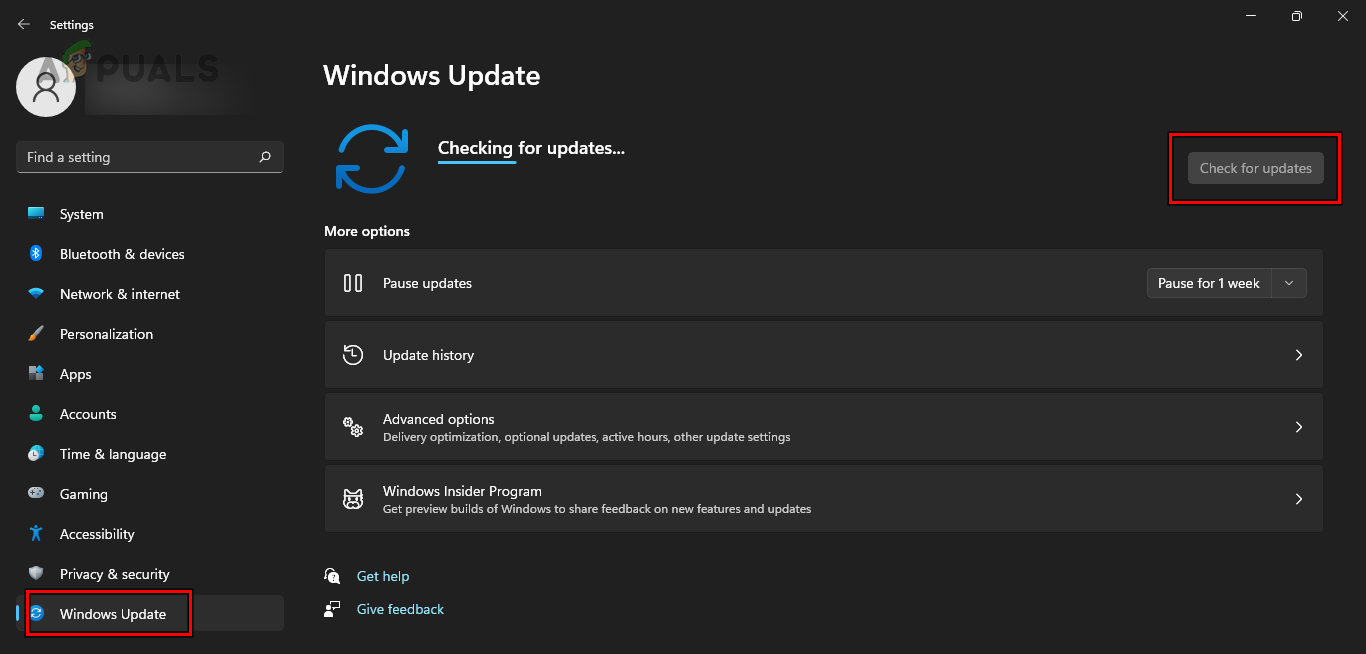
Check for Windows Updates - Install all the available updates and restart the system. Verify if the mouse issue is resolved.
4. Run the Hardware and Devices Troubleshooter
The mouse might get stuck due to a generic misconfiguration of your system. Here, running the Hardware and Devices Troubleshooter will help us identify and troubleshoot any such issue.
- Press the Windows + R keys and execute the following:
msdt.exe -id DeviceDiagnostic
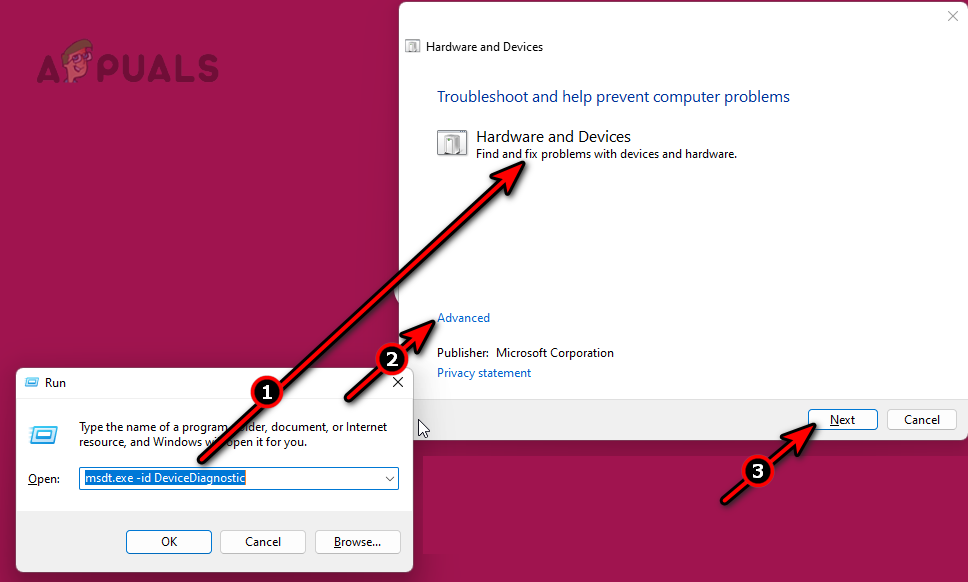
Run Hardware and Devices Troubleshooter - Follow the prompts on the screen to complete the process and apply any suggested troubleshooting processes.
5. Perform SFC and DISM Scans
If the essential input components of the OS are damaged, the mouse will not operate correctly, and its cursor will get stuck in a corner. To solve this, perform SFC and DISM scans which will repair the OS files.
- Press the Windows key and search for Command Prompt.
- Right-click on it and select Run as Administrator.
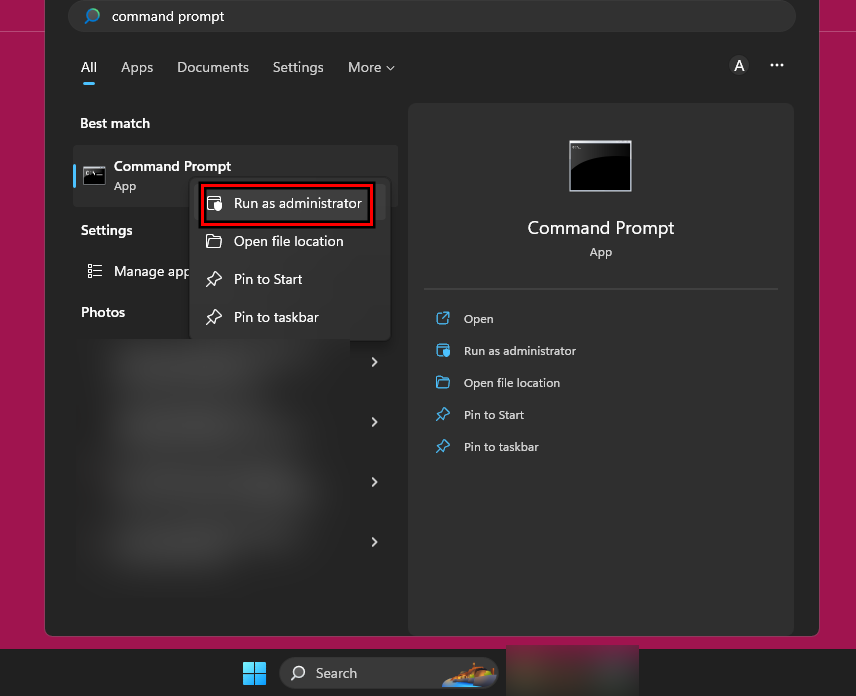
Open Command Prompt as an Administrator - Execute the following one by one:
sfc /scannow

Dism.exe /online /cleanup-image /CheckHealth

Dism.exe /online /cleanup-image /ScanHealth

Dism.exe /online /cleanup-image /RestoreHealth
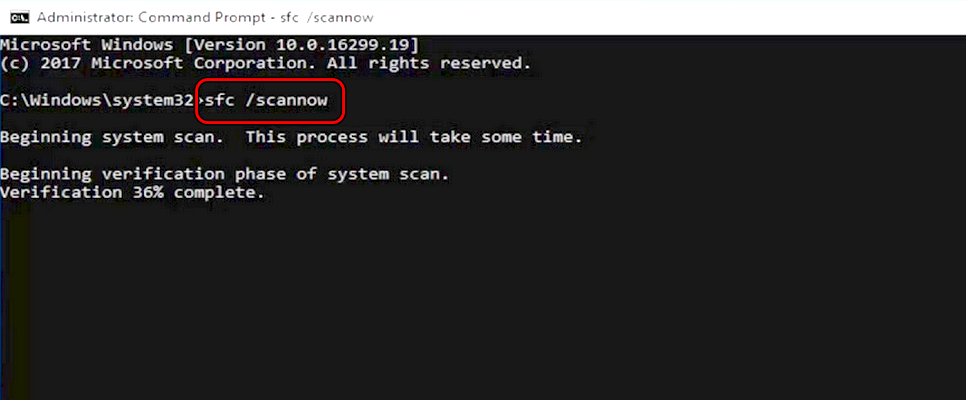
Perform an SFC Scan on Windows 11 - Restart the system and check if the mouse is operating correctly.
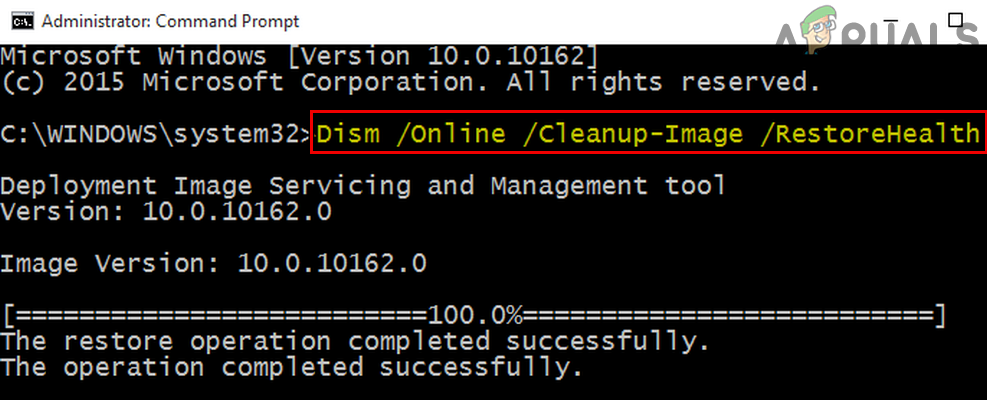
Use the DISM Command to RestoreHealth
6. Set the Display Scaling to 100%
The display scaling affects the placement of icons, images, text, and other UI elements on the screen. If the mouse is not compatible with enhanced scaling, it will get stuck in a screen corner. In such a case, setting the display scaling to 100% will solve the problem.
- Press the Windows + I keys to open Settings and use the Tab key to go to Display in the System tab.
- Hit the Enter key and navigate to Scale.
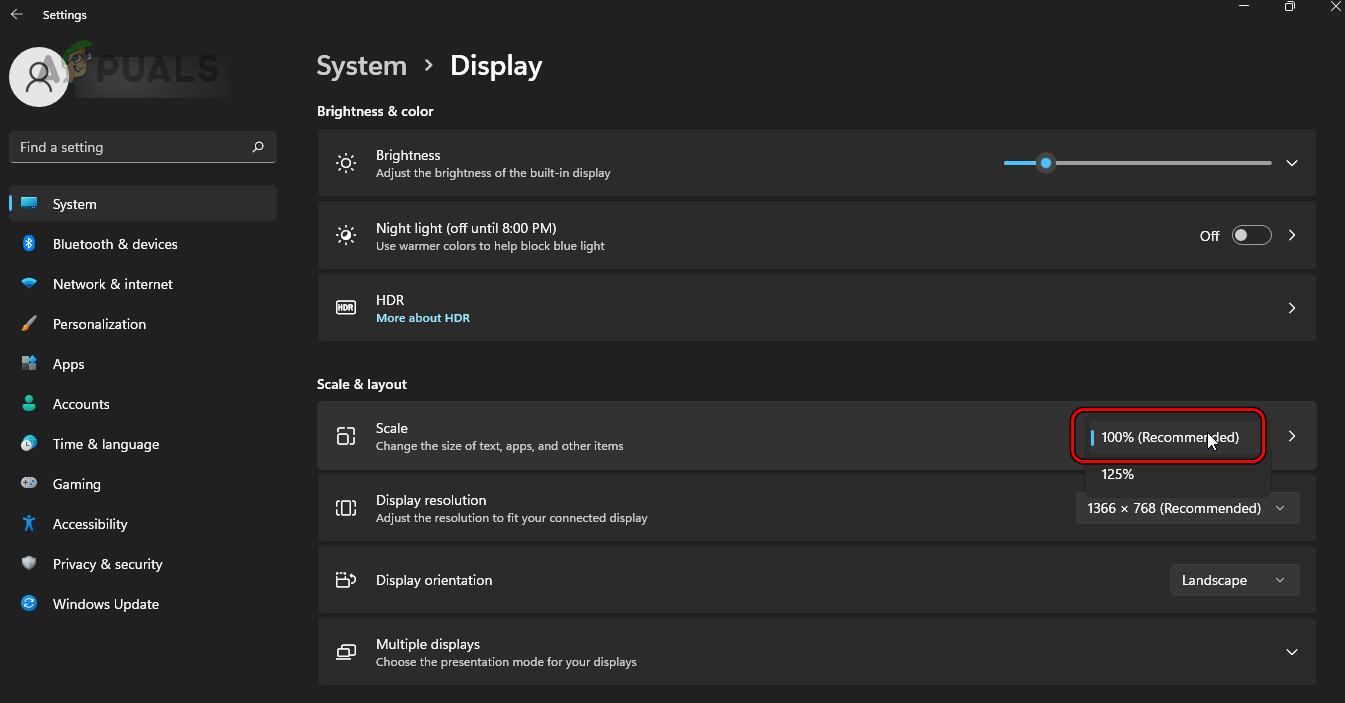
Set the Display Scaling of the PC to 100% - Press the Enter keys and select 100%.
- Restart the system and see if the mouse problem is solved.
- If not, press the Windows + Ctrl + Shift + B keys to restart the graphics drive and see if that clears the problem.
7. Check for Electromagnetic Interference
If there is electromagnetic interference around the mouse or PC, this can cause the mouse cursor to get stuck in a corner. Here, checking and removing any electromagnetic interference will solve the problem.
- Power off other electronic devices in the room. Such devices can be wireless keyboard/mouse, router, AirPods Pro, mobile phones, etc.

Remove Electromagnetic Interference Around the PC and Mouse - Check if the mouse is working correctly. If so, power on the electronic devices one by one to find out which one was causing the issue.
8. Update or Reinstall the Mouse Driver
You will face the mouse issue at hand if the mouse driver is outdated, or its core files are damaged. This will make the driver incompatible with the OS. In such a case, updating the mouse driver or reinstalling it will solve the problem.
Update the Mouse Driver
- Press Windows + X to open the Quick Access menu and select Device Manager.
- Press Tab and then use the down arrow key to navigate to Mice and Other Pointing Devices.
- Press the right arrow key to expand the tab and then the down arrow key to select the mouse.
- Press the Shift + F10 keys and select Update Driver.
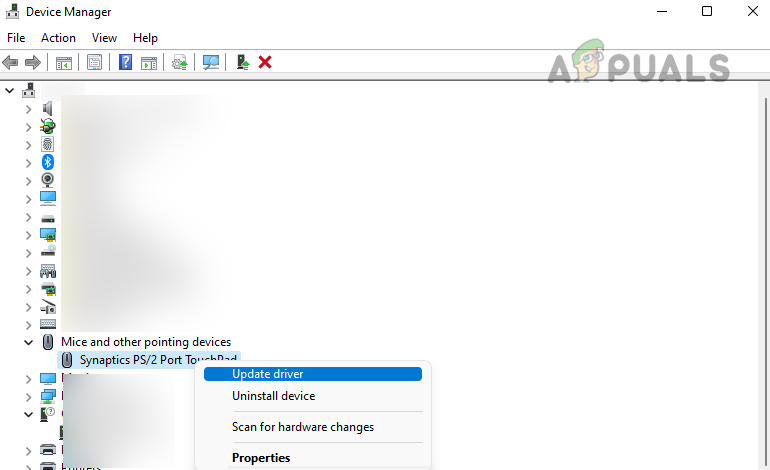
Update Mouse Driver - Hit the Enter key and follow the prompts on the screen to complete the process.
- Once done, restart the system and check if the mouse is not stuck anymore.
Reinstall the Mouse Driver
- Download the latest mouse driver from the OEM website.
- Open the Device Manager and expand the Mice and Other Pointing Devices.
- Press the Shift + F10 keys and select Uninstall Driver.
- Press the Enter key and press the spacebar to checkmark Attempt to Remove the Driver for This Device.
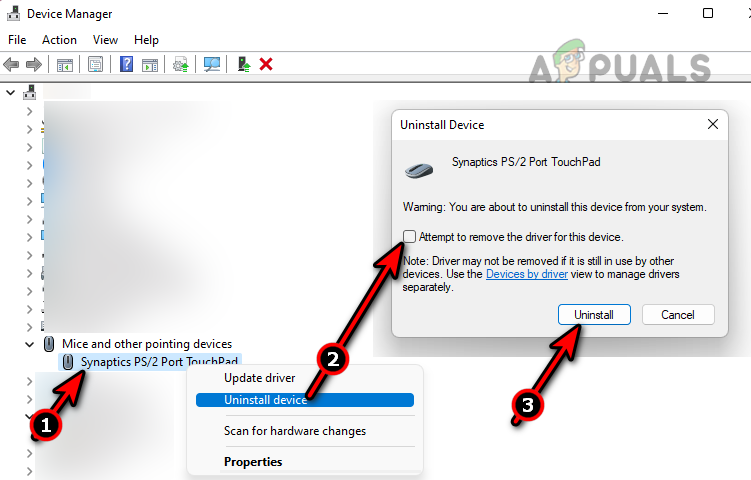
Uninstall the Mouse Driver and Attempt to Remove the Driver of This Device - Press the Enter key and once done, unplug the mouse (if external) and restart the system.
- Plug the mouse in another port and let the Windows install a generic driver. See if the issue is resolved.
- If not, install the latest downloaded driver and verify if that makes the mouse work correctly.
9. Restore the Touchpad Settings to Default
If a touchpad configuration conflicts with the mouse, the mouse will get trapped in a corner. In such a case, restoring the touchpad settings to default will solve the problem.
- Press the Windows key and search for Control Panel.
- Select Control Panel by using the arrow keys and hit the Enter key.
- Use the Tab key to select Mouse and hit Enter.
- Use the Tab key to select Restore Defaults and press Enter.
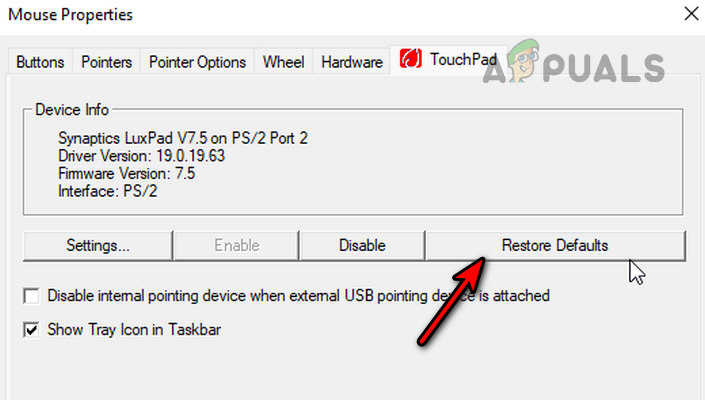
Restore Touchpad to Defaults - Restart the system and see if the mouse is no more trapped in a corner.
- If not, enable Pointer Trails and check if the problem is solved.
10. Perform a Clean Boot and Uninstall the Conflicting Apps
You will get the mouse issue at hand if another application on your system conflicts with the system’s input modules. Here, performing a clean boot to identify the problematic application and then uninstalling the application will get the job done.
Clean Boot the System
- Clean boot your Windows PC and see if the mouse issue is resolved.
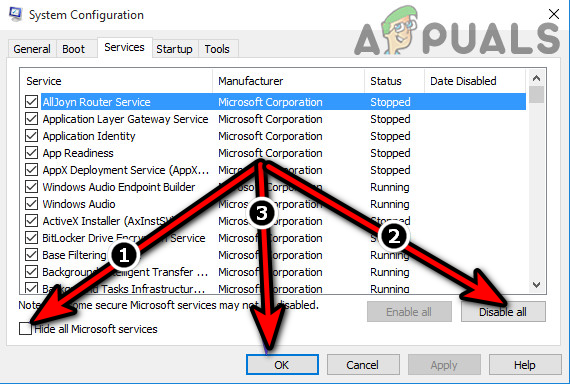
Clean Boot the Windows PC - If so, one by one enable all the processes/services disabled during clean boot and find out which one is causing the issue. Once found, uninstall it.
- If this does not work, boot the Windows PC into Safe Mode and see if the mouse problem is solved. If so, then a driver incompatibility is causing the issue and will need troubleshooting.
Uninstall the Conflicting Applications
Afterburner and Riva Tuner are known to cause such issues. If you have any of these or a similar one, uninstall it. To uninstall Afterburner:
- Press Windows + X keys and open Apps & Features.
- Expand the options of Afterburner and click on Uninstall.
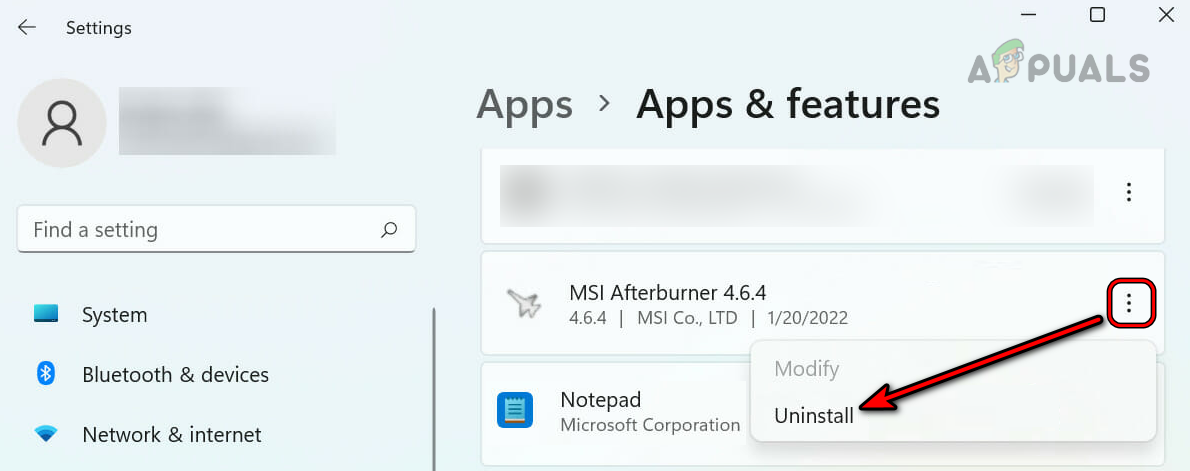
Uninstall MSI Afterburner - Follow the prompts to uninstall Afterburner and restart the system. Verify if the issue is resolved.
11. Uninstall Conflicting Update
If the mouse started to behave strangely after an OS update, then the incompatibility of the update with your system has triggered the issue. In this case, uninstalling the conflicting update will do the trick.
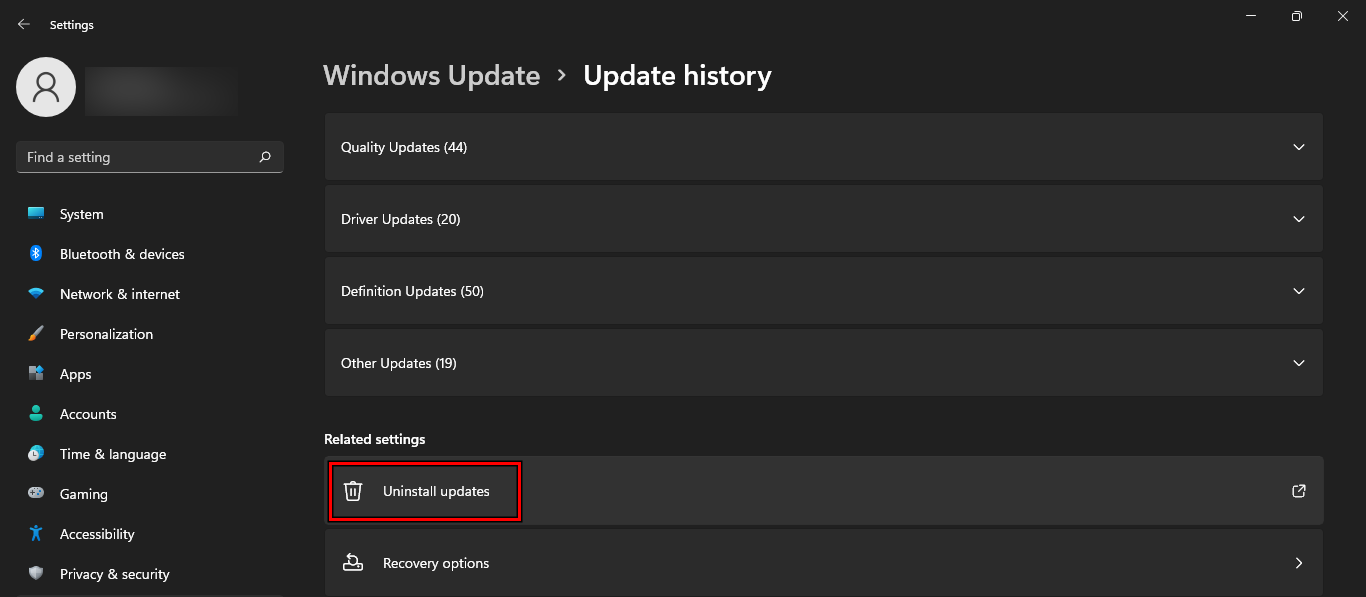
- Press Windows + X keys and go to Settings > Windows Update.
- Open Update History and click on Update History.
- Near the bottom of the panel, open Uninstall Updates.
Open Uninstall Updates in the Update History - Select the latest update (check the Installed-on column) and click Uninstall.
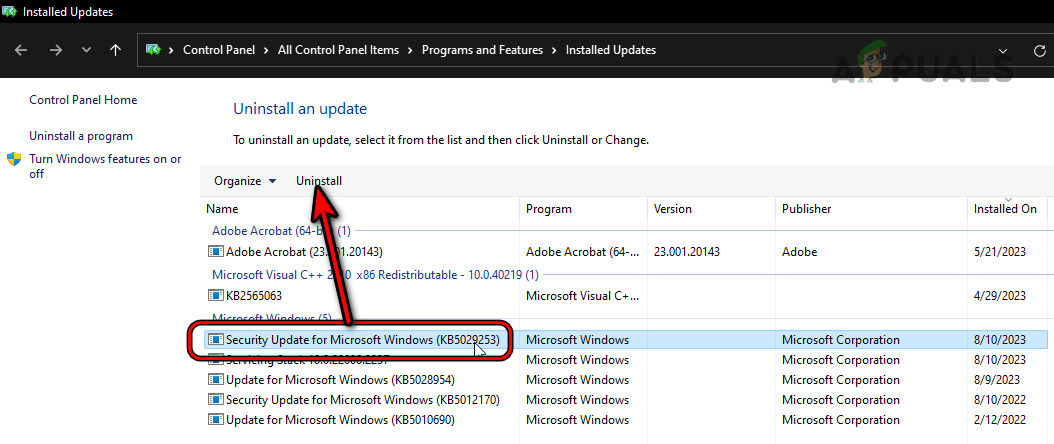
Uninstall Latest Windows Update - Follow the prompts on the screen to complete the process and restart the system. Confirm if the issue is cleared. If so, you may need to hide the update.
12. Disable Touch Screen in the Device Manager
If dust has accumulated on the touch screen or if it is malfunctioning, the invalid or ghost input from the touch screen will move the cursor to that point, causing the mouse to get stuck in that corner. To resolve this issue, disable the Touch Screen in the Device Manager.
- Press the Windows + X keys and open Device Manager.
- Expand Human Interface Devices (HID) and right-click or press Shift+F10 on the HID-compliant Touch Screen.

Disable HID-Compliant Touch Screen - Select Disable and restart the system. Verify if the problem is solved.
- If it does, clean the screen of your laptop and enable Touchscreen. Confirm if the mouse is working correctly.
If the issue persists even after trying the above methods, try another mouse and see if the issue occurs. If it occurs, restore or reset the system to default. If this does not work, contact Microsoft or OEM Support for further assistance.
To confirm if the issue is hardware-based or software-based, boot the system into UEFI or BIOS and see if the mouse works correctly. If the issue is occurring in a multiple-display setup, you may be experiencing sticky corners, and the only way out is to use a 3rd party app (such as Continuous Mouse).
Reviewed by Huzaifa Haroon


