How to Fix Minecraft GLFW Error 65542 (Driver Does Not Support OpenGL)?
Players encountered an error after the 1.17 update of Minecraft, which caused the game to stop functioning for those using integrated GPUs. This happened because the game’s updated shaders did not support integrated graphics cards. If you are experiencing frequent errors and have an integrated GPU, there might be little you can do on your side, except perhaps reverting to an older version of the game.

To help understand and resolve these issues, we have detailed the causes as follows:
- Incompatible System Requirements: Many users encounter this error due to incompatible system requirements following the 1.17 update. If upgrading your system with a new graphics card is not an immediate option, you may need to wait for a patch that addresses compatibility.
- Integrated Graphics Card: If your computer has an integrated GPU, Minecraft may not function properly after the most recent update. In such cases, playing the game might only be possible after a future update.
- Problems with OpenGL: OpenGL is a critical library for rendering graphics in games and applications. Some users suggest that replacing the openGL32.dll file can resolve this error.
- Corrupted or Outdated Graphics Driver: This error can also occur when graphics drivers are either outdated or corrupted, which often causes the Minecraft GLFW Error 65542 (Driver Does Not Support OpenGL).
1. Replace OpenGL32.dll Manually
This dynamic link library (DLL) file is critical for the game to manage and execute graphical rendering tasks. If it becomes corrupted, the game may struggle to interact with the system’s graphics hardware, resulting in errors.
By downloading a fresh copy of the file and placing it into the appropriate directory, you are essentially giving the game a clean slate to work from, potentially clearing out any errors associated with the previous, possibly damaged version of the file.
- Manually download the DLL file by visiting this page.
- Find the Download button and select it, ensuring you choose the correct version for your system.
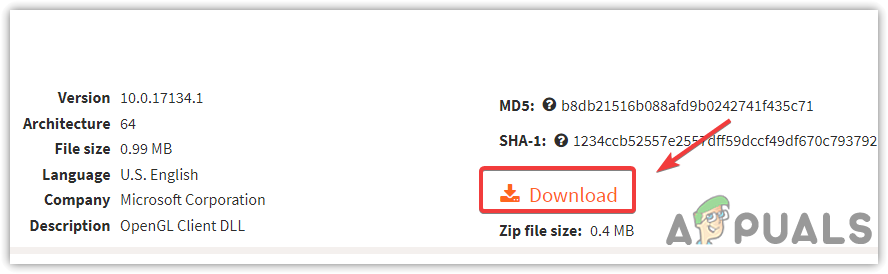
- After the download completes, locate the file in your downloads directory.
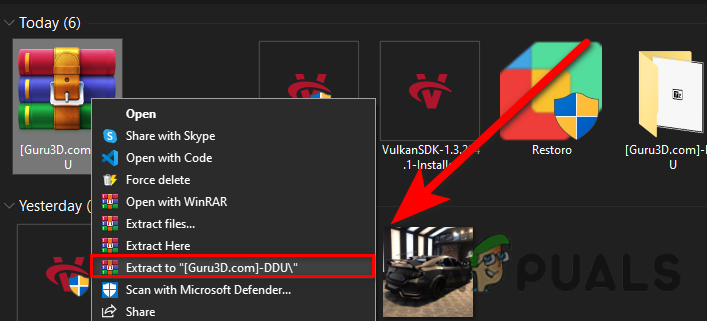
- Extract the ZIP folder contents to a designated place using an extraction tool like WinRar.
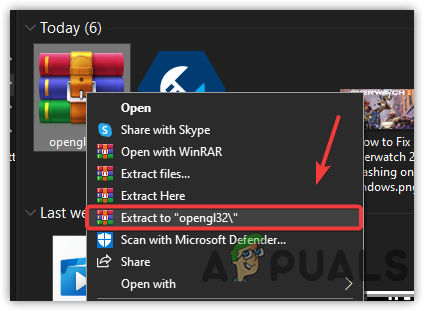
Extracting DLL Zip Folder - Navigate to the folder and copy the OpenGL32.dll file by pressing Ctrl + C.
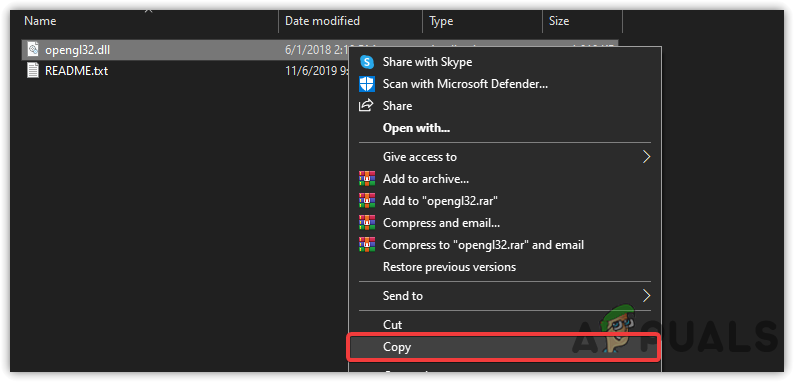
Copy DLL File - Navigate to the directory where Java is installed, typically:
C:\Program Files\Java\jdk-16.0.2\bin
- Paste the file with Ctrl + V and provide administrator permissions if prompted.
- After completion, launch Minecraft to check if the issue has been resolved.
2. Download The Latest Driver
The first solution is to update your integrated graphics driver. Refreshing your integrated GPU’s driver can often be the key to overcoming compatibility issues. When Minecraft updates its software, the demands on the graphics processing may also change. Older drivers might not support these new requirements, which can result in errors such as the GLFW Error 65542.
By installing the latest drivers, you make sure your GPU is equipped to handle the updated shaders and functionality, potentially resolving the error and restoring your gaming experience.
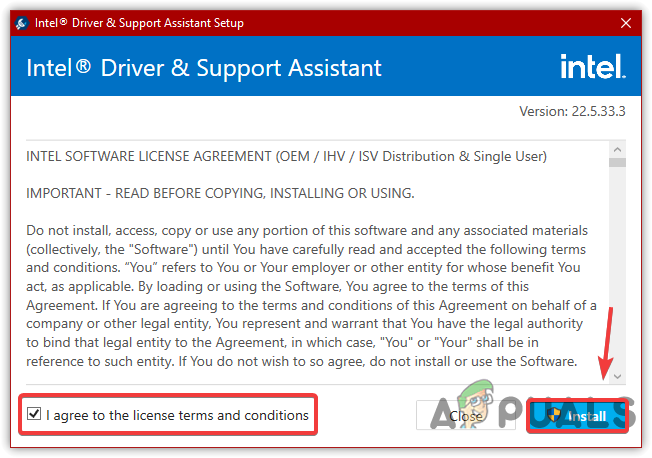
- Go to the Intel Driver & Support Assistant page and download the software.
- Run the installer by double-clicking on it.
- Agree to the License Terms and Conditions.
- Click on Install and complete the installation process.
- Accept the prompt and begin the installation.
- Restart your computer as required to complete the setup.
3. Reinstall Graphics Driver
Corrupted or outdated graphics drivers can lead to issues, and it is important to keep them up to date. It is recommended to first look for driver updates before proceeding with reinstallation. To properly uninstall the graphics driver and make sure no residual files are left behind, use Display Driver Uninstaller (DDU).
Device Manager might not remove the driver completely, which can cause driver conflicts. DDU provides a thorough removal process.
3.1 Uninstall Graphics Driver
- Download Display Driver Uninstaller.
- Once downloaded, restart your computer while holding the Shift key to access advanced startup options.
- From the options menu, select:
Troubleshoot>Advanced option>Startup Settings. - Click Restart.

Click to Restart - Upon restarting, select F5 to boot Windows into Safe Mode.
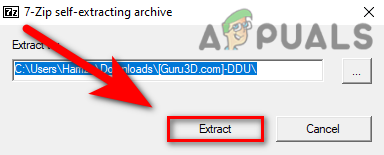
- Extract the DDU Zip folder and navigate to it.
Extract DDU Folder - Run the Display Driver Uninstaller application from the extracted folder.
Extract DDU Application - Select the device type and its vendor, then click Clean & Restart to completely uninstalling the drivers.
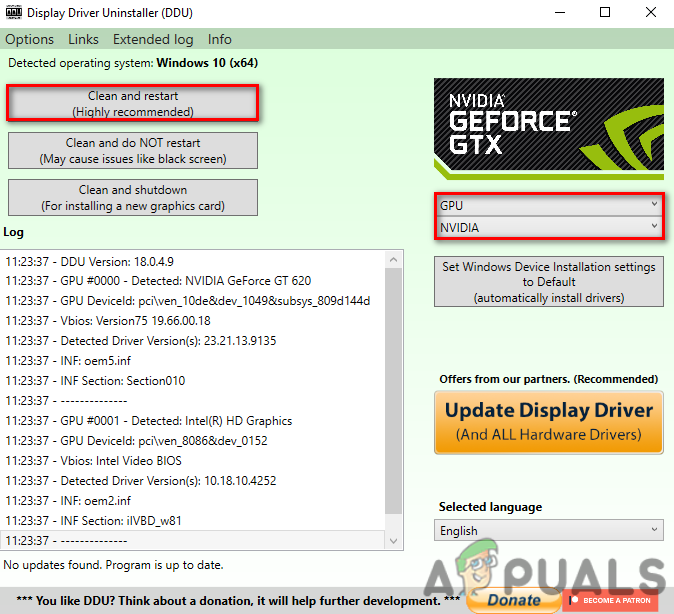
Select Device Type and Its Vendor
3.2 Install Graphics Driver
- After the uninstallation, visit the official website of your GPU manufacturer to download the latest graphics driver.
- Navigate to the Drivers section, select the appropriate graphics driver and begin the download.

Download Graphics Driver - Install the downloaded driver and restart your computer to apply the changes.
4. Try a Different Version Of Minecraft
Going for an alternative version of Minecraft can often fix compatibility issues introduced by updates. New updates, while enhancing features or security, can inadvertently cause conflicts with certain system configurations, particularly if there are specific hardware limitations like an integrated GPU.
By reverting to an earlier version – one that previously operated without hiccups – you essentially roll back to a state where the game’s requirements aligned well with your computer’s capabilities, ensuring a smooth gaming experience without the onset of new update-related errors.
- To install an older version, open the TL Launcher and select the desired version of Minecraft.
- Click Install and wait for the installation to complete.
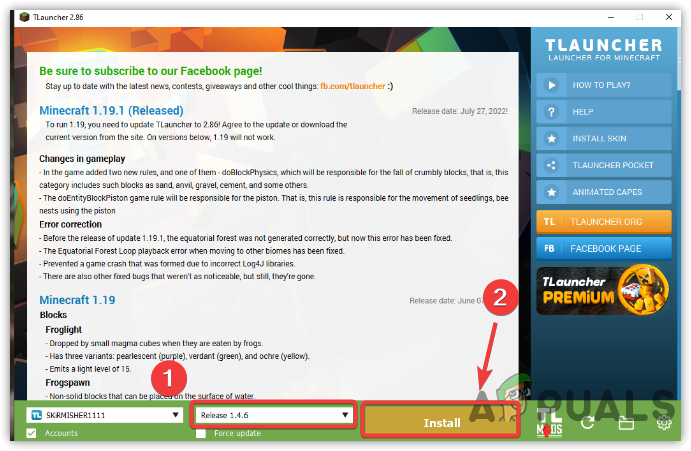
Installing Previous Version Of Minecraft - Launch the game to see if the error has been resolved.


