How to Transform a Picture into a Vector Image on Adobe Illustrator
Being a Graphic Designer, you might need a lot of pictures from the internet to make something on Adobe Illustrator, but because those images are not of good quality, you cannot use them in your design. By low quality, I mean that when you zoom into a picture, you can notice the image getting pixellated because of the poor quality. To work effortlessly on Adobe Illustrator and to make some amazing pieces of art, it is best if you use Vector files of images which would not pixellate no matter how much you zoom in. That is one reason why designers prefer to use Adobe Illustrator when creating illustrations or logos because the work does not pixellate.
What are Vector Images
A vector image can be best defined as an image which uses values instead of pixels. I am sure many of you are aware of the term pixels. Pixels are small squares used to join together and make an image. Vector is the complete opposite of pixels. While in an image which is pixel based, you will always be able to see the pixels when you zoom extremely into the image, for instance, if you have to print a pixel image on a large scale, you will notice the small squares. However, the vector, on the other hand, will show you a much smoother picture if it is in the vector format.
How to Change an Image from Pixel to Vector
I love working with Adobe Illustrator because it is a vector based program. And it allows you to change already existing pixel images into vector images with a very simple and easy process. Follow the steps as mentioned below to make an image a vector.
- I used an image from the internet and dragged and dropped it to Adobe Illustrator. When I zoomed into the image, this is how it appeared on Adobe Illustrator.
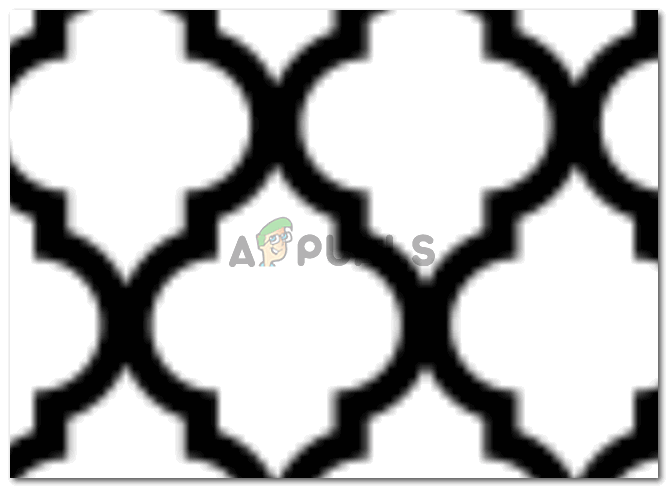
Notice the blurred edges in this image. you cannot see the clear edges of the black design because of the pixelation. And if you are a professional designer, you cannot afford this design to be a part of your design because it will directly impact your designs clarity. - Now to change this image into a vector, you will have to locate the tab for Image Trace which will be visible on the top tool panel for Adobe Illustrator.

Image Trace. This is the first step to creating a vector. And probably the only step as after you click this tab, your image will change instantly into a vector image. 
Clicking on the arrow attached to this tab will show you a dropdown list of options to choose from. These options will basically help you edit your image once it has been vectorized. You can try and check all of these options to get the best output for your image. - The minute you choose one of these options, your image will be vectorized immediately and you will see a visible difference in the image. It is more clear now. And the colors are much brighter now.
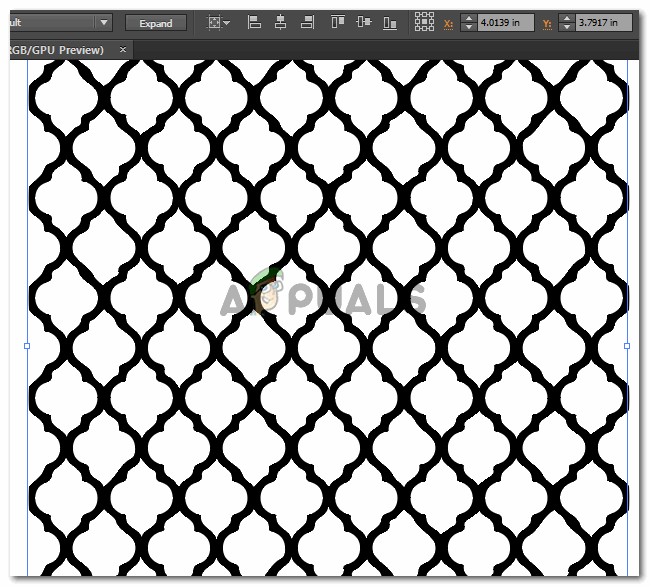
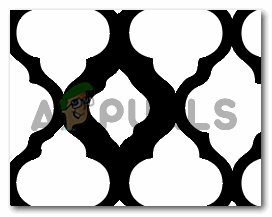
Notice this image with the first one on this blog. Do you see the huge difference an image can make if it is in the vector format? 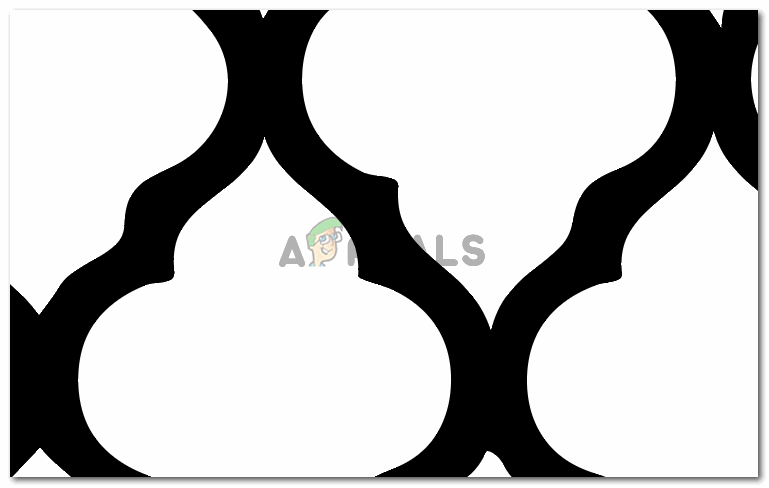
I zoomed into the image just to be sure of the pixels. And see how clear the edges are. they don’t look blur at all, there are no squares in the image and the black is now perfectly smooth in comparison to the original image - This is one of the reasons why I personally love Adobe Illustrator. The colors turn out to be so much clearer. Moving on. Now that your image has been changed into a vector successfully, you would want to use this image and make a few changes as per your requirements. For this, while your image is selected, click on the tab on the top toolbar which says ‘Expand’.
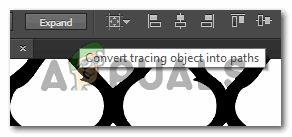
Expand allows you to make your image editable by creating paths. Paths allow you to use the anchor points and move them in whatever direction you wish to use them in. You can change the image as you like now. 
Clicking on Expand will make your image show you the paths. These basically are different anchor points on the image which can be used to change the shape of the image. - When I first added this image to Adobe Illustrator, it was one whole image. It did not have any parts. But now because it has been expanded, each part of the image has its anchor points which can be moved in any direction. I simply clicked on one of the motives which selected that part of the entire design and displayed the anchor points for it.
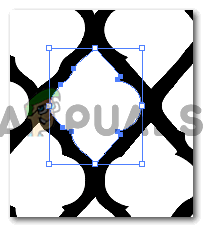
The selected motive which can be edited - Now use the bigger blue rectangle to increase or decrease the size of the motive. The anchor points on the inner side of the motive can be used to change the shape as well.
This is what I experimented on the design.


