How to Record Guitar on PC Using Reaper DAW
Many budding musicians want to know “how can I record my instrument on computer”? Hint: You do not attach a 3.5mm adapter to your guitar cable and plug it directly into the Line In port of your motherboard.
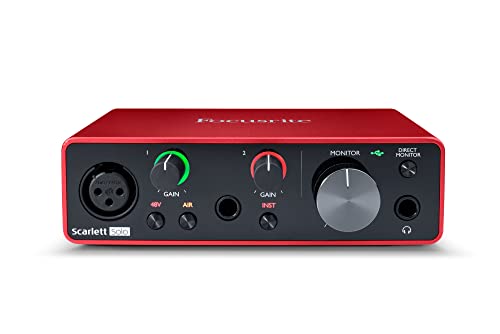
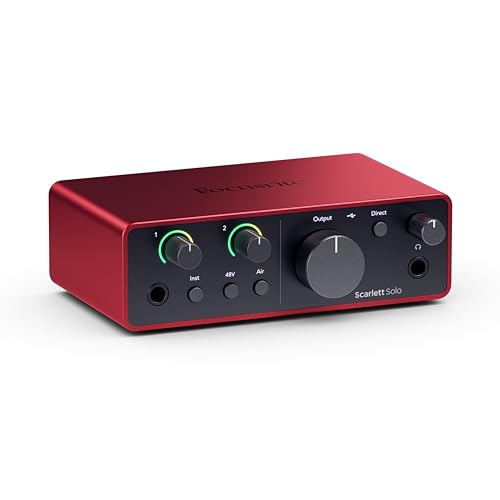
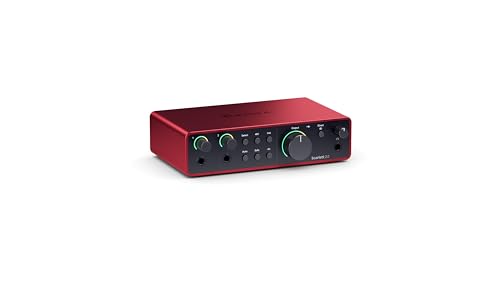
What you need is an audio interface – they typically look like this, and cost anywhere between $50 to over $1,000 depending on brand and quality.
Another option is an effects pedal with built-in audio interface over USB, like the strongZoom G2.1NU - Check Latest Price/strong (typically around $150) at the time of writing this article.

Choosing an audio interface can be a little difficult – you need to consider the connection type (Thunderbolt, USB, FireWire, PCI/PCIe card). Thunderbolt is currently the fastest connection type with the lowest audio latency, followed by FireWire, then USB – take note that there is no difference in recording audio over USB 2.0 vs USB 3.0. This is because even though USB 3.0 has a higher bandwidth / transfer rate, it does pretty much nothing for your audio resampling / latency / etc.
The other thing to consider is the tech specs of your audio interface, most notably the highest supported bit depth and sample rate. Most professionals will record at around 24-bit / 48kHz, or as high as 32-bit / 192kHz. This is super important not only for audio quality, because recording at a higher bitrate / sample rate will actually reduce your audio latency when using Direct Monitoring inside a DAW like Reaper.
Direct Monitoring, by the way, is when you can hear yourself play while you’re recording (or jamming out inside a VST). If you have a high audio latency, then you get a bit of delay between hitting strings on your guitar and the sound being produced on your speakers. I’ll explain all of this further throughout this guide.
Requirements:
- Cockos Reaper
- An audio interface
- A guitar
- (Optional) ASIO4ALL universal ASIO driver
- (Optional) VST software like Guitar Rig, Overloud TH3, etc.
Installing ASIO4ALL Drivers
ASIO4ALL drivers are optional but recommended – they typically perform better than on-board drivers like Realtek HD for audio latency and buffer size. ASIO4ALL can get as low as 5Ms audio latency whereas with Realtek HD you’ll typically max out around 14Ms.
So, lets begin by installing the ASIO4ALL drivers – or you can skip this step and head straight to configuring Reaper.
Download the ASIO4ALL drivers and run the installer, and when it gets to the Choose Components menu, check “Off-line Settings”.


Now when the installation is complete, you can open the Offline Settings from your Start menu and configure the interface (buffer, latency compensation, etc.)
Configuring Reaper’s Preferences
Now lets go into Reaper, and adjust the Preferences. You can go into Options > Preferences, or just hit CTRL + P.
Now here’s a quick overview of all the categories in Reaper’s Preferences menu:

- General – Provides basic options, including undo limits, start-up options, keyboard controls, and multi-touch controls.
- Project – Here you can set your template defaults, and how your project should behave. If you plan to use the same template over and over again, this is a good menu to become familiar with.
- Audio – This menu provides in-depth detail for you to tweak your audio settings. Changes to this menu can have drastic implications to how the system runs.
- Appearance – While generally meant for aesthetics, these options also have a few performance tweaks, and also general workflow/editing tweaks.
- Editing Behavior – From cursor and zoom changes, to MIDI, envelopes and mouse tweaks, here is where the workflow options really come into play.
- Media – Controls how Reaper should handle various media files including audio, video, MIDI, and REX.
- Plugins – The plugins menu tells the system where to find your plugins and how to handle them, and provides tweaks for touchy plugins that do not always play nice.
- Control Surfaces – If you have any control surfaces, they will show and can be tweaked here.
- External Editors – Some programs cannot run as plugins, but are still highly valuable. (Melodyne, for example.) This menu allows you to assign various external editors to different file types (wav, mid) and edit them in these external editors, while maintaining the file’s position inside Reaper.
So what we really want to do here is set the ASIO4ALL as your Device Driver.
Under the “Device” settings, change Audio System to ASIO.
Then change ASIO Driver to ASIO4ALL.
Now there’s a few performance tweaks to get the best audio latency possible, so follow along closely:
- Audio > Do not process muted tracks – If CPU is a precious resource for you, then you want to make sure this option is checked. However if need to switch mutes on and off a lot for to A/B effects, this will cause a slight hiccup after unmuting.
- Audio > Device > ASIO Thread Priority – Generally speaking, we always want our ASIO devices to be the most important part of our DAW, since they handle the audio. Setting this option to Time Critical is almost always a must.
- Audio > Device > Buffering > Thread Priority – Similar to the above, but deals with the audio threads more generally. Again, higher is faster and more stable, but uses more CPU.
- Audio > Device > Buffering > Anticipative FX Processing – This cool option is great when mixing. It allows Reaper to read ahead of where you are playing back from, so it can process and FX before they happen. Makes for a more stable mixing environment.
- Audio > Device > Buffering>Optimize buffering for low latency hardware – Better buffering performance is always a good thing. Make sure this one is checked.
- Appearance > UI updates – When you are recording, you do not want any graphics to overtake your audio in CPU importance, in which case this option should be set to Lazy. However, when you are editing you will want a more responsive GUI, and should probably bump up this setting.
- Plugins > Compatibility > Disable saving full plugin state – If you find that you’re getting slight hiccups with certain plugins loaded, it might be because of the sheer amount of data the plugin is storing in the project. This option will prevent them from doing so, but may mean the plugin will not load correctly when you reopen the project. If you are not using samplers, you should be fine with this checked. But if you use virtual instruments, you should not use this option. Useful, but approach at your own risk!
- Plugins > VST > VST Compatibility – If you’re running into problems with certain plugins (or UAD cards), this set of checkboxes can save you a lot of frustration. Read them carefully, and only choose the ones relating to your problem.
When you change the buffer settings in Reaper, you generally want to open the ASIO4ALL offline settings (from your Start menu) and adjust the slider to match what you put in Reaper.
Now we can test the audio latency between your guitar / audio interface and Reaper by using Direct Monitor on a recording track.
Right click on the left side panel of Reaper and hit “Add New Track”, alternatively you can press CTRL + T.
On the new track, click the “Record Arm/Disarm” button, then click the Record Monitoring button to ON.
Now give your guitar a few strums, and you should be able to hear yourself playing in real-time.
Troubleshooting Audio Latency
If you don’t hear anything, there’s a few things to try.
First, make sure that your ASIO4ALL settings (in the Offline Settings panel) match what your audio interface is actually capable of. Check the specs of your audio interface and set ASIO4ALL and Reaper’s settings to the maximum bitrate and frequency your audio interface is capable of.
Basically, make sure everything is the same across the board – if your ASIO4ALL settings are set to a buffer of 224, make sure you have the same buffer set in Reaper.
Also check the volume on your audio interface and your guitar’s volume knob. That was probably it, wasn’t it?
If you’re able to hear yourself play, but there’s noticeable crackle / distortion, you want to raise your buffer. If there’s a delay between you hitting your guitar strings and the audio playing through your speakers, then lower the distortion. You really want to try and find the “sweet spot”.
Also remember that in general, DAWs can be pretty CPU intensive, especially if you’re using a lot of plug-ins or VST sound effects. A good multi-threaded CPU is definitely recommended, and you should optimize your computer’s CPU and memory usage during recording sessions. This means doing things like:
- Closing unnecessary background programs and Windows services
- Disabling CPU throttling like AMD’s “Cool n Quiet” feature in the BIOS
- Setting Reaper to “High Priority” in the Task Manager
Using a VST in Reaper
If you can’t afford fancy amplifiers and effects pedals, you can totally consider a VST (Virtual Studio Technology) software specifically for guitarists – these typically come pre-loaded with tons of effects and presets, so you can get your favorite artist’s sound on your guitar.

There’s a bunch of them out there – Amplitude, Guitar Rig, GTR, Pod Farm, Overloud TH3, etc.
My personal favourite is Overloud TH3, so I’ll be using that for example referencing.
When you install Overloud TH3, it will ask where you want to install the VST plug-in files. If you’re going to experiment with DAWs, you should install it somewhere like C:\VSTs, so its easy to find and load in the software.
Now there’s several ways to approach using VST plug-ins in Reaper – you can set a different VST for each track (if you’re building a multi-track chain layer), or you can set a “Master FX” on the main mixer so that each track carries the same VST plug-in.
In either case, let’s say I want to use Overloud TH3 on the Master FX mixer, so that each track I record as a separate layer will use the same FX.
First lets go into Preferences and tell Reaper where to find our Overloud TH3 plug-in.
Go into Preferences > Plug-ins > VST.
Click the “Add” button next to the path box, and add the folder for your Overloud TH3 VST file. Then click the “Re-scan” button, hit Apply and OK.
Now when you click the “Master FX” button in the bottom left corner on the Master Mixer, it will open all the available plug-ins. Find the VST3 plug-in for TH3 (Overloud). You might also see a VST version, but VST3 is typically superior to VST (less resource intensive, better coding, etc.)
This will open the VST in a new window, where you can use Overloud TH3 (or similar VST) like you normally would.