How to FRP Bypass Samsung Devices – Android 5.0.1 to 7.0.1
Samsung phones have a security featured called FRP – Factory Reset Protection. Basically, if you factory reset your phone while you have device-protection enabled, such as a screen lock pattern, it will trigger the FRP. You will need the first and original Google account you setup the phone with, to go through the initial setup wizard steps again after a factory reset.
If you do not remember the original Google account you used with your Samsung phone, or someone gave / sold you that phone, it is impossible to bypass the FRP through any conventional methods – in fact, if you call Samsung or Google support, they’ll pretty much tell you that you’re screwed and you should’ve remembered your passwords.
There are, however, several methods to bypass FRP with various tools. Some of the methods are device-specific, as there are different tools for different Samsung models – this article will include the methods that support the most range of Samsung devices.
Please note that FRP is protection against phone thievery, and Appuals does not condone thievery – if you’re trying to bypass FRP on a phone you stole, you’re a terrible person. But if you’re an average consumer who simply forgot their Google account and are locked out of your phone after a factory reset, we sympathize.
How to Bypass FRP for older Samsung variants
This method should work on most Android 5.0.1 to 6.0.1 devices – later device models, like the Galaxy S9, will require a different method. But this method will work for Samsung devices such as the S6, S7, J3, J5, J7, Note 5, Note 7, A5, A6, A7, Galaxy Prime, etc.
Requirements:
- Samsung SideSync for PC
- Google Account Manager for Android 5.0.1
- Google Account Manager for Android 6.0.1
- Google Account Manager for Android 7.0.1
- Account Login APK
- Samsung USB Drivers
- So what you want to do first is install the Samsung USB drivers for PC and install them, if you don’t already have them.
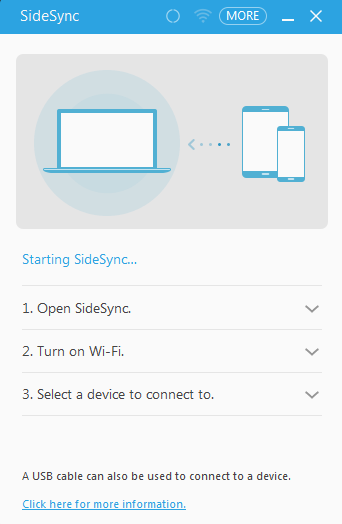
- Next download and install Samsung SideSync – this is an official Samsung app for passing data between your computer and your Samsung device, but what we’re really using it for is its automatic pop-up window that allows us to bypass the Android setup wizard, which you otherwise normally cannot exit or minimize on your phone screen.
- Once SideSync is installed on your computer, go ahead and turn on your Samsung phone, then proceed through the setup wizard until you get to the part where its requesting your original Google account.

- Connect your Samsung device to your PC via USB, and you should get a popup toolbar on your Samsung device, asking if you’d like to open Galaxy Apps, Chrome, or Internet Browser. Launch one of the internet browsers (Chrome or generic browser, it doesn’t matter).
- Navigate to this guide’s page on your phone, and download both the Google Account Manager APK (for your Android version) and the Account Login APK. Alternatively, you could download both APK files to your computer, and simply transfer them to your internal storage.
- Once the APK files are on your Samsung device, exit back to the Android setup wizard, disconnect and reconnect the USB cable to make the popup toolbar appear again, and this time choose “Galaxy Apps”.
- Now search for ES File Explorer, download and launch it from within the Galaxy Apps store.
- Using ES File Explorer, navigate to where your Account Manager and Account Login APKs are stored – first, install the Google Account Manager APK. You will need to allow installation from Unknown Sources to proceed.
- After that, install the Account Login APK through ES File Explorer as well.
- After the Account Login app is installed, it will automatically redirect you to a Google log-in page; do not sign in here. Tap the 3 dots in the upper-right corner, and choose “Browser sign-in”.
- This will launch the internet browser to Google sign-in. Now log in to the Google account you want to use for this device from now on.
- After signing in to this account, simply restart your Samsung device through the Power button.
- When your device reboots, it will allow you to go through the Android setup wizard, as the phone now thinks that the new Google account we just added is the original Google account it was requesting the whole time.
- Tattoo your Google account and password somewhere on your body so you never forget it.