Fix: Unable to create new files or open existing ones in Photoshop
Some users have been reaching us with questions after noticing that Photoshop is becoming unable to create new files or open existing ones after it’s been running for several minutes. Restarting the machine seems to restore the lost functionality, but the issue seems to return after some time. The issue is confirmed to occur on Windows 7, Windows 8.1 and Windows 10 with both 64-bit and 32-bit version. Also, the problem is not exclusive to a certain Photoshop version as it’s encountered with multiple versions including CC, CS4, CS5 and even the newest version (CC 2019).

What is causing Photoshop to fail in creating new files & open existing ones?
We analyzed this issue by looking at various user reports and the repair strategies that are typically effective in resolving this particular issue. As it turns out, there are several different potential culprits that might be responsible for this behavior:
- Photoshop CC Glitch – As it turns out, this particular error can also occur due to a recurring glitch that seems to affect primarily CC versions of Photoshop. Several affected users have managed to find a workaround for it (not a permanent fix). If this scenario is applicable to your current situation, you should be able to open new files & folders without the need to restart by opening the project in Illustrator and then opening Photoshop via the Illustrator menu.
- Photoshop doesn’t have admin access – It’s also possible that you’re encountering this issue because the software doesn’t have the necessary privileges to complete certain actions. This is primarily occurring on Windows version older than Windows 7. In this case, you can resolve the issue by configuring the launch executable to run with admin access.
- Photoshop Setting file is corrupted – More often than not, this problem will occur due to the fact that the Photoshop Setting file has become corrupted. There are a variety of causes for this, from AV interventions to bad disk sectors. If this scenario is applicable, the issue can be resolved by deleting the Photoshop file using a shortcut during the startup procedure.
- OpenCL or OpenGL is causing instability – OpenCL and OpenGL are two types of technologies that are known to cause this issue on low to medium spec configurations. Although it might make you lose some features, you should be able to resolve the issue by disabling both OpenCL and OpenGL.
- Outdated or corrupted GPU driver – If you’re using a dedicated graphics card, the driver that is being actively used might also be responsible for this problem. If this scenario is applicable, you should be able to resolve the issue by either updating the GPU driver or uninstalling it and leaving Windows to install the built-in equivalent.
- The swap folder for Photoshop is on the same drive as the OS – Although this is not a bad file by itself, several users have reported that they only get this issue while Photoshop is configured to use the OS Drive (C by default) as a scratch disk. In this case, you should be able to resolve the issue my reconfiguring Photoshop to use a different drive as swap space.
Method 1: Creating the file in Illustrator (if applicable)
If you’re looking for a quick workaround (not an actual fix), you should be able to open existing projects or create new files by opening them in Illustrator first and then choosing the option to Edit in Photoshop. This is less than ideal, but it will help you complete your work without the need for constant restarts.
To open a file in Illustrator, simply launch the program and use the ribbon bar at the top to select File > Open. Then, navigate to the location of the Photoshop file, select it and click Open. Once the file is opened in Illustrator, access the File menu and click on Edit in Photoshop (Edit Image).

But in order for this method to work, you need to have a Creative Cloud subscription that contains both Adobe Illustrator and Adobe Photoshop.
If this method didn’t resolve the issue, you’re looking for a permanent fix or the steps are not applicable to your current situation, move down to the next method below.
Method 2: Opening Photoshop with administrative access
This might seem like an overly simplified fix, but a lot of users have managed to resolve this issue by ensuring that Photoshop opens with administrative privileges. In most cases, this is confirmed to be effective for users that are on Windows 7, Windows 8 / 8.1 or even Windows Vista.
As it turns out, missing administrative privileges can also be responsible for Photoshop’s refusal to open or create new projects. Here’s a quick guide on opening Photoshop with administrative privileges as well as how to force the software to open with admin access every time:
- First things first, make sure that Photoshop is completely closed – Check your tray-bar icon to confirm that Photoshop or Creative Cloud is not running in the background.
- Next, right-click on the Photoshop executable (the one that you use to launch the program) and click on Run as Administrator. If you’re prompted by the UAC (User Account Control) window, click Yes to grant admin access.
- Once Photoshop is opened, use it normally and see if the issue is still occurring. If it isn’t, continue with the steps below to make the changes permanent.
- Close Photoshop completely once again.
- Right-click on the Photoshop executable once again and choose Properties from the context menu.
- When you’re inside the Properties screen of Photoshop, select the compatibility tab, go to the Settings section and check the box associated with Run this program as an administrator.
- Click on Apply and then open Photoshop again to see if the fix was effective.
If this method wasn’t effective in your particular scenario, move down to the next method below.
Method 3: Deleting your Photoshop Setting file
It’s possible that a corrupted Photoshop settings file is causing this behavior. Several users have reported that they managed to resolve this issue by closing photoshop and forcing the Settings file dialog box at the next restart.
This procedure is will resolve the problem in most cases, but keep in mind that it also nukes any custom shortcuts that you might have previously established.
If you’re prepared to take the risks, start by closing Photoshop completely – also, check tour tray-icon to confirm that the software is not still running in the background. It if doesn’t, go to the main Photoshop executable and hold Ctrl + Alt + Shift while double-clicking on the Photoshop shortcut.
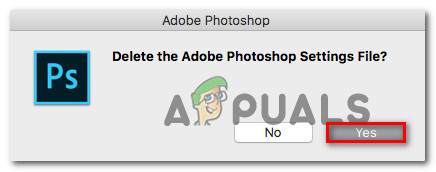
Keep holding the keys pressed until you see a dialog box asking you whether you want to delete your Settings file. When you see it, click on Yes to get rid of your Adobe Photoshop Settings file.
Note: If you’re using a Mac computer, hold Command + Options + Shift.
Once the settings file has been deleted, leave your Photoshop to stay Idle and see if the same behavior is still occurring. If the issue is still not resolved, move down to the next method below.
Method 4: Disabling OpenCL /OpenGL
Another potential culprit for this particular issue is situations where OpenCL and/or OpenGL is enabled on low-to-medium PC configurations. Several affected users have reported that they managed to resolve the issue by disabling the two technologies and restarting their computer.
Keep in mind that disabling these to performance options will limit the performance of your editing software as you’ll lose certain GPU features such as Scrubby Zoom, HUD Color Picker, Repousse, and several others. But you’ll likely get more stability as a result.
After doing so and restarting Photoshop, some users reported that the issue never came back for them. Here’s what you need to do to disable OpenCL and/or OpenGL:
- Open Photoshop and wait until the software is fully loaded.
- Use the ribbon bar at the top to access the Edit tab, then select Preferences from the context menu and click on Performance.
- Once you’re inside the Preferences settings of your Photoshop application, click on Advanced Settings (under Graphics Processor Settings).
- From the next menu, uncheck the boxes associated with Use Graphics Processor to Accelerate Computation and Use OpenCL. Then, click on Yes to save the current configuration.
- Close Photoshop, then restart your computer to make sure that the change is fully enforced. Once the next startup sequence is complete, start Photoshop once again and see if the same issue is still occurring.

If the issue is still not resolved for you, move down to the next method below.
Method 5: Updating Graphic Drivers to the latest versions
Several affected users have reported that the issue was resolved indefinitely and Photoshop stopped acting up even after long periods of time after they reinstalled or updated their GPU card drivers on the affected machine. This is confirmed to be effective on both Windows 7 and Windows 10.
In most cases, Photoshop was much more stable while using the built-in driver than it was prior to this operation. However, leaving the built-in drivers can affect your system performance with games and other resource demanding activities.
Here’s a quick guide on uninstalling your current GPU drivers and replacing them with the latest version or with the built-in equivalents:
- Press Windows key + R to open up a Run dialog box. Then, type “devmgmt.msc” inside the text box and press Enter to open up Device Manager.
- Once you’re inside Device Manager, scroll through the list of devices and expand the menu associated with Display adapters.
- If you have two GPUs (a dedicated & an integrated solution) you’ll see two different devices here. Since Photoshop is configured by default to use the most powerful graphics card, right-click on your dedicated GPU and choose Properties from the context menu.
- Inside the Properties menu of your dedicated GPU, click on the Driver tab and then click on Uninstall Device. Confirm at the confirmation prompt by clicking Uninstall, but don’t check the box associated with Delete the driver software for this device.
- Once the driver has been removed, close Device Manager and restart your computer. This will force your OS to install a driver instead of the one you just uninstalled. Depending on what is stored locally, it might choose to download the newest version or it might install a locally stored driver that fits the description.
- After the next startup sequence is complete, open Photoshop and check if the issue has been resolved. In case the issue is still occurring, continue with the next steps below.
- In case you’re still encountering the same problem (or you see an error message at launch), you should be able to resolve it by bringing your dedicated drivers up to date. The easiest way to do this is to install a proprietary software capable of installing the right driver for your GPU automatically Each GPU manufacturer has its own software that will do this:
GeForce Experience – Nvidia
Adrenalin – AMD
Intel Driver – Intel - After the procedure is complete, restart your computer once again and see if the issue is now resolved.
If you’re still encountering the same problem, move down to the next method below.
Method 6: Changing the swap drive (scratch disk)
As unlikely as this might seem, several affected users have confirmed that they were able to resolve this issue by changing the default swipe drive to a different drive (or directory). Although there’s no official explanation on why this procedure is effective, it’s likely that this ends up clearing any corruption inside the swap folder, since it will need to be recreated again.
Here’s a quick guide on changing the Swap drive for photoshop to a different location:
- Open Photoshop with admin privileges. Follow Method 2 for instructions on how to do so.
- Once you’re inside Photoshop, access the Edit tab from the ribbon bar at the top and select Preferences, then click on Scratch disks.
- Once you’re inside the Scratch Disks tab of the Preferences menu, uncheck the box associated with the drive that is currently active and checks the other one.
- Click Ok to save the changes, then restart your computer.
- At the next startup sequence, open Photoshop again and see if the issue has been resolved.

If you’re still dealing with the same problem after idling periods, move down to the next method below.
Method 7: Reinstalling the Photoshop application
As it turns out, this issue might also occur due to file corruption inside the installation folder of Photoshop. Several users that we’re also struggling to resolve this behavior have reported that they finally got a breakthrough after trying to uninstall the software completely and then reinstalling the latest available version based on their license.
Here’s a quick guide on uninstalling your current Photoshop version and installing the latest available version:
- Press Windows key + R to open up a Run dialog box. Then, type “appwiz.cpl” inside the text box and press Enter to open up the Programs and Features menu.

Type appwiz.cpl and Press Enter to Open Installed Programs List - Inside the Programs and Features window, scroll through the list of applications and locate your Photoshop installation. Once you see it, right-click on it and choose Uninstall / Change. If you’re prompted by the UAC (User Account Control) prompt, click Yes to grant administrative privileges.

Uninstalling the Photoshop installation - From the uninstallation menu, follow the on-screen prompts to complete the uninstallation, then restart your computer.
- Once the next startup sequence is complete, visit this link here, login with your Adobe account and download the latest version of Photoshop (according to what license you own).
- When the installation is complete, open the application and see if the issue has been resolved.