How to Fix Notifications on Windows 10
Windows notifications provide a great way for Windows users to get important alerts from the apps. Unfortunately, the Windows 10 notifications aren’t working properly after the latest Windows Update. A lot of the Windows users are noticing that they don’t get the notification popup (banner notification) but they do see the notification count (bottom right corner of the screen) getting increments. For example, if you perform a specific task that would raise a Windows notification then you won’t see a notification alert nor will you hear a notification sound.
You will, however, see the notification count increment by 1. This means that the Windows 10 notifications aren’t completely broken i.e. you are getting the notification but they aren’t showing as alerts. Users who experienced this also noticed that the notifications weren’t showing up in the action center as well. So, the notification won’t show an alert and it won’t show up in the action center but the counter will be incremented. You should also keep in mind that this isn’t specifically applicable to a single (or a few) apps. The Windows notifications won’t work for any app or any alert at all.
What causes Windows 10 Notifications to stop working?
The main reason, as mentioned above, is the Windows update. This problem usually starts happening after a Windows Update. The solution for this is to turn a certain setting on. So the most logical explanation is that the latest Windows update might have turned it off. Before continuing, verify that you haven’t manually disabled Windows 10 notifications.
Method 1: Enable Let Apps run in the background
There is an option in the Windows privacy settings that allow users to select whether the apps should run in the background or not. Enabling this option will let the apps run in the background and, therefore, show the notifications. Simply follow the steps given below
- Hold Windows key and press I
- Select Privacy
- Select Background apps from the left pane.
- Toggle on the option Let Apps run in the background
- Toggle on the apps that you want to get the notifications from

That’s it. Reboot and the issue should be fixed after the restart.
Note: If this doesn’t solve the issue then simply wait for the next Windows Update. If you can, report the bug in the Windows Feedback hub. The issue will most likely get fixed in the upcoming updates.
Method 2: Turn on Notifications for Specific Apps
Sometimes the issue isn’t an issue at all. Sometimes we forget to turn on the notifications or a Windows Update simply changes the settings. So, making sure that the notifications are turned on for your system is the first step. We will also make you go through a series of steps that will help you check whether the notifications are on for specific apps. Sometimes the notifications are on but not for every app. So, if you are experiencing an issue with only a couple of apps then that will be resolved by these steps.
- Hold Windows key and press I
- Select System
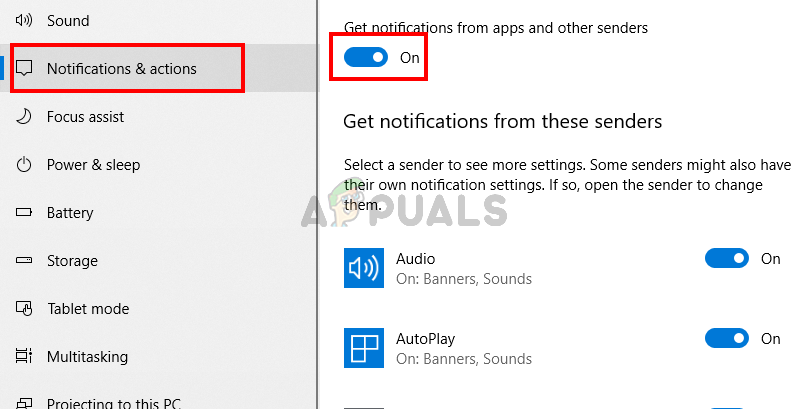
- Select Notifications & actions from the left pane
- Make sure Get Notifications from apps and other senders is turned on
- Scroll down and have a look at the list of apps. Make sure the apps that you want to get notifications from being turned on.
Once done, check if the issue is resolved
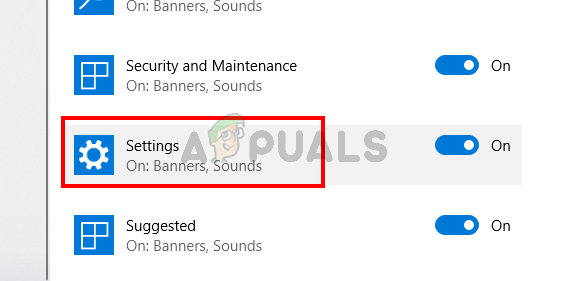
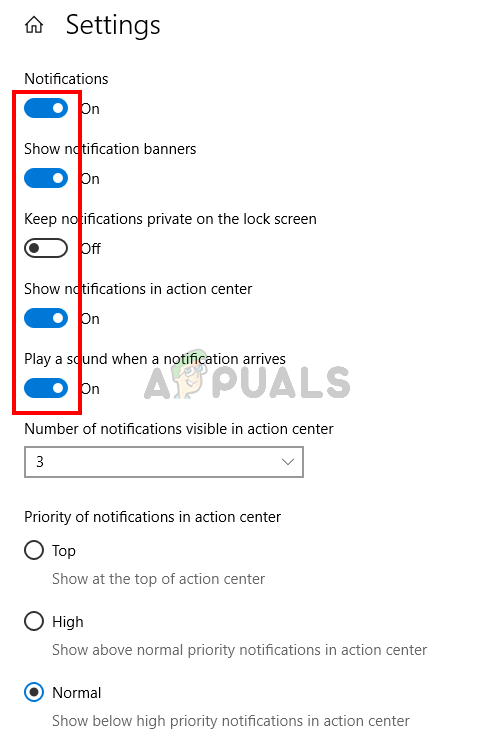
Note: If the issue isn’t resolved then follow the steps given above until step 5. Then click Settings from the list and make sure all the essential settings are turned on e.g. show notifications in action center, Play a sound when a notification arrives, etc.
Method 3: Turn on/off Notifications via Registry
You can also turn on/off the notifications for all apps via the registry editor. The registry method is a bit tedious and technical so we have provided a bat file. All you have to do is download the files and double click. The file will automatically do the job for you.
- Click here
- Once the file is downloaded, unzip the file and double-click the Turn_On_App_Notifications.reg and confirm any additional prompts.
Now check and the notifications should be working fine. Although this file turns on the notifications for all apps and senders, you can still follow the steps given in method 2 and change various other settings according to your liking.
You can reverse the changes by double-clicking the Turn_Off_App_Notifications.reg (it should be in the downloaded zip file). This will turn off the notifications for all the apps. The process is the same, download and double-clicking to run the file and you should be good to go.
Method 4: Adding Action Center through Power Shell
In some cases, the issue might be triggered if the Windows 10 Action center has somehow been disabled or if it is being interfered with on your computer through a third-party app or service. Therefore, in this step, we will be disabling the Windows 10 Action center from the Powershell window and then we will check to see if doing so fixes the issue.
- Press “Windows’ + “R” to open the Run prompt.
- Type in “Powershell” and press “Shift” + “Ctrl” + “Enter” to open with admin permissions.
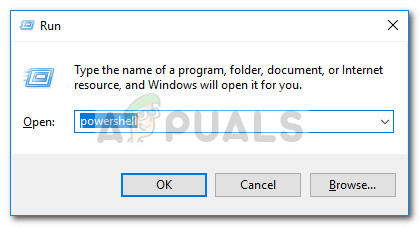
PowerShell - Type in the following command inside the PowerShell window.
Get-AppxPackage | % { Add-AppxPackage -DisableDevelopmentMode -Register "$($_.InstallLocation)\AppxManifest.xml" -verbose } - Entering this command in the command prompt should run a couple of text lines on the screen as it goes through the process.
- Once the command is executed, check to see if doing so has fixed the notifications not working issue.
Method 5: Performing an SFC Scan
In some cases, certain Windows services or drivers might’ve gotten broken or corrupted due to which the Windows Notifications aren’t working. Therefore, in this step, we will be performing an SFC scan to fix this issue by automatically checking and replacing any corrupted system files. In order to do so, follow the steps listed as follows.
- Press “Windows’ + “R’ to open the Run prompt.
- Type in “cmd” and then press “Shift’ + “Ctrl” + “Enter” to provide admin permissions.
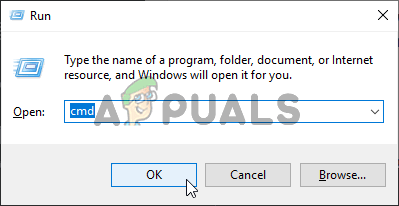
Running the Command Prompt - Type in the following command inside the command prompt and press “Enter” to execute it.
sfc /scannow
- Let the computer scan for any broken or corrupted items and it should automatically replace them with working ones.
- Check to see if doing so fixes the notifications not working issue on Windows 10.
Method 6: Reconfigure Registry Settings
If the above registry fix doesn’t work for you, we can try to manually reconfigure some registry settings in an attempt to fix the Windows notifications. In this step, we will be changing the value of a registry entry that should be responsible for sending notifications to the Windows 10 action center. In order to do so, follow the steps below.
- Press “Windows’ + “R’ to open the Run prompt.
- Type in “Regedit” and press “Enter” to open the registry editor.
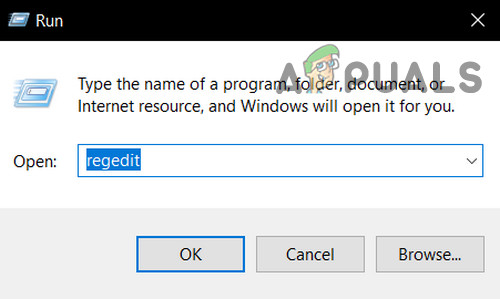
Open Regedit - Inside the registry editor, navigate to the following path.
HKEY_CURRENT_USER\Software\Microsoft\Windows\CurrentVersion\PushNotifications
- Inside the registry path, there should be a ToastEnabled entry in the right pane.
- Double click on the entry and change its value to “1”.
- Save your changes and restart the computer.
- Check to see if doing so fixes the issue.
Method 7: Run DISM Scan
In some situations, the Drive health or partition system on your computer might’ve been damaged which can in some cases interfere with system functions. Therefore, in this step, we will be running a complete DISM scan to fix the Windows 10 Notifications not working and the action center notifications not working issue. Make sure to follow the steps below to run this scan.
- Press “Windows’ + “R’ to open the Run prompt.
- Type in “cmd” and then press “Shift’ + “Ctrl” + “Enter” to provide administrative privileges.
Running the Command Prompt - Type in the following commands inside the command prompt and press “Enter” after each one to execute them on your computer.
DISM.exe /Online /Cleanup-image /Scanhealth DISM.exe /Online /Cleanup-image /Restorehealth - Wait for the command prompt window to scan for any health issues and then automatically fix them using the default Windows troubleshooting techniques.
- After the scan finishes, check to see if doing so had any effect on the notifications and if they are fixed.
Method 8: Restart Windows Explorer
In some situations, the Windows Explorer might get glitched due to which the file sorting system and notifications on the computer might not work properly because the computer gets confused between the timelines. Therefore, in this step, we will be restarting the Windows Explorer and then we will check to see if doing so fixes the notifications not working issue. For that:
- Press “Windows’ + “R” to open the Run prompt.
- Type in “taskmgr” and press “Enter” to open the task manager.

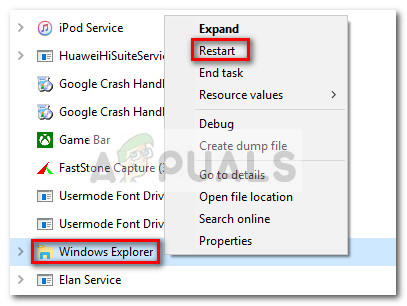
Running the Task Manager - Inside the task manager, click on the “Processes” tab and navigate through the list of active processes.
- Right-click on the “Windows Explorer” entry inside the task manager and select “Restart’ from the list.
- Wait for the Windows Explorer to be restarted and then check to see if notifications start working.
Some users reported that this fix worked for them but they had to repeat it after a while to get their notifications working again. Therefore, we can create a batch file to execute on Windows that will automatically perform these steps on our computer and we will not have to repeat them again and again. For that:
- Right-click anywhere on your desktop and select the “New>” option.
- Click on the “Text Document” option and a new text document will be created on your desktop.
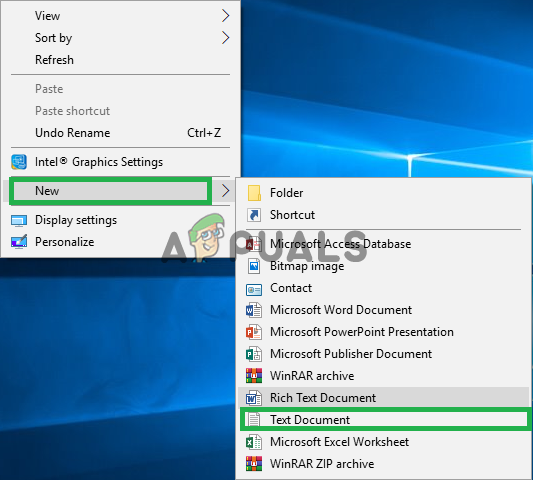
Right-Clicking on the desktop and selecting “Create New Text Document” option - Open this text document and paste the following lines inside of the text document.
taskkill /f /IM explorer.exe
start explorer.exe
exit
- Click on the “File” option at the top left of the window and select the “Save As” option.
- Enter the “TaskMRestart.bat” as the file name and select “All Files” from the “File Type” dropdown.
- Save this file on your desktop and exit out of the document.
- Now, double-clicking on this newly saved file should automatically restart File Explorer which should fix the notifications not working issue quite easily.
- You can just click on the file whenever the notifications stop working and it should automatically fix the issue by restarting the File Explorer.
Method 9: Using Third-Party Tool
In some cases, the HDD or SSD that you might be using as your partition might need to be defragged and due to the delay in this process by the default Windows defragger, you might be getting issues such as the Windows 10 Notifications not working and other errors.
Therefore, in this step, we will be using a third-party tool called the Advanced System Care tool to perform a Smart Defrag on our partition and that should hopefully get rid of this issue. However, before doing so, we will have to download and install it on our computer. For that:
- Download the Advanced System Care Tool from here.
- After the download finishes, run the executable to install it on your computer.
- Follow the on-screen instructions to complete the installation process.
- After the installation is finished, run the executable on the desktop to start up the software.
- After the software launches, click on the “Toolbox” option from the top and select the “Smart Defrag” option from the list of available buttons.

Running a Smart Defrag - Click on “Install” to install this feature with the software and then follow the on-screen instructions to perform this step on your computer.
- After completing this, check to see if the Notifications are still not working.
Method 10: Optimize Disk Drive
In some cases, the root partition of your computer where you have installed the Windows 10 operating system might’ve acquired some bad sectors or it must be badly optimized due to which you are running into the notifications not working issue. In order to fix this, we will be running an optimized operation on the disk drive through the disk management tool. For that:
- Press “Windows” + “R” to open the Run prompt.
- Type in “Diskmgmt.msc” and press “enter” to launch the disk management window.
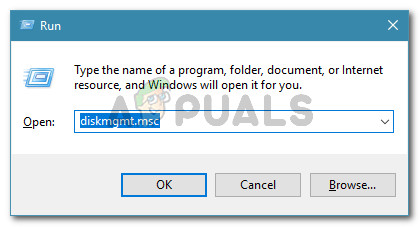
Run dialog: diskmgmt.msc - Inside the disk management window, the partitions installed on the system will be listed.
- Right-click on the root drive where you have installed the Windows operating system and select the “Properties” button.
- Inside the drive properties, click on the “Tools” tab from the top and then click on the “Optimize” button.
- This should open up a new window. In the new window, select the root drive again and click on the “Optimize” button.
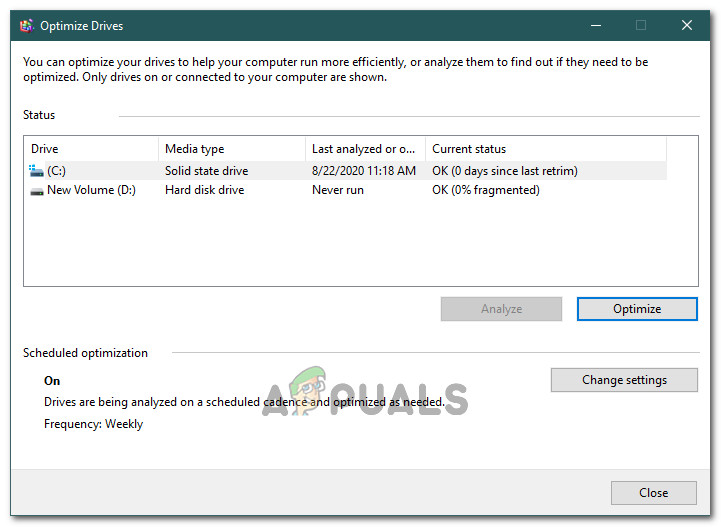
Clicking on the “Optimize”
button - Wait for the defragmentation process to be completed and check to see if doing so fixes the issue.
Method 11: Run Microsoft Account Troubleshooter
It is possible in some cases, that there might have been some issues associated with the account that you are using to sign in to the operating system. Either its database might be corrupted or it might be glitched due to which the notifications aren’t working. In order to fix this, we can run the Microsoft Account Troubleshooter to get around these issues. For that:
- Open your favorite browser and click on this link.
- Wait for the download to be completed and run the downloaded file after that.
- On the window that opens up, click on the “Advanced” option, and then make sure that the “Apply Repairs Automatically” is checked.

Checking the “Apply Repairs Automatically” box - Click on “Next” to proceed to the next screen and let the troubleshooter run on the computer.
- Follow the on-screen instructions to further apply any changes that have to be made to your computer.
- Check to see if the issue persists even after applying these changes to your computer.
Method 12: Checking for Updates
The notifications might not be properly registering on your computer because your operating system has acquired some false configuration files or if the updates haven’t been properly installed on it. Therefore, in this step, we will be checking for any available updates and applying them on our computer. In order to do that, follow the guide below.
- Press “Windows’ + “I” to open the settings.
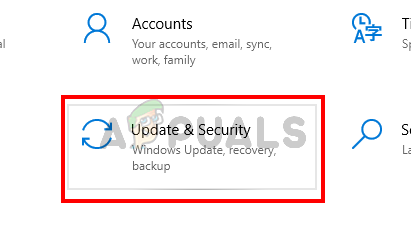
- In the settings, click on the “Update and Security” option and then select the “Windows Update” button from the left side.
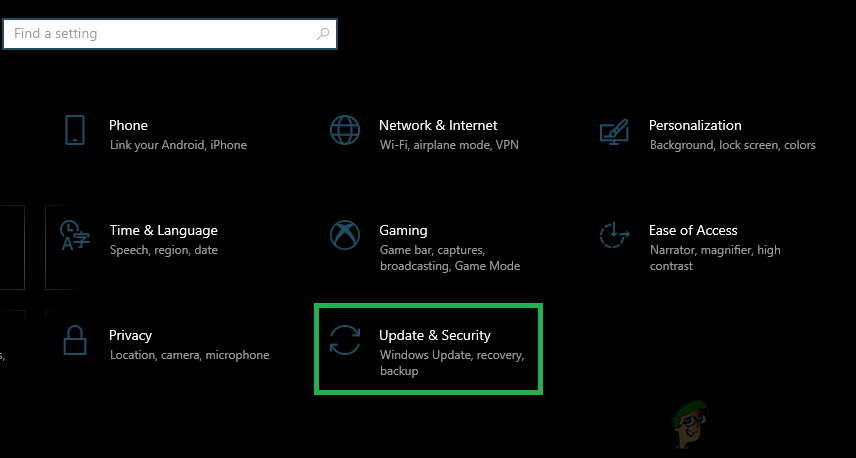
Clicking on the “Update and Security” option - Click on the “Check for Updates” option and let the operating system check for any missing updates on your computer.
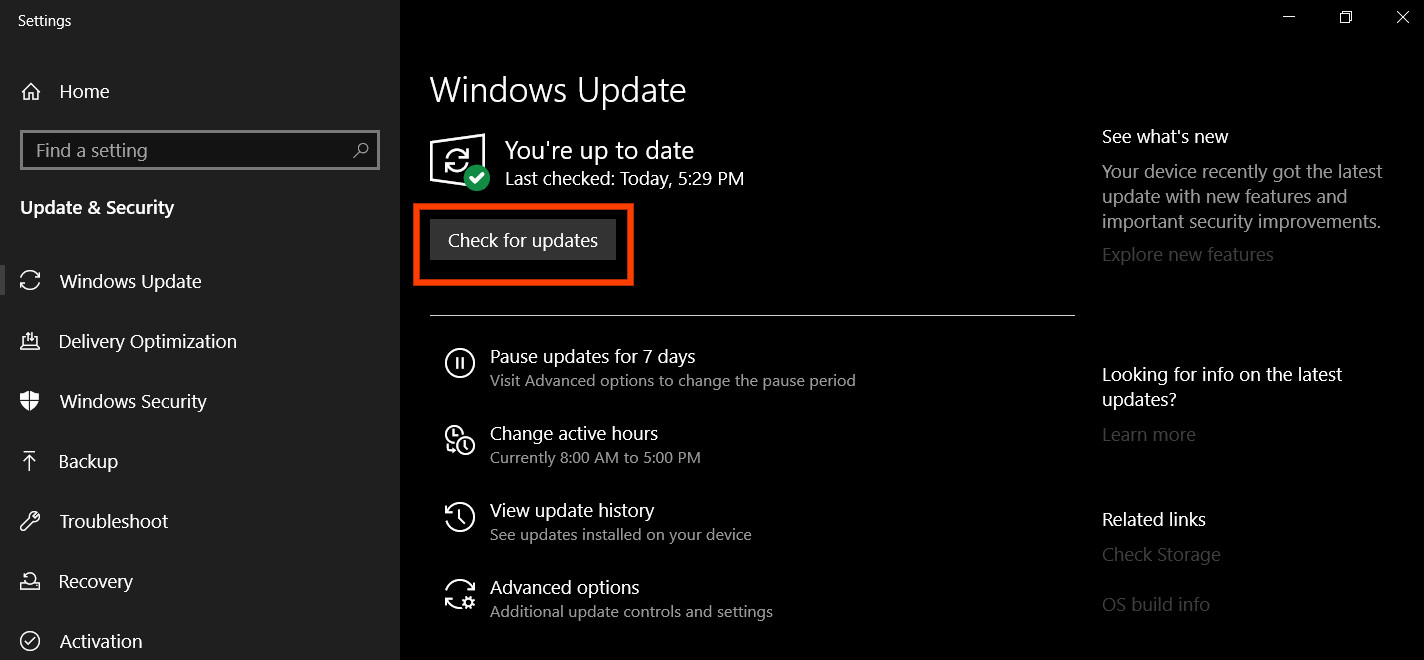
Check For Updates - Check to see if the issue is fixed after applying an update.
Method 13: Performing a Restore
In some situations, a recent change made to the system settings or configurations might’ve affected this feature and broken it on your computer. It is also possible that a recent driver or application install has caused this. Therefore, in this step, we will be restoring the computer to a reset point in the past where this feature was working. For that:
- Press “Windows” + “R” to launch the Run prompt.
- Type in “rstrui” and press “Enter” to start the restore management window.
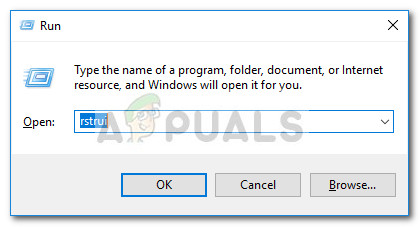
Run dialog: rstrui - Click on “Next” and check the “Show more Restore Points” option.
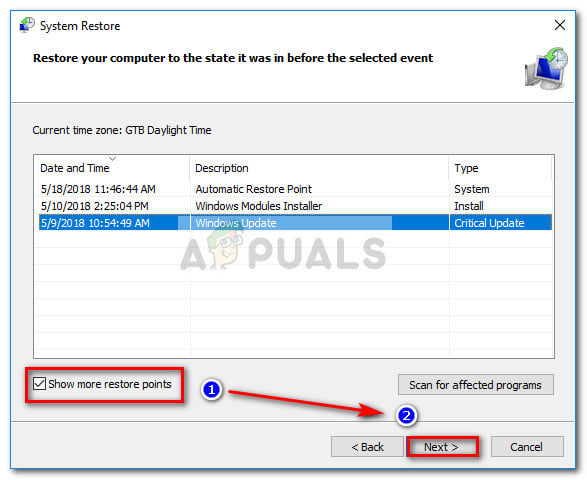
Enable Show more restore points box and click Next - Click on a restore point from the list that is before the date on which this issue started occurring.
- Select “Next” again and follow the on-screen instructions to revert everything to the selected point.
- Check to see if doing so has fixed the issues with Windows 10 notifications
Method 14: Removing Akamai Netsession Client
It is possible that your computer has installed the Akamai Netsession Client to handle some network-related tasks and it is actually preventing the Windows 10 notifications from going through. Therefore, in this step, we will be removing this client from the add or remove programs feature and that should get the notifications back to working again. In order to do this:
- Press “Windows” + “R” to open the Run prompt.
- Type in “appwiz.cpl” and press “Enter” to open the app management window.

Type appwiz.cpl and Press Enter to Open Installed Programs List - In the app management window, scroll down and right-click on the “Akamai Netsession Client” application.
- Select “Uninstall” from the list and then follow the on-screen instructions to remove the application from your computer.
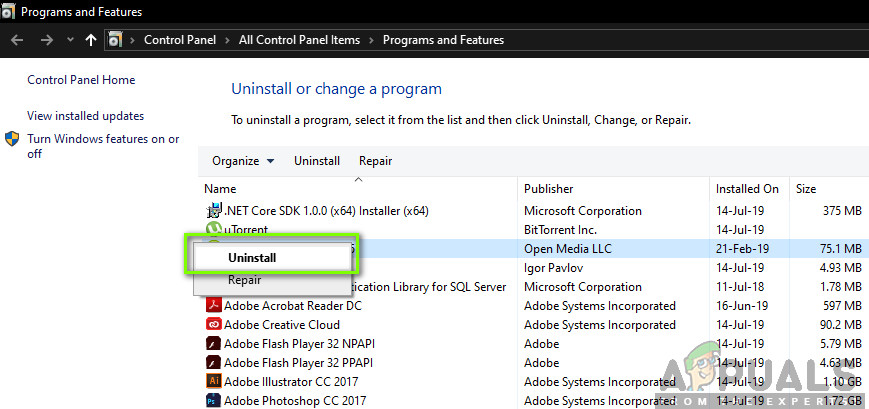
Uninstalling application - Make sure to repeat this process for every version of the software that might’ve been installed on your computer.
- Check to see if doing so has fixed the notifications issue on your computer.
Solution 15: Uninstalling Dropbox
It is possible that the Dropbox application installed on your computer might be interfering with some system functions and it might be preventing your notifications from going through. Therefore, in this step, we will be removing the Dropbox application from our computer through the application management screen in the control panel. For that:
- Press “Windows” + “R” to open the Run prompt.
- Type in “appwiz.cpl” and press “Enter” to open the App Manager Window.
Type appwiz.cpl and Press Enter to Open Installed Programs List - Inside the app manager, scroll down and right-click on the “Dropbox” application.
- Select “Uninstall” from the list and then follow the on-screen instructions to remove the application from your computer.
Uninstalling application - Check to see if doing so has fixed notification issue.
Solution 16: Hiding the Taskbar
It is possible that the Windows taskbar might be glitching out and it might actually be preventing the Windows notifications from being displayed. Therefore, in this step, we will be hiding the taskbar when it isn’t active and that should fix this issue for some users. In order to do this, we will have to reconfigure some taskbar settings. For that:
- Closeout of all unnecessary applications and navigate to your desktop.
- Right-click on the taskbar and select the “Taskbar Settings” option.
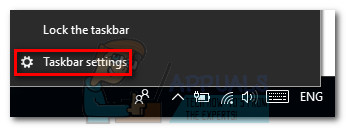
Right-clicking on the taskbar and selecting “Taskbar Settings” - Inside the next window, click on the “Automatically hide the taskbar in desktop mode” toggle to turn it on.
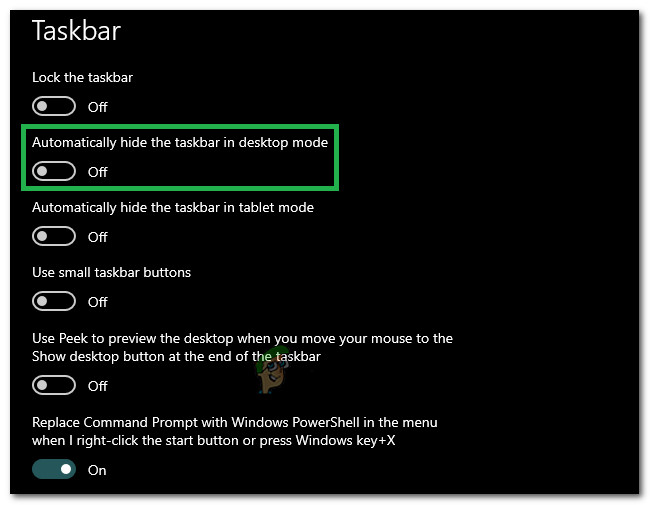
Clicking on the “Automatically Hide the Taskbar in Desktop Mode” button - Navigate back to the desktop and verify that the taskbar automatically hides.
- Check to see if doing so has fixed the notification issue on Windows 10.
Solution 17: Creating a New User Account
It is possible that the user account that you are using might have acquired a corrupted database or some of its settings might not have been configured properly. It is also possible that it isn’t properly registered with the Microsoft servers due to which you are facing the notifications issue on your computer. Therefore, in this step, we will be creating a new user account from scratch and you will also be able to import your data from the previous account to this new account. In order to do this:
- Press “Windows” + “I” to open settings and click on the “Accounts” option.
- In the accounts option, click on the “Family and Other Users” button from the left side.
- Select the “Add Someone Else to this PC” option from the menu.
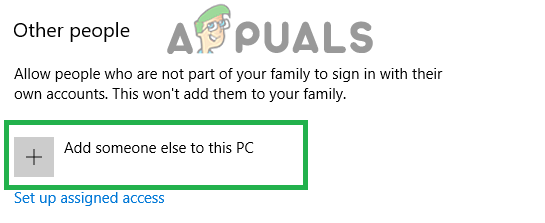
Clicking on “Family & Other people” and selecting “Add someone Else to this PC” - Click on the “I don’t have this person’s sign-in information” button in the next window.
- Click on the “Add a user without a Microsoft Account” option from the new window that pops up.
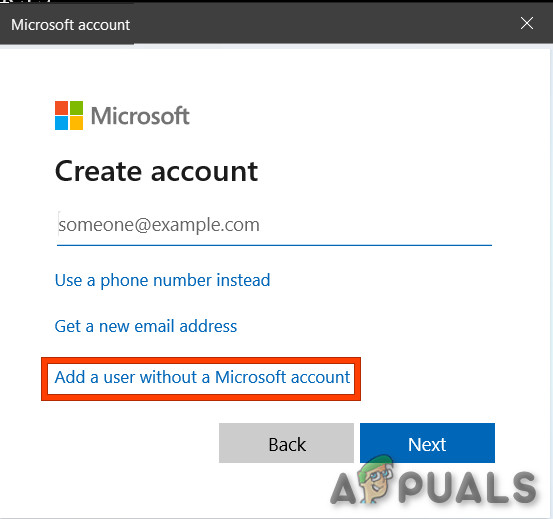
Add a user without Microsoft Account - After that, enter the user account’s username and assign it a password.
- Input the security questions, answer them, and then click on the “Next” option.
- After creating this account, click on it and then select the “Change Account Type” option.
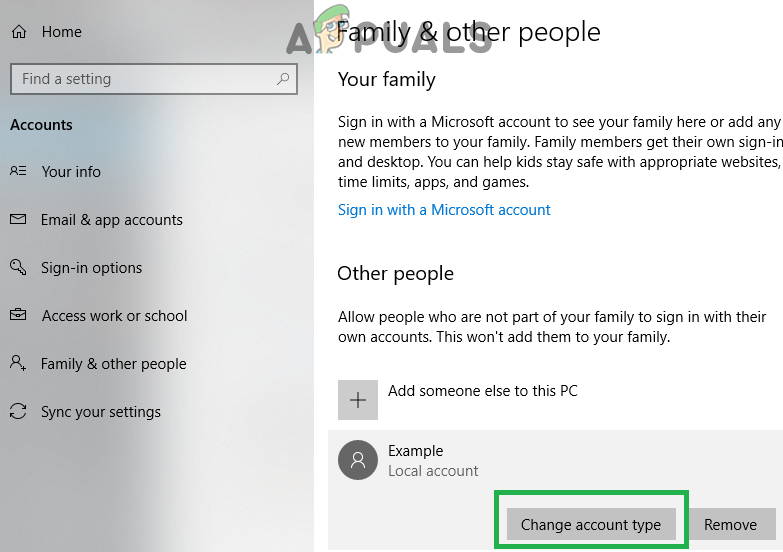
Clicking on the “Change Account Type” option. - Click on the “Account Type’ dropdown and then select the “Administrator” option.
- Save your changes and login to the account using the credentials that you chose.
- After logging into the account, check to see if the issue persists.
Solution 18: Low-Level Format on HDD
Most users that were unable to fix this issue with any solution available on the internet were most likely running into it due to a bad HDD that was unable to fix itself by fragmentation or even through a clean Windows Install. What this necessarily means is that the Hard Drive that you are using is so badly messed up that even a simple format is unable to bring it back to normal.
However, we thought of fixing this solution through a low-level format that gets rid of all the data to such a scope that it is very difficult to identify or recover it through any method. In addition to making the data unrecoverable, it essentially improves the health of the HDD and gets rid of the worst sectors. In order to do this though, you will have to reinstall Windows on your computer after the process.
- Create a recovery USB for your computer.
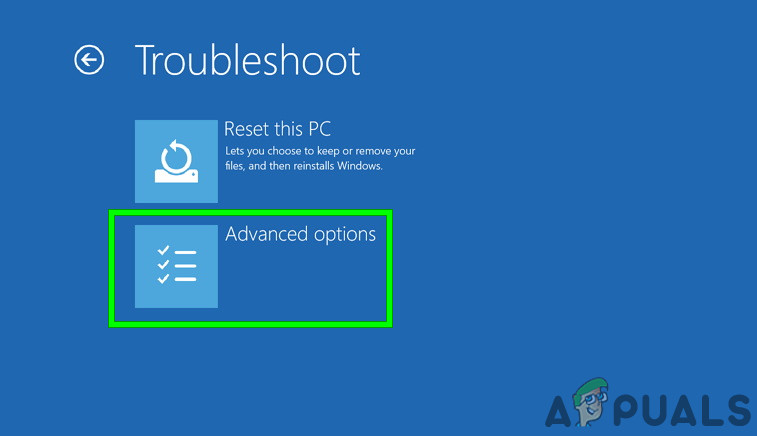
- Boot from the recovery drive and once you get to the “Choose an Option” screen, click on the “Troubleshoot” button.
- In the next window, click on the “Advanced Options” screen and after that, select the “Command Prompt” option.
Advanced options in Troubleshoot screen - Now before we enter the command that will perform this format, you should make sure that you have a USB stick that you can use later on to reinstall Windows and also that you have backed-up all your important data.
- Enter in the following command in the command prompt and press “Enter”.
Format C: /P:4
Note: It is very important that you understand what this command does to your HDD. Basically, it writes the HDD with 0s and random numbers, and each time it fills up the HDD with these random strings, it is called a single pass. In the above command, we have configured the command prompt to format the Hard Disk and perform 4 passes on it to make the data unrecoverable to the HDD more optimized. You can select the number of passes that you want it to perform and we recommend that you go for at least 4. Also, make sure that you replace the “C” with the drive letter of the partition on which Windows has been installed.
- After this command is completed, reinstall Windows on your computer and check to see if doing so has fixed the issue.
Solution 19: Performing Clean Shutdown
In some cases, you might actually be able to fix this issue by performing a clean shutdown. However, you might not be able to do this by just clicking on the “Shutdown” button in the start menu. You can give that a go once and if that doesn’t work, you can attempt to perform a more elaborate shutdown which can in some cases fix this issue.
Basically, most computers by default on Windows 10 are configured to perform a “Fast Startup”. What this means that a file is written to the RAM which contains some basic startup instructions and these don’t need to be loaded from the RAM but we will be performing a complete shutdown by disabling Fast Startup and then turning off the machine. For that:
- Press “Windows” + “R” to open the Run prompt.
- Type in “Control Panel” and press “enter” to launch the classical Control Panel interface.
- Inside the control panel, click on the “Hardware and Sound” option and then select the “Power Options” button.
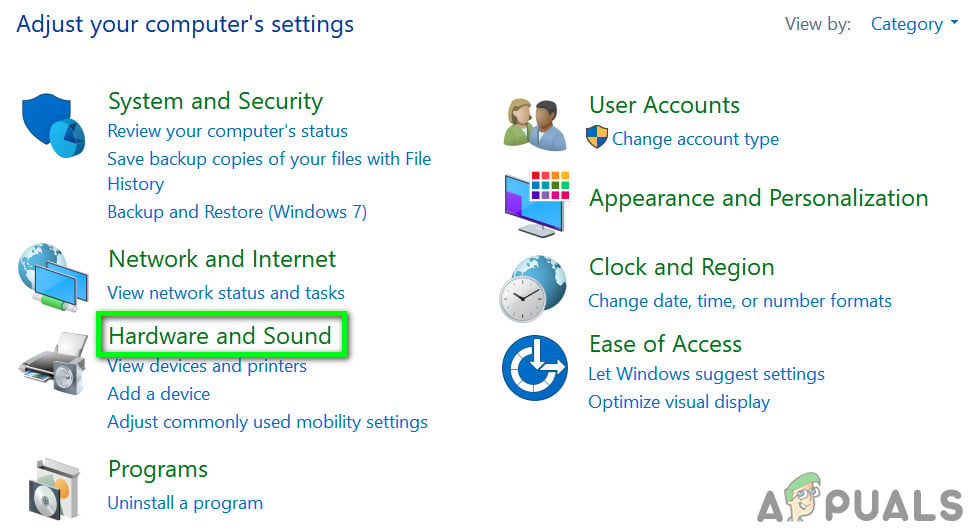
Open “Hardware and Sound” - Inside the power options, click on the “Choose what the power button does” from the left side.
- Click on the “Change Settings” option if the fast startup option is greyed out.
- Make sure to uncheck the “Turn on Fast Startup” option and save your changes.
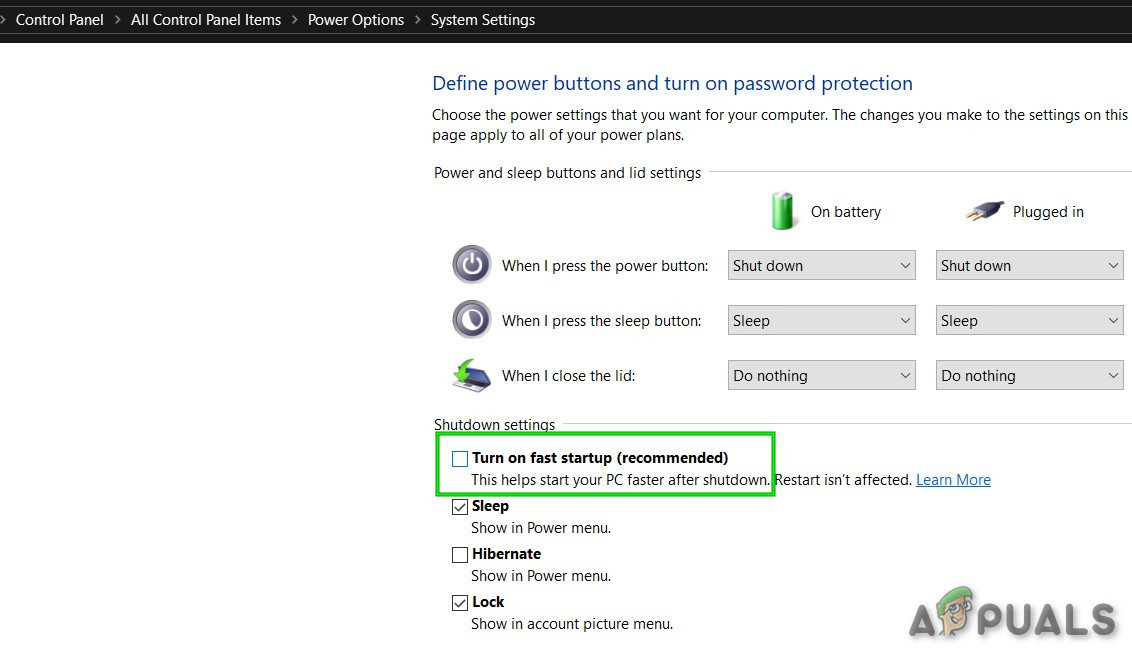
Uncheck the Turn on fast startup - Closeout of the window and terminate any unnecessary applications.
- Click on the “Start Menu”, click on the “Power Options” and select “Shutdown” from the list.
- This will completely shut down your computer.
- Turn it back on and check to see if doing so fixes the issue.
Solution 20: Uninstalling Updates
The notifications not working bug is a fairly common one but as no one might suspect, it is sometimes caused due to the Windows Update itself. Microsoft is practically known for releasing faulty updates that aren’t properly optimized for all hardware and they end up breaking certain Windows features. Therefore, in this step, we will be uninstalling all updates and then check to see if doing so fixes this issue.
- Press “Windows” + “I” buttons to open the settings.
- In settings, click on the “Update and Security” option and then select the “Windows Update” button from the left pane.
Open Windows Settings and Click Update & Security To Check For Updates - In the Windows Update, click on the “View Update History” option.
- In the update History, click on the “Uninstall Updates” option and it should take you to the uninstallation screen where all the recently installed updates will be listed.
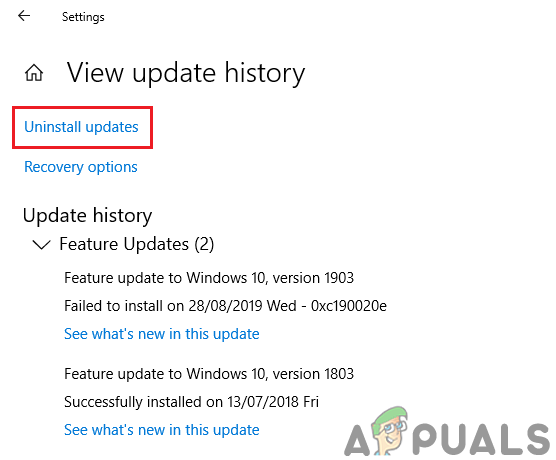
Uninstalling Windows updates from settings. - From the list, right-click on the update that was installed recently and ended up breaking the notifications on Windows 10.
- Right-click on this update and select the “Uninstall” button to remove it completely from the computer.
- Follow through with the on-screen instructions and check to see if uninstalling fixes this issue.
Solution 21: Renaming UsrClass.dat File
In some situations, it is possible that the user account data might’ve been corrupted due to which this particular issue is being triggered. Therefore, as a remedy, we can try to rename the file which contains most of this data and a new file should be generated in its place which obviously won’t be corrupt. This might get some configurations reverted to the defaults but your Data and Account should be safe. In order to do this:
- Press “Windows’ + “R” to open the Run prompt.
Pressing Windows+R to open the Run Prompt - Type in the following address and press “Enter” to automatically open it.
%LocalData%\Microsoft\Windows
- Click on the “View” button at the top and then make sure to check the “Hidden Items” box to make sure that you are able to view all the hidden items.

View Hidden Items option is checked - You should see the “UsrClass.Dat” file in the list of files after some scrolling.
- If you are unable to find it, simply search for it from the search bar at the top right side.
- Right-click on this file and select the “Rename” option.
- Change its name to something else, save your changes, and exit out of the folder.
- After completing this step, check to see if doing so has fixed your issue.
Note: If you are unable to change the name of the file because it shows that it is in use, it is recommended that you try to change its name from a different user account and navigate to the “C:\Users\<username>\AppData\Local\Microsoft\Windows” path to change its name.