How To Create A Public/Private Event on Facebook
You can create an event on Facebook to invite friends, the general public and family on upcoming occasions or to anything you would like people to attend. Events allow you to market yourself as well in a unique way. Imagine if you were to host a party or an opening ceremony where you would send invites in the form of (cards, letters, e-mails or calls) to people hoping they would attend. If you compare this to Events on FB, you won’t have to do all that, it saves money as well as time – You create an event, and then you have several options to promote it, paid promotion, asking friends and at the same time, these events also provide statistics showing how many would attend.
Creating these events is not that difficult if you follow the steps as mentioned below. If you are using your personal computer for making an event on Facebook, this is what you need to do.
- Locate ‘Events’ On Your Newsfeed of Facebook. The tab for ‘Events’ on Facebook is towards the left side of the news feed.
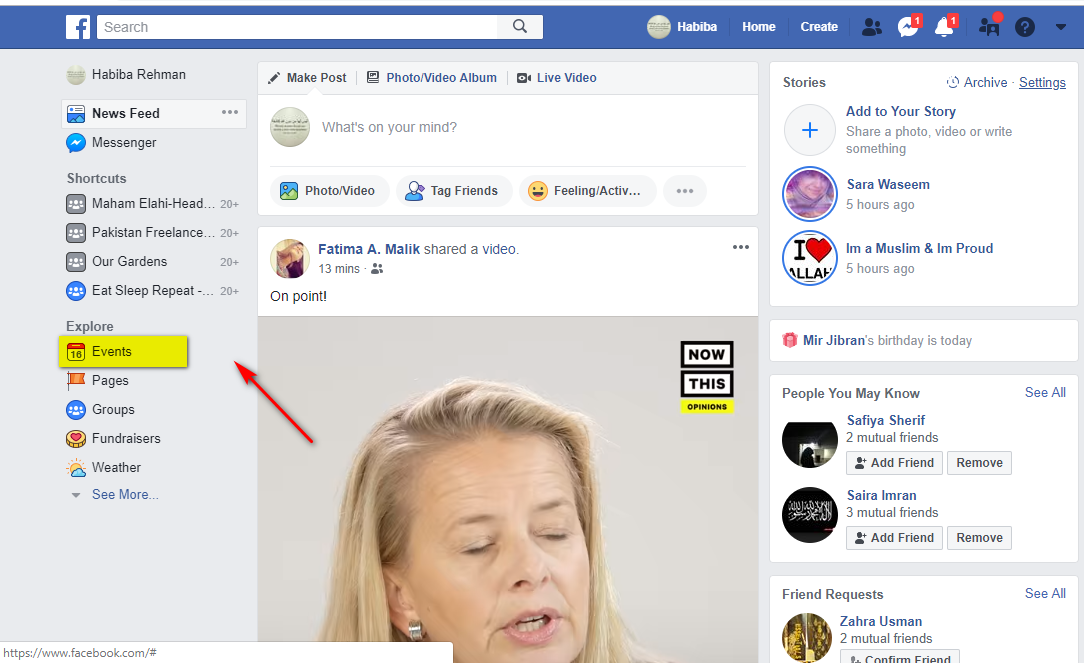
Tab for Events on the left - Click the Event Tab. Once you click the Event tab, you will see a lot of events that have been created by your friends and the people around you. You will also see events that your friends are going to on this page. From what events are there today, tomorrow, and the events scheduled this week on the right, this is how you will see your Facebook page now.
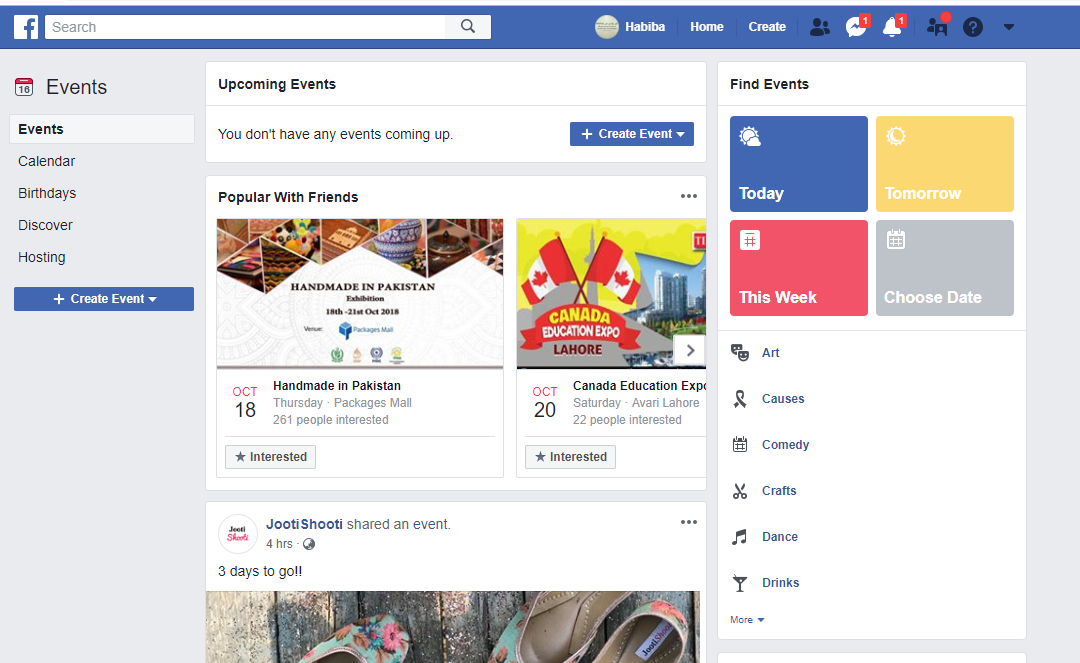
Stepping ahead - Clicking ‘Create Event’ is what you need to do next. The tab for Create Event is right in front of you on the same page. Click that icon to create your event.
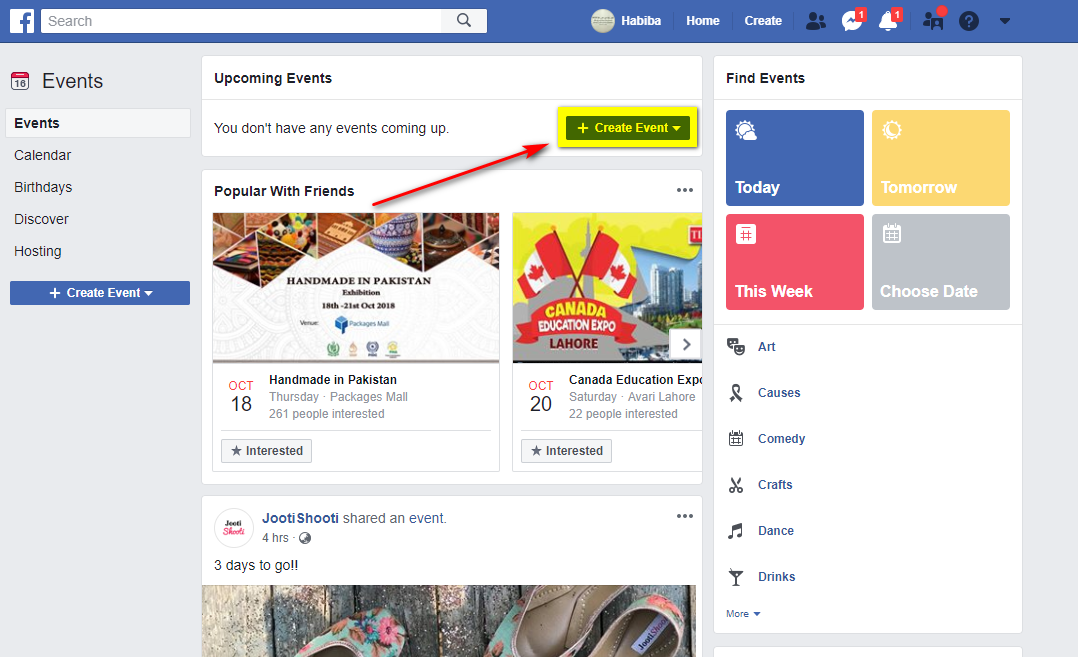
Create Event - Create a Public or Private Event. After clicking on Create events, you will be given two options of events. A public event and a private event. A public event will be open to the public and can be viewed by everyone on Facebook. Such events are mostly for businesses that want to reach out to a larger market of consumers.
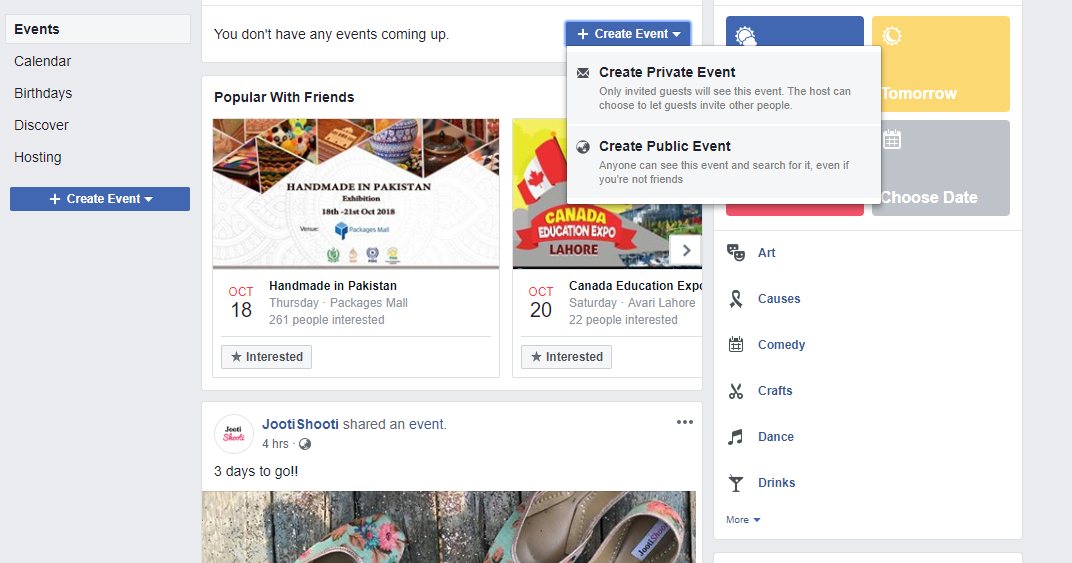
Choosing between private and public events
While private events, are those for which you want to invite a limited number of guests. This one is mostly for personal use, like invited friends over to tea parties, or inviting a specific batch of school to a reunion. The people who are not part of this event cannot view the details or the activities taking place within this event.
Click on the one you want to make, considering who all should be allowed to see the event.
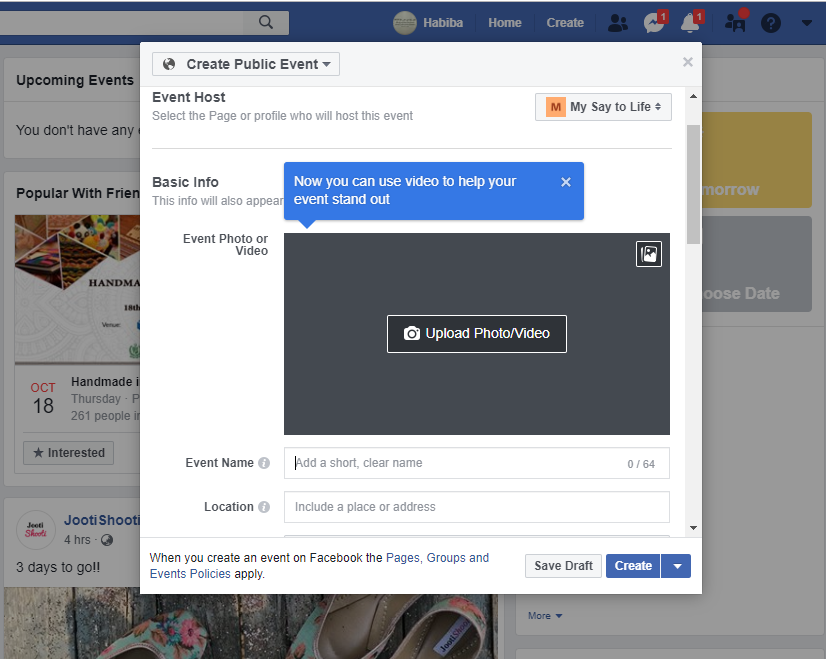
- Make a private event or a public one. Once you click on either of the two, you can now add the details of your event. All the important information that must be given for an event should be added to this field. That is, the name of the event, the location, at what time will the event start and by when will it end. You can also add a detailed description of the event to let the viewer know what exactly it will be about.
For example, if it is a charity event, you can add a description saying, ‘Charity is one of the most beautiful ways to help the world look a bit more beautiful by helping the ones in need. Let’s join hands together in this noble cause’.

The picture above shows how your Facebook will appear once you click on ‘create private event’. And for a public event, it will appear as follows:
Click Create!.
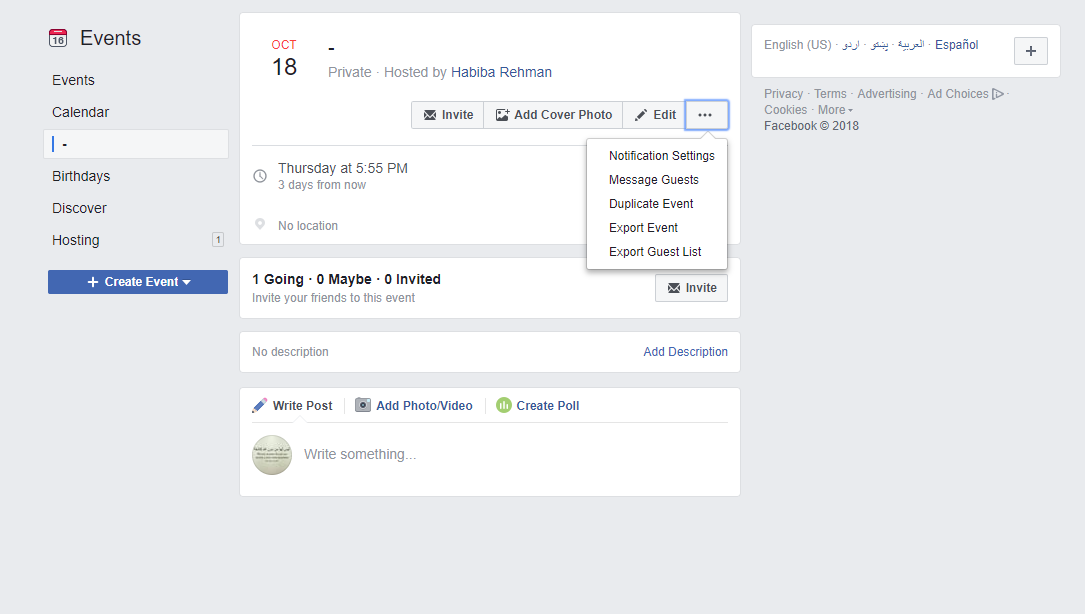
The last and the most important step is to click create, to complete your steps to create an event. Once you have added all the information in the specified fields, you are now good to create the event. And once you click the create button, this is how your event will appear. It will show you all the details about who accepted your invitation, who is going for this event and who is not. It will also show you the members who are still not sure about coming to the event.
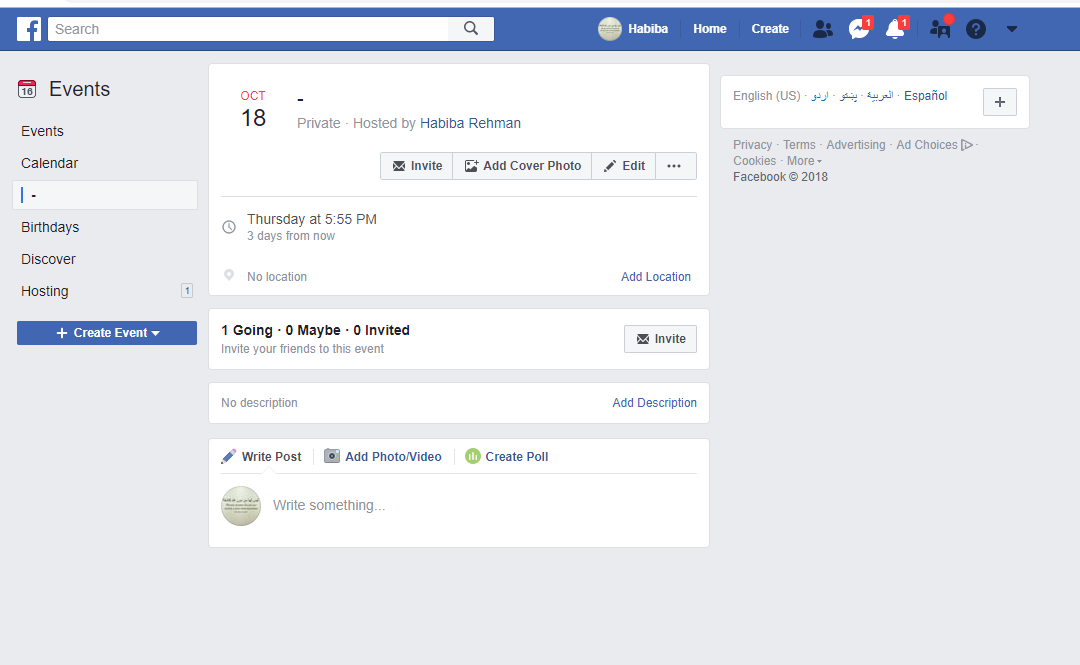
Your friends and family can talk here, discuss the event, add pictures, and they can also create a poll. To make the event look more appealing, you should add pictures related to the event to inform the audience even better, whether it is a public event, like a charity lunch, or a private event, like a small gathering of friends.
Edit On the Go. If you have added something that needs to be changed, for instance, you need to change the date of the event, you can do that even after the event has been created by clicking on ‘EDIT’.
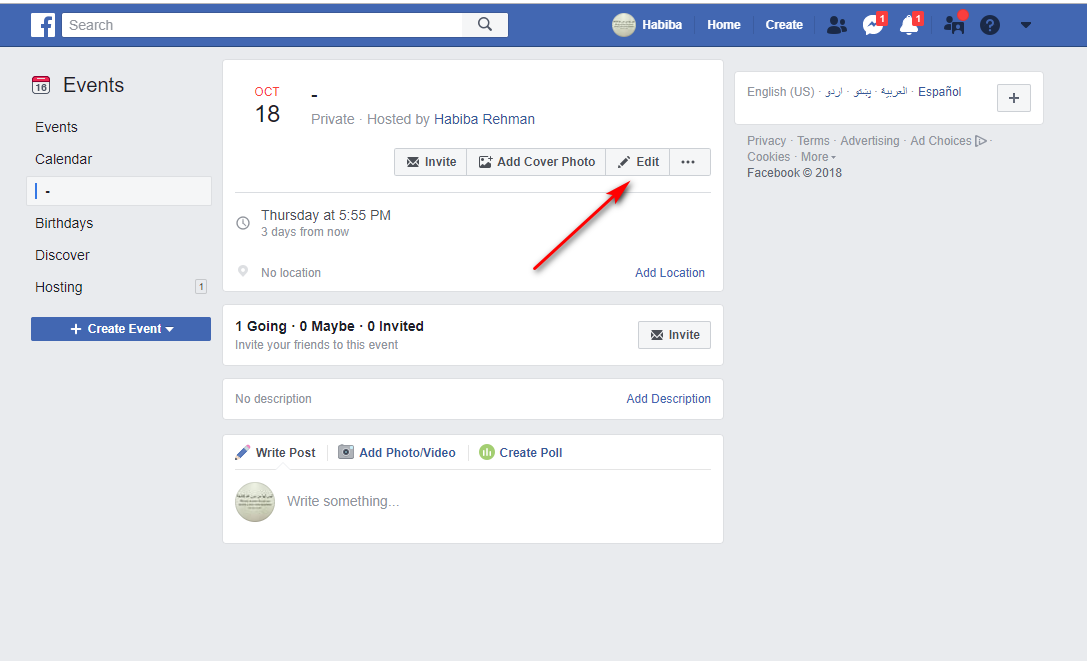
Once you click on Edit, you can now change anything that needs to be changed on the event that you have already created.
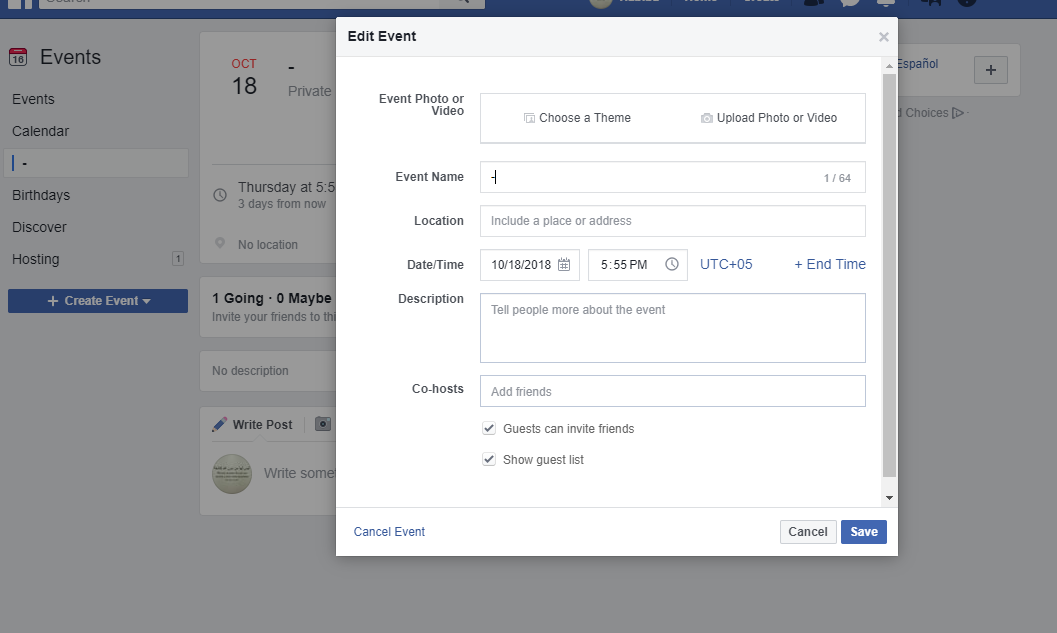
This doesn’t only allow you to change the important information about the event. But you can also cancel the event if the event has been canceled in real-time. Or, if you have changed the name of the event, you can also change that from the Edit option fields.
Manage Your Event Easily. The three dots as shown in the picture below will give you more options to manage other important features like notifications, messaging and informing your guests about any changes, exporting your guest list to another event created by you. You can also export your event if it is like a continuous sort of a thing; for instance, you can have two to three charity events a year.