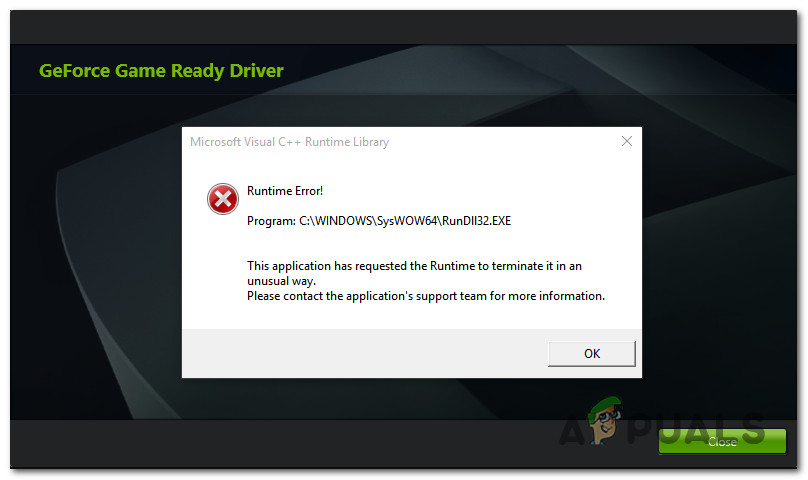
How to Fix GeForce Experience ‘C++ Runtime Error’
Some Windows users are encountering the ‘C++ Runtime Error‘ whenever they attempt to install or launch Nvidia GeForce Experience conventionally. In most cases, this problem is reported to occur when users attempt to install a GeForce Game Ready driver using the GeForce Experience interface.
As it turns out, there are several different causes that are known to trigger this particular error code. Here’s a shortlist of potential culprits were confirmed to cause this issue:
- Superficial installation glitch – As turns out, this error message can also occur in an instance in which the installation of the Nvidia driver was completed successfully. If this scenario is applicable, a simple restart should allow you to take care of the issue.
- Missing admin access – According to some affected users, this problem can also occur in situations where the driver installer doesn’t have the necessary permissions to replace or modify files from the existing driver dependencies. In this case, you should be able to fix the problem by forcing Nvidia Experience to open with admin access.
- An ongoing issue with the update feature – In the past, this Runtime C++ Error occurred when there was an issue with how Nvidia Experience handled updating requests. In this case, you should be able to fix the problem by installing the driver update manually using the official Nvidia download page.
- Conflicting Nvidia service – If you’re seeing this error while attempting to uninstall an NVIDIA driver or an associated dependency, you can most likely fix the problem by disabling every Nvidia-related service via the Services screen before repeating the operation.
- Corrupted Nvidia Experience installation – As some affected users have reported, this problem can also occur if you’re dealing with some type of system file corruption. In this case, you should be able to fix the problem by reinstalling every involved Nvidia component following the official channels.
Now that you know the culprits, here’s a shortlist of confirmed methods that might fix the C++ Runtime Error with Nvidia Experience.
Method 1: Restarting your on Computer
Before you move over to any of the other fixes, you should start by ensuring that you’re not actually dealing with a superficial issue that will be resolved with a regular computer reboot. As it turns out, some users that encountered the C++ Runtime Error with Nvidia Experience have reported that the error went away on its own once they’ve restarted their computer.
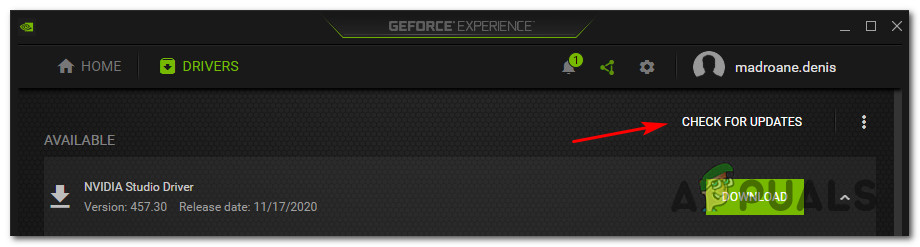
So even if you get the error at the end of the driver updating attempt and it looks like the operation has failed, restart your computer and wait for the next startup to complete. Next, (once your computer boots back up) open Nvidia Experience, visit the Drivers tab, and click on Check for Updates to see if the update is installed properly or not.
If no new version is found, you can conclude that the installation was successful despite the C++ Runtime Error that you previously encountered.
However, if Nvidia Experience is still finding a new driver version and you have the option to click on the Download button, repeat the installation once again, and see if the operation is successful the second time.
If the same issue is still occurring, move down to the next potential fix below.
Method 2: Running Nvidia Experience with Admin access
According to some affected users, this particular issue can also be related to a permission issue that prevents the installer from replacing some files because it’s missing admin access.
If this scenario is applicable, you should be able to fix the problem by forcing your OS to open Nvidia Experience with admin access in order to ensure that it has the necessary permissions to install the update.
But before doing this, ensure that Nvidia Experience is closed completely and no background process associated with it is currently running.
After you do this, right-click on the Nvidia Experience executable or shortcut and choose Run as Administrator from the context menu that just appeared.
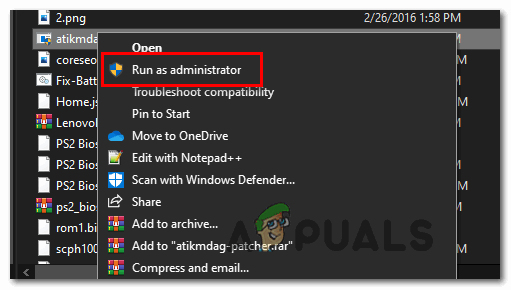
When prompted by the UAC (User Account Control) menu, click Yes to grant admin access, then repeat the operation and see if you are able to complete the installation of the update without encountering the same C++ Runtime Error.
In case the same problem is still occurring, move down to the next potential fix below.
Method 3: Installing the Update Manually
In case Nvidia Experience seems incapable of updating your driver version automatically, you should go for the manual approach and see if this allows you to circumvent the apparition of the C++ Runtime Error.
This method has confirmed to be successful by a lot of uses that were previously incapable of updating their Nvidia drivers to the latest version. Affected users are speculating that the manual approach is effective because it doesn’t rely on Nvidia Experience to fetch the required files (it downloads them locally)
If you want to try this method, follow the instructions below to install the failing update manually using the official download page of Nvidia:
- Open your default browser and visit the Download Drivers page of Nvidia.
- Once you’re on the correct page, set the correct Product Type, Product Series, Product, Operating System, then choose Game Ready Driver (under Download Type). Finally, choose your language and click on Search to find the appropriate driver version.

Downloading the correct Driver version - Once the correct driver is identified, click n the Download button and wait until the operation is complete.
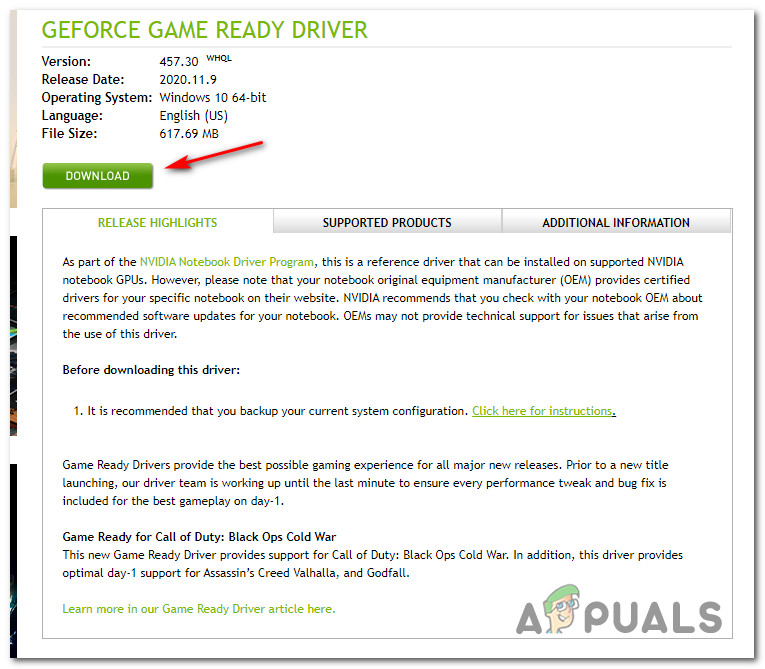
Downloading the correct driver Note: If you get redirected to a different page, click Download once again to initiate the installation.
- Once the download is complete, double-click on the installation executable, click Yes at the UAC (User Account Control) to grant admin access, then follow the on-screen prompts to complete the installation of the pending driver.
- If the installation completes successfully (without the ‘C++ Runtime Error‘), restart your computer one final time.
In case this circumvention attempt ultimately triggers the same error code, move down to the next potential fix below.
Method 4: Disabling Nvidia-related Services
If you see this error while attempting to uninstall Nvidia Experience or when attempting to remove a dependency associated with it, chances are the issue is occurring due to one or more services that[‘s currently stuck in a limbo state.
If this scenario is applicable, you might be able to avoid the problem by disabling every Nvidia related service before retying the uninstallation operation. This needs to be done from the Services screen.
In case you’re looking for a specific step by step instructions, follow the instructions below:
- Press Windows key + R to open up a Run dialog box. Next, type ‘services.cpl’ inside the text box and press Enter to open up the Services screen.
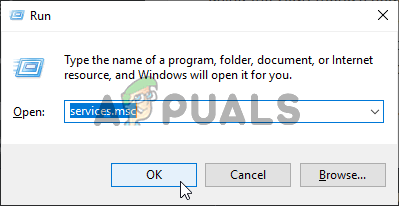
Opening Services Note: If you’re prompted by the UAC (User Account Control) prompt, click Yes to grant admin access.
- Once you’re inside the Services screen, move over to the right-hand side section and click on the Name icon to order the list in alphabetical order.
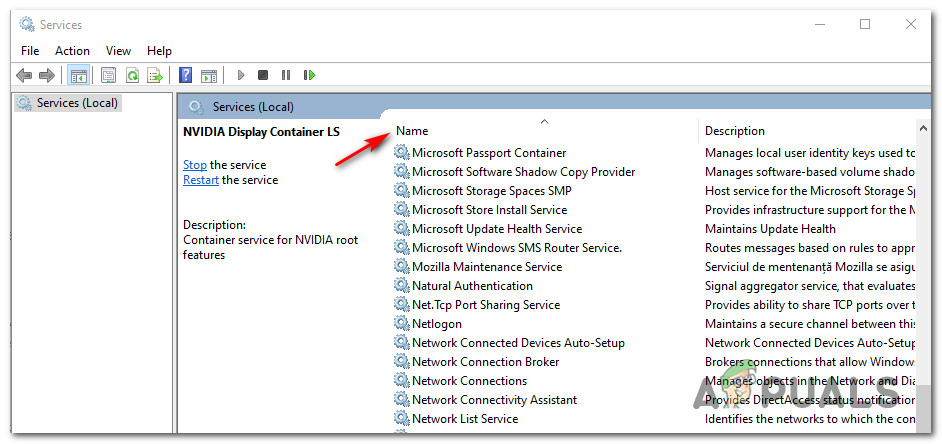
Ordering the Services list - After you’ve ordered the list properly, right-click on every service starting with NVIDIA and choose Stop from the newly appeared context menu.
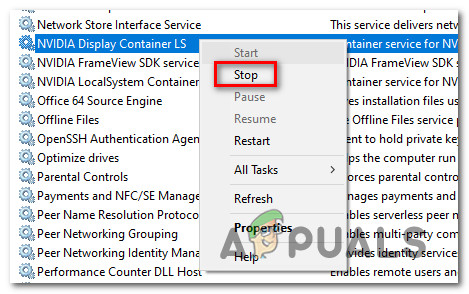
Stopping every Nvidia service - Repeat the step above with every Nvidia service out there until every Nvidia service is effectively stopped.
- Next, repeat the uninstallation sequence that was ultimately triggering the C++ Runtime Error and see if the operation is complete.
If the problem is still not fixed, move down to the final potential fix below.
Method 5: Reinstalling Nvidia Experience
If none of the methods above have worked for you, one last thing you should try is to uninstall the Nvidia experience along with every Nvidia component and associated dependency before doing a complete reinstall. This operation will take care of the majority of inconsistency that might produce the C++ Runtime Error with Nvidia Experience.
If you’re unsure on how to do this, follow the instructions below to reinstall every involved Nvidia component in order to fix the error message:
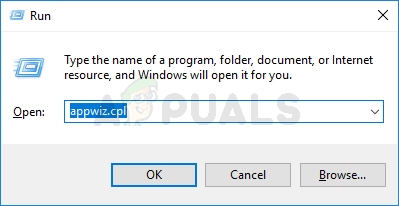
- Open up a Run dialog box by pressing Windows key + R. Next, type ‘appwiz.cpl’ and press Enter to open up the Programs and Features screen. If you are prompted by the UAC (User Account Control), click Yes to grant admin access.
Type appwiz.cpl and Press Enter To Open Installed Programs Page - Once you’re inside the Programs and Features window, start by clicking on the Publisher column in order to sort every installed up via their Publisher.
- After you manage to order the applications properly, right-click on the first item published by Nvidia Corporation and choose Uninstall from the context menu. Next, repeat the process with every item published by Nvidia Corporation from this list.
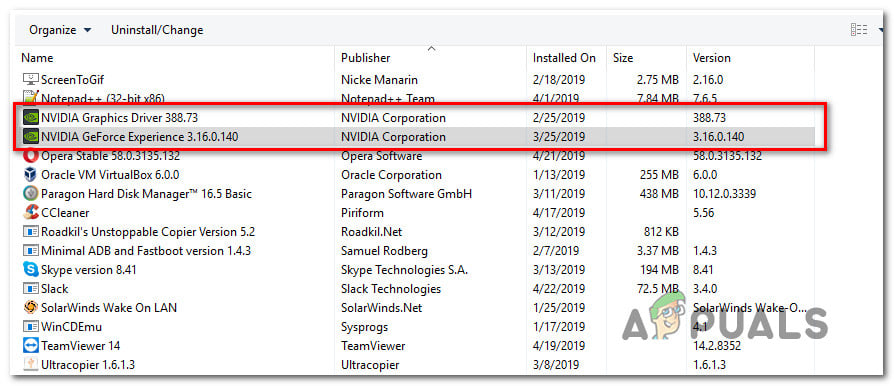
Uninstalling every Nvidia installation - Next, follow the uninstallation prompts until you manage to remove every component published by Nvidia Corporation. Needless to say, you need to do this with every component and dependency belonging to Nvidia.
- Once every uninstallation procedure is complete, reboot your computer and wait for the next startup to complete.
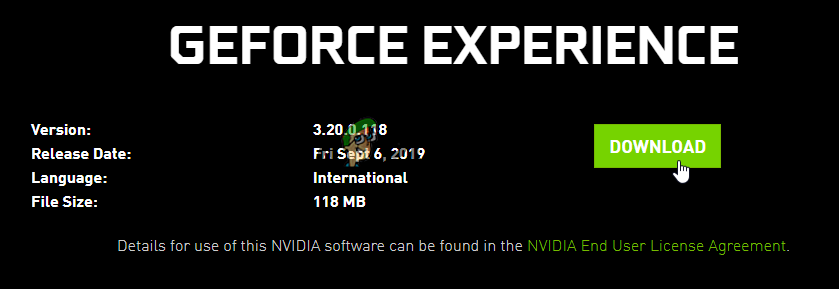
- After your computer boots back up, visit the download page of Nvidia Experience and download the latest version available. Next, follow the on-screen instructions to complete the installation of the latest version of Nvidia Experience.
Downloading GeForce Experience - After the GeForce Experience application is reinstalled, open the application, go to the Drivers tab and click on Check for Updates and install every pending driver update that you’re prompted to.
Check for Updates in GeForce Experience