Fix: Windows Shell Experience Host has Stopped Working
Windows Shell Experience Host is an official part of the Windows operating system. It is responsible for displaying all the universal applications in a windows interface. It also has the task to handle several graphical elements of the interface such as the taskbar transparency, the Start-Menu, the clock etc.
This process is one of the essential components of the Graphic User Interface of Windows and it is directly related to utilities such as the Start-Menu etc. Many users seem to have the problem where this application crashes and an error message comes forward. There are several methods to solve this issue. Start with the first and work your way down.
Solution 1: Updating your System Software
Many users reported that they solved their problem by updating their system software. The latest updates of Windows try to utilize your computer to the fullest by having increased features and user ease of access. For this purpose to be achieved, it is recommended that you have the latest version of all your system software. Furthermore, it is possible that the software is conflicting with the application, thus, causing the problem.
- Update your BIOS
- Chipset
- Power Management Drivers
- Graphics Software
- Windows Update
Each of these utilities are listed because users reported that updating these solved the problem for them. Make sure to update them accordingly before moving on to the technical solutions. Especially graphic software is known to cause problem with the service.
Solution 2: Running System File Checker
System File Checker (SFC) is a utility present in Microsoft Windows which allows the users to scan their computers for corrupt files in their operating system. This tool has been there in Microsoft Windows since windows 98. It is a very useful tool for diagnosing the problem and checking if any problem is due to corrupt files in windows.
We can try running SFC and see if our problem gets solved. You will get one of the three responses when running SFC.
- Windows didn’t find any integrity violations
- Windows Resource Protection found corrupt files and repaired them
- Windows Resource Protection found corrupt files but was unable to fix some (or all) of them
- Press Windows + R to launch the Run application. Type “taskmgr” in the dialogue box and hit Enter to launch your computer’s task manager.
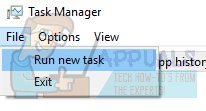
- Now click on File option present at the top left side of the window and select “Run new task” from the list of options available.
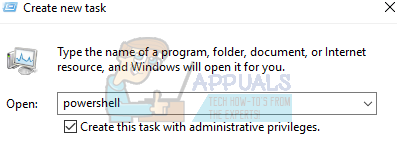
- Now type “powershell” in the dialogue box and check the option underneath which states “Create this task with administrative privileges”.
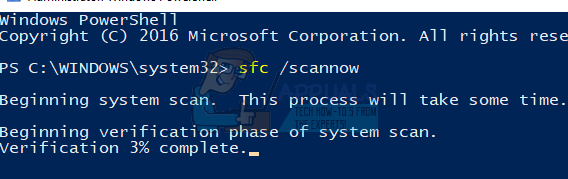
- Once in the Windows Powershell, type “sfc /scannow” and hit Enter. This process may take some time as your entire Windows files are being scanned by the computer and being checked for corrupt phases.
- If you encounter an error where Windows states that it found some error but was unable to fix them, you should type “DISM /Online /Cleanup-Image /RestoreHealth” in the powershell. This will download the corrupt files from the Windows update servers and replace the corrupt ones. Do note that this process can also consume some time according to your internet connection. Don’t cancel in any stage and let it run.
If an error was detected and was fixed using the above methods, restart your computer and check if the taskbar started working normally.
Solution 3: Re-registering the Start-Menu
We can also try re-registering the start menu from an application package present in your Windows Operating System. This will re-register all the default application on your computer.
- Press Windows + S to launch the search bar. Type “PowerShell” in the dialogue box, right-click on the application which comes forth and select “Run as administrator”.
- Once in PowerShell, execute the following command by copy/pasting it and pressing Enter.
Get-AppXPackage | Foreach {Add-AppxPackage -DisableDevelopmentMode -Register “$($_.InstallLocation)\AppXManifest.xml”}

- Restart your computer and check if the problem at hand got solved.
Solution 4: Making a New Account
You can ask the administrator to make you a new account or if you access to the administrative account, you make a new one yourself. We can guide you on how to make a new account so all the account settings in the new will be the same as your current account. This way you won’t feel any difference and also fix the problem.
Note: If you have another account/accounts present on your computer, copy their data to a storage device and delete their accounts (if the problem is occurring in all the accounts). If the problem lies with just one account, don’t delete them and proceed with the following method.
- First to boot your computer in safe mode.
- Open an administrator account. Type Settings in the start menu dialogue box and click on Accounts.

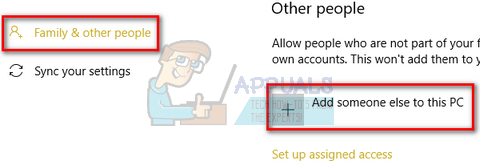
- Now click “Family and other users” options present at the left side of the window.
- Once inside select the menu, select “Add someone else to this PC”.
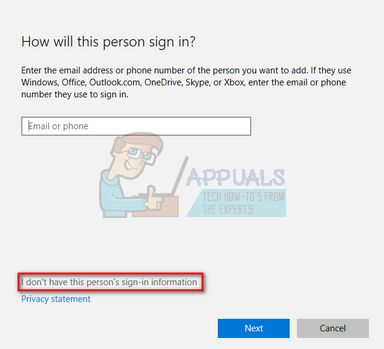
- Now Windows will guide you through its wizard on how to create a new account. When the new window comes forth, click “I don’t have this person’s sign-in information”.
- Now select the option “Add a user without Microsoft”. Windows will now prompt you to make a new Microsoft account and display a window like this.
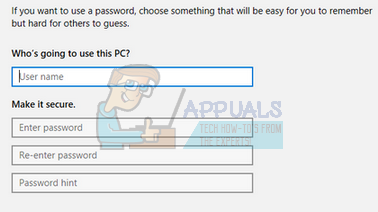
- Enter all the details and chose an easy password which you can remember.
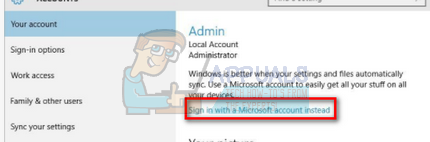
- Now navigate to Settings > Accounts > Your Account.
- At the space beneath your account picture, you will see an option which says “Sign in with local account instead”.
- Enter your current password when the prompt comes and click on Next.
- Now enter username and password for your local account and click on “Sign out and finish”.
- Now you can easily switch to a new local account, and move all your personal files to it without any barriers.
- After switching to the local account, check if the problem still persists. If it doesn’t and everything is going smooth, proceed with the instructions.
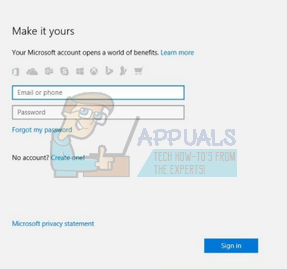
- Now navigate to Settings > Accounts > Your Account and select the option “Sign in with a Microsoft Account instead”.
- Enter your username and password and click Sign in.
- Now you can safely delete your old account and continue using this one.