Fix: Windows 10 Update Error 0x8007000d
Error code 0x8007000d means that there is a file that is needed by Windows Update, but that file is either damaged or missing. This won’t let you install any updates for Windows or any drivers, and it also won’t let you upgrade Windows 10 in case a newer version is available. Another potential cause may also be broken drivers as well.
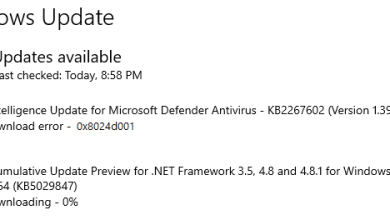
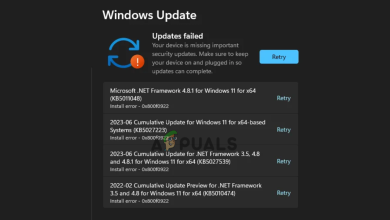
You will see this error when you try to run Windows Update from your device, and anything you try to download in that way will undoubtedly fail. This is quite frustrating, as Microsoft’s idea with Windows 10 was to offer Windows as a service with continuous updates, so breaking this function leads to missing out on a lot of functionality, as well as a lot of security updates which Microsoft delivers every now and then.
There are, fortunately, quite a few ways you can go around solving this, and you can try all of them and see which one solves your issue. If the first one doesn’t work, move on to the next method, and so on until you solve the problem.
1. Use the Compatibility Troubleshooter
If this problem happens when you’re trying to install a specific driver, it might be solved by using the Compatibility Troubleshooter with that driver. The steps are fairly easy, and are outlined below, so follow them to try and solve the problem.
- Open File Explorer by pressing simultaneously the Windows and E Navigate to the folder where the setup for the driver you can’t install is.
- Right-click the setup file, and click Troubleshoot Compatibility.
- Within the Program Compatibility Troubleshooter, choose Troubleshoot Program.
- On the next screen, select the problems you’re experiencing with the driver, and click Next.
- Choose an older version of Windows where the driver will work (Windows 7 would be a good option as it is by far the most stable version of Windows).
- Click Next and choose Test the program… .
- Run the setup as you would normally, and if everything goes as it should, choose Yes, save these settings for this program at the end. Otherwise, move on to the next method.
2. Manually reset the Windows Update components
Resetting the Windows Update components can solve a few issues with it, and this is one of those issues, so this is definitely worth trying.
- Press Windows and X, and choose Command Prompt (Admin) from the menu that appears in the lower-left corner.
- In the Command Prompt, type in the following commands, and press Enter after each one of them to execute them. Make sure not to make a typo anywhere, as it might cause more problems than it actually fixes.
net stop bits
net stop wuauserv
net stop appidsvc
net stop cryptsvc
Ren %systemroot%SoftwareDistribution SoftwareDistribution.bak
Ren %systemroot%system32catroot2 catroot2.bak
- Next, you should delete the qmgr*.dat This is also done from within the Command Prompt, and you need the following command, and an Enter to execute it:
Del "%ALLUSERSPROFILE%\Application Data\Microsoft\Network\Downloader\qmgr*.dat
- While you’re still in the Command Prompt window, type in another command to navigate to the System32 folder, where you will need to reregister the BITS files, as well as the Windows Update files. That command is cd /d %windir%\system32, so enter it and press Enter to execute it.
- Once inside, type in the following commands, each one followed by an Enter for execution, to reset the aforementioned BITS and Windows Update files.
regsvr32.exe atl.dll
regsvr32.exe urlmon.dll
regsvr32.exe mshtml.dll
regsvr32.exe shdocvw.dll
regsvr32.exe browseui.dll
regsvr32.exe jscript.dll
regsvr32.exe vbscript.dll
regsvr32.exe scrrun.dll
regsvr32.exe msxml.dll
regsvr32.exe msxml3.dll
regsvr32.exe msxml6.dll
regsvr32.exe actxprxy.dll
regsvr32.exe softpub.dll
regsvr32.exe wintrust.dll
regsvr32.exe dssenh.dll
regsvr32.exe rsaenh.dll
regsvr32.exe gpkcsp.dll
regsvr32.exe sccbase.dll
regsvr32.exe slbcsp.dll
regsvr32.exe cryptdlg.dll
regsvr32.exe oleaut32.dll
regsvr32.exe ole32.dll
regsvr32.exe shell32.dll
regsvr32.exe initpki.dll
regsvr32.exe wuapi.dll
regsvr32.exe wuaueng.dll
regsvr32.exe wuaueng1.dll
regsvr32.exe wucltui.dll
regsvr32.exe wups.dll
regsvr32.exe wups2.dll
regsvr32.exe wuweb.dll
regsvr32.exe qmgr.dll
regsvr32.exe qmgrprxy.dll
regsvr32.exe wucltux.dll
regsvr32.exe muweb.dll
regsvr32.exe wuwebv.dll
- Type these commands in the Command Prompt and execute them, to reset Winsock.
netsh winsock reset
netsh winhttp reset proxy
- Re-start the services you stopped initially, with the following commands (don’t forget an Enter after each one to execute it):
net start bits
net start wuauserv
net start appidsvc
net start cryptsvc
- Finally, reboot your computer. The issue should be fixed now.
3. Run DISM
If the previous method didn’t fix your problem, you can run the Deployment Image Servicing and Management tool, which is a built-in tool that fixes any potential problems with corrupt files.
- Press Windows and X, and choose Command Prompt (Admin) to open an elevated command prompt.
- Type in the following command, press Enter to execute it and wait for as long as it takes to complete.
dism.exe /online /cleanup-image /scanhealth
- After the previous command is done, type in this one, and again, press Enter and give it enough time to finish:
dism.exe /online /cleanup-image /restorehealth
- Once the command is finished running, you can close the command prompt.
At the end of the day, this issue is just another one of the many that still plague Windows 10, almost two years after its initial release. However, if you follow the methods above, you can fix the issue yourself and update or upgrade your operating system as it should be updated. If none of these methods shown above helped you at all, you can try upgrading your Windows by using a Windows Media Creation tool to install the Windows update.