Fix: Windows 10 No Sound
Your audio might be completely gone or it might cut a lot if you just recently updated your Windows 10. This issue can also lead to a high CPU usage and crashes within the Edge browser as well.
This error occurs as a result of bugs present in one of the latest Windows 10 builds starting from Build 15007 and it is noticeable whenever a PC user tries to play any audio. The problem is with the Windows Spectrum program so deleting or disabling Spectrum usually fixes the issue. The Microsoft officials have already admitted that it’s a known bug and are trying to fix this bug in the latest builds. The following methods and steps should reliably fix the problem.
Method 1: Fix Audio from CMD
- Go to search menu, type cmd, and launch Command Prompt
- Copy and paste the following:
Rmdir /s %ProgramData%\Microsoft\Spectrum\PersistedSpatialAnchorsShutdown - Then choose Y to confirm removal.
- Type Exit and restart your computer

Method 2: Deleting Spectrum Folder
Since the problem is caused by the Windows Spectrum, deleting the Spectrum folder solves the problems caused by it.
- Hold Windows Key and press E
- Click View
- Check the option Hidden Items (If it’s not already checked). This is important because ProgramData folder is hidden so you won’t be able to access it.
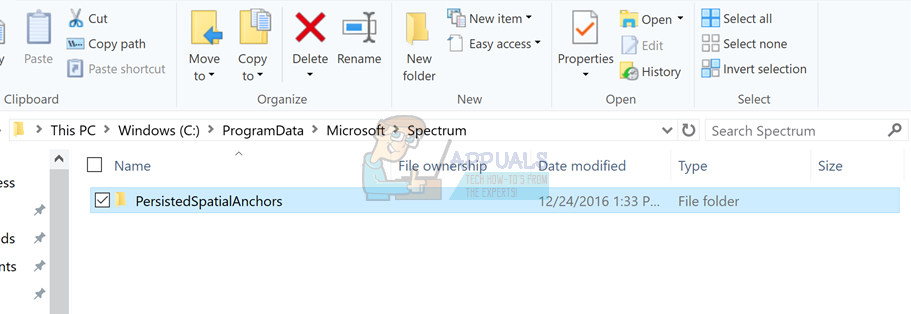
- Type c:\ProgramData\Microsoft\Spectrum in the address bar located at the top-mid of the File Explorer and press Enter
- Right click the folder named PersistedSpatialAnchors and select Delete
- Press Ok if it asks for conformation.
Now restart your computer and the audio problem should be solved by now.
Note: If it says that the folder or program is in use and can’t delete it then restart your computer and then try to delete it. If you still can’t delete the files after a reboot then follow method 3 to stop the Spectrum service and follow this method to delete the file.
Method 3: Stop Spectrum Service (Check this method. I couldn’t perform it because I don’t have the Spectrum. A User suggested it.)
If you aren’t comfortable by deleting the Spectrum or it doesn’t let you delete the Spectrum because it is in use then that means you have stop the Spectrum first.
- Hold Windows Key and press R
- Type services.msc and press Enter
- Locate Spectrum Service and double click it
- Select Disabled from the drop down list in the Startup section and make sure the service is Stopped (by clicking the Stop button)
Or
- Hold Windows Key and press R
- Type taskmgr and press Enter
- Locate the Spectrum.exe
- Right click on the Spectrum.exe and click End Task
You can repeat the method 2 after this to make sure that Spectrum is deleted and it doesn’t start again.
If you are connecting your audio device via USB or HDMI then you will need to set the audio device as the default device. Right click the sound icon on your screen (right bottom) and select Playback devices. Select your audio device and click on the Set Default.
Method 4: Trying Different Audio Formats
Sometimes the issue might be because of the unintentional change in the audio format. You can change the audio format back to what it originally was, very easily. But, sometimes there might be multiple audio formats available for you. In that case, you should try every audio format until your sound starts working again.
These are the steps for changing your audio formats
- Right click the sound icon on your task bar (right bottom)
- Select Playback devices

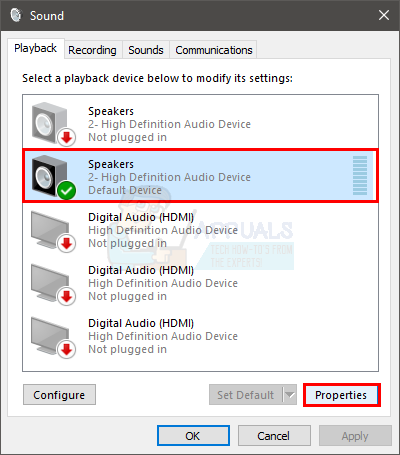
- Now select your audio device (which should be default). It should have a green tick beside it
- Select Properties
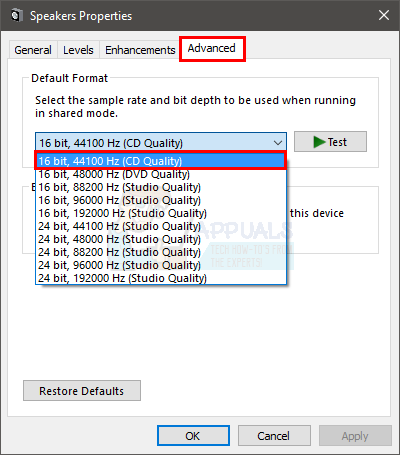
- Select the Advanced tab
- Now, select a format from the drop down list in section Default Format. Select any one you want. We will recommend the 16 bit, 44100Hz
- Click Apply then select Ok
- Now check whether the audio is working or not.
Repeat the above given steps and select some other audio format if the audio doesn’t work. You should try to select each audio format from the list to make sure the problem isn’t caused by the wrong audio format.
Method 5: Disabling and Enabling
Disabling and then re-enabling your default device from the sound screen seems to work for a lot of users. Follow the steps given below to disable and then re-enable your default device
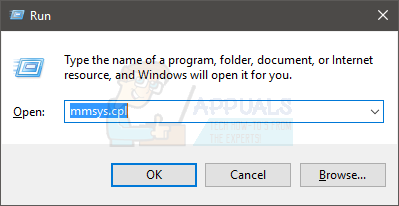
- Press and Hold Windows key and press R
- Type mmsys.cpl and press Enter
- Select your default device (the one with the green tick)
- Select Properties
- Select General tab
- Select Don’t use this device (disable) from the drop down menu in device usage section
- Click Apply then Ok
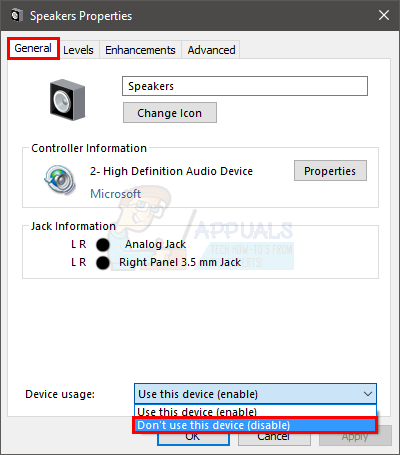
- Click Apply then select Ok again
- Now, repeat the steps from 1-8. But, select Use this device (enable) from the drop down menu in step 6.
Your audio should work fine once you are done.
Method 6: Disable Enhancements
Disabling the enhancements for your audio device also solves the issue that you are having. It is a Microsoft’s recommended solution as well.
- Right click the sound icon on your task bar (right bottom)
- Select Playback devices
- Now select your audio device (which should be default). It should have a green tick beside it
- Select Properties
- Select Enhancements tab
- Check the option that says Disable all enhancements
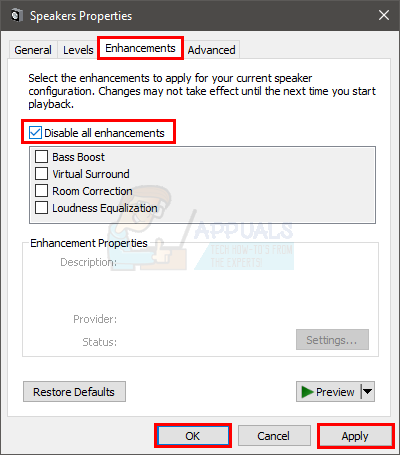
- Click Apply then Ok
- Now check if your device is working or not
- You should be on the Playback device window If the problem isn’t solved, select the other working device (if you have one), disable its enhancements and check if the audio is working or not. Repeat this step for all other devices that you have on the Playback devices window.
If disabling enhancements doesn’t work then move to the next method.
Method 7: High Definition Audio Device Driver
Reinstalling your audio driver and selecting the High Definition Audio Device solves this problem as well. Usually, the High Definition Audio CODEC will be available (or a variation of it) which causes this problem. If High Definition Audio CODEC is already the driver in your device manager then it is a good indicator that the problem is caused by this. This has something to do with the latest Windows update and this driver. So, updating/re-installing the driver and selecting the above mentioned driver solves the problem.
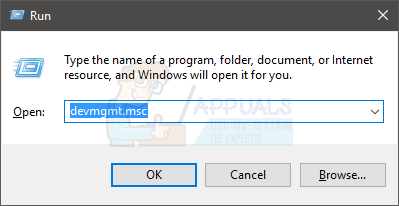
- Hold Windows key and press R
- Type devmgmt.msc and press Enter
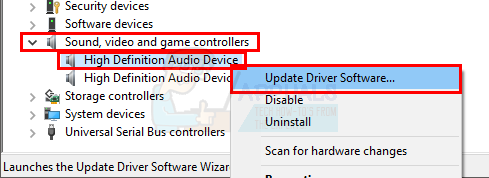
- Locate and double click Sound, video and game controllers
- Right click IDT High Definition Audio CODEC and select Update Driver Software…
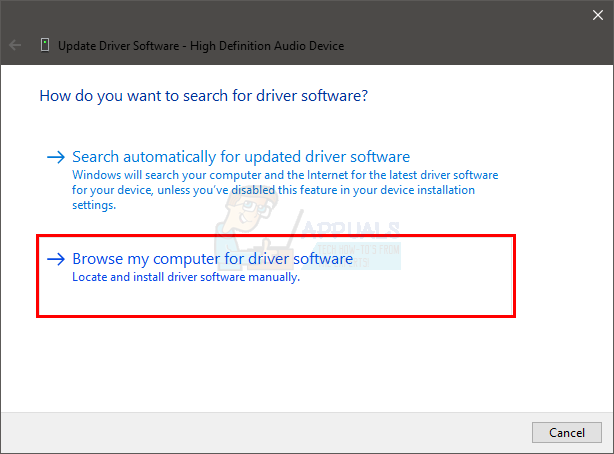
- Select Browse my computer for driver software
- Select the option Let me pick from a list of device drivers on my computer
- A new window will pop up and a list of drivers will be there. Select the High Definition Audio Device and select Next. Make sure the option Show compatible hardware is checked. Ignore any warnings and follow the on-screen instructions.
Once you are done, your audio should work properly.
Method 8: Update Drivers
Although this might seem unnecessary but sometimes the problem is simply associated with the wrong/corrupted audio driver. You have to make sure that you have the compatible and the latest drivers installed.
You can install the drivers both automatically and manually. Steps for both are given below.
Automatic Driver Update/Installation
You can uninstall the driver and reboot your computer. The Windows will automatically search and install the most compatible audio driver for your system.
- Hold Windows key and press R
- Type devmgmt.msc and press Enter
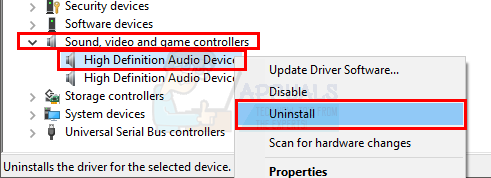
- Locate and double click Sound, video and game controllers
- Right click your audio device and select Uninstall
- Follow any additional on-screen instructions
- Reboot the system once you are done
Once the system is rebooted, your audio should be back. You won’t have to do anything. Or you can force the Windows to search and install a compatible driver for your system by following the steps given below.
- Hold Windows key and press R
- Type devmgmt.msc and press Enter
- Locate and double click Sound, video and game controllers
- Right click your audio device and select Update Driver Software…
- Select Search automatically for updated driver software

- If the Windows find any updated version then it will let you know. You can follow the on-screen instructions if windows find an updated version otherwise that’s all that you have to do.
Manual Installation
If the automatic search for drivers doesn’t work then you can always do a manual install of the drivers. Manually installing the drivers isn’t hard and takes only a few minutes. For this to work, you will need to go to your audio manufacture’s website and download the latest driver.
The complete step by step guide is given below
- Go to your manufacturer’s website and download the latest driver
- Hold Windows key and press R
- Type devmgmt.msc and press Enter
- Locate and double click Sound, video and game controllers
- Right click your audio device and select Update Driver Software…
- Select Browse my computer for driver software
- Now click Browse and select the location of the driver that you downloaded in step 1
- Click Next

Now follow any addition on screen instructions and reboot your computer when the driver is installed. This should fix the audio driver issue for you.
Method 9: Windows Troubleshooter
The quickest thing that can solve your problem is the Microsoft’s own Troubleshooter for sound. You can easily download it and run it. The troubleshooter will automatically detect and solve any problems you might have
Go here and download the troubleshooter. Run the troubleshooter once you are done downloading it. Follow the on screen instructions to check what the problem is.
You can also click on your sound icon in the tsk bar (bottom right corner) and select Troubleshoot sound problems. It will automatically detect and solve any issues that you might have.