Fix: Error 0x80070005 on Windows 10 Store
This error, 0x80070005, is a generic error which technically means that for some reason, permissions are denied or access is denied. Therefore, many other Windows programs and services may indicate this error when they find that permissions are being denied.
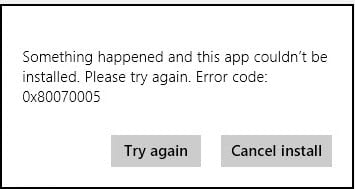
However, in this guide, we will focus only on this error in relation to app updates on Windows 8/8.1/10. When an app fails to update itself due to permission issues, this is the error you will receive: ‘Something happened and this app couldn’t be installed – 0x80070005.’
Method 1: Fix the Permissions of the Packages Folder
1. Hold the Windows key and press R.
2. In the Run dialog that opens up, type %appdata% and click OK.
3. By default, this will take you to Appdata\Roaming ;however, we need to be in AppData\Local. Click AppData from the top (breadcrumb) and choose “AppData,” then select “Local.
4. Now, in the Local folder, locate the folder called Packages.
5. Right-click on Packages and select Properties.
6. Click the “Security” tab.
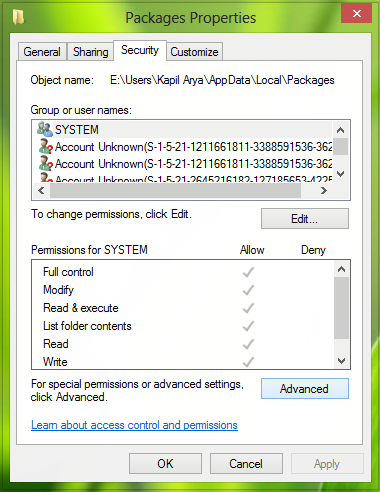
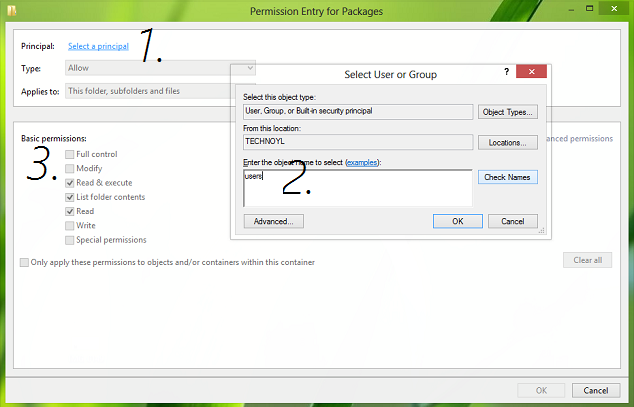
7. Now, click the Advanced button and ensure that all the users listed there have full control. If not, click Add. Choose Select a Principal, type “users” in the box that reads “Enter the object name to select.” Once this is done, click Check Names and then put a checkmark in the box that says “Full Permission.
8. Click Apply/OK. This should grant full permissions, and your issue should now be resolved.
Method 2: Change the download location of Windows Store apps back to your Windows partition.
If Method 1 did not work for you, there is no need to fret. This problem can also be caused by the download location of Windows Store apps being changed from the partition of a computer’s HDD/SSD on which Windows is installed (which, in most cases, is drive C) to another partition. In such cases, changing the download location of Windows Store apps back to the default value almost always resolves the problem. However, unfortunately, the Windows Store does not have an option or feature that allows users to change the default download location of apps, so you will have to use the Registry Editor to do so. To use this solution, you need to:
- Press the Windows Logo key + R to open the Run dialog box.
- Type “regedit” into the Run dialog and press Enter to launch the Registry Editor.
- In the left pane of the Registry Editor, navigate to the following directory:
HKEY_LOCAL_MACHINE > SOFTWARE > Microsoft > Windows > CurrentVersion
- Locate the registry key titled ‘Appx‘ under ‘CurrentVersion‘ in the left pane and take ownership of it. If you do not know how to take ownership of a registry key, refer to Method 1 from this guide.
- Once you have taken ownership of the Appx registry key, click on it in the left pane of the Registry Editor to display its contents in the right pane.
- In the right pane of the Registry Editor, locate and double-click on the registry value named PackageRoot to edit it.
- Replace the contents of the registry value’s Value data field with the directory where you want Windows Store apps to be installed from now on. Any directory will suffice, as long as it resides in the same partition as your Windows installation (C:\Program Files\WindowsApps, for example, will work exceptionally well).
- Click on “OK.
- Close the Registry Editor and restart your computer.
When the computer boots up, open the Windows Store and try to install or update an app to determine whether the problem has been fixed.
Method 3: Reset Your Computer’s Windows Store Cache.
If a Windows 10 user is having any kind of trouble downloading, installing, or updating applications from the Windows Store, resetting the Windows Store cache is a pretty sensible course of action, and this also holds true in the case of this problem. To reset your computer’s Windows Store cache, you need to:
- Press the Windows Logo key + R to open the Run dialog box.
- Type wsreset.exe into the Run dialog and press Enter.
- Wait for the command to be executed and the Windows Store cache to be reset.
- Restart your computer, and when it boots up, check to see whether or not the problem has been resolved.
Method 4: Re-register the Windows Store.
- Open the Start Menu.
- Search for “PowerShell.
- Right-click on the search result titled “Windows PowerShell” and click on “Run as Administrator.
- Type the following into the elevated instance of Windows PowerShell and press Enter:
powershell -ExecutionPolicy Unrestricted Add-AppxPackage -DisableDevelopmentMode -Register $Env:SystemRoot\WinStore\AppxManifest.XML
- Once the command has been executed, close Windows PowerShell and restart your computer.
When the computer boots up, launch the Windows Store and check whether the issue persists.
Method 5: Ensure that your computer’s date and time settings are correct.
Technology can sometimes be extremely fickle, and a prime example of this is the fact that simply having the wrong time, date, and/or time zone on your Windows 10 computer can lead to an inability to install or update applications from the Windows Store. If you are experiencing this issue, try ensuring that all of your computer’s date and time settings are correct. To do so, you need to:
- Click on the date and time in your notification area.
- Click on “Change Date and Time Settings…
- Click on “Change Date and Time…“, ensure that your computer has the correct date and time, and click on “OK.
- Click on “Change Time Zone,” ensure that your computer is set to the correct time zone, and click “OK.
- Click on Apply and then on OK.
- Restart the computer, wait for it to boot up, and check whether your ability to install and/or update applications from the Windows Store has been restored.
If none of the methods listed and described above have worked for you, fear not, as you still have one last resort – creating and switching to a new user account. In almost all cases, this issue only affects one user account on an affected computer, which is why you can get rid of this issue by simply creating a new user account and switching to it for good, and then deleting your old user account. You should be able to successfully download, install, and update applications from the Windows Store on the new user account. If you do choose to take this path, however, make sure that you transfer any valuable data/files that you do not want to lose from your old account to your new one before deleting the old account.