How to Fix ‘(Error: 0x00000709)’ When Selecting a Default Printer?
Fix: Operation could not be completed (error 0x00000709) on Windows
There have been reports of users encountering an issue with their printers. As it turns out, upon attempting to change the default printer on their system, the “Operation could not be completed (error 0x00000709)” error message is triggered. On the other hand, some users are experiencing this error message in a shared network where a deleted printer keeps reappearing. The error message appears when they try to connect to the said printer when it reemerges. In this article, we will guide you through the process of fixing the aforementioned problem quite easily, so please follow along.
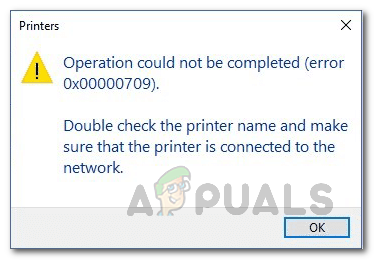
As it turns out, printers remain one of the most widely used devices, especially in work environments. Not only that, but some of us also use printers in our homes for our convenience. When you set a default printer, all print jobs are sent to the selected printer automatically, instead of having to select a printer every time you wish to print something, which can be quite repetitive. In some cases, Windows may refuse to change the default printer on your computer. In such a scenario, you can get the job done quite easily by modifying some keys in your Windows Registry. With that said, let us get started and show you how to change your default printer on your operating system without any issues.
Change the Default Printer via the Windows Registry.
As it turns out, when encountering the 0x00000709 error code while trying to change the default printer on your computer, do not worry, as there are alternative ways to change the default printer.
In such a case, as we have mentioned previously, what you can do is use the Windows Registry to change the default printer on your computer. The Windows Registry is responsible for how the operating system on your computer behaves, and as such, it stores the default printer in a key. When facing the problem in question, you can edit this key to change the default printer on your computer. Normally, making changes to the Windows Registry is not recommended, especially when you do not know what you are doing. This is because any unwanted changes can cause serious damage to the operating system. Therefore, before proceeding with the instructions that we are going to provide, we would recommend creating a backup of the Windows Registry in case anything goes wrong.
The instructions below are quite straightforward, and if you follow them strictly, you won’t face any issues. With that said, let’s get started and show you how to change the default printer via the Windows Registry.
- First of all, open the Run dialog box on your computer by pressing the Windows key + R on your keyboard.
- In the Run dialog box, type “regedit” and then press the Enter key on your keyboard.
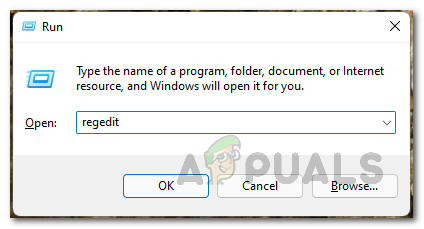
Opening up Windows Registry - In the follow-up User Access Control dialog box, click the Yes button.
- This will bring up the Windows Registry. In the address bar, copy and paste the following path, then hit Enter to navigate to the respective location automatically.
Computer\HKEY_CURRENT_USER\Software\Microsoft\Windows NT\CurrentVersion\Windows
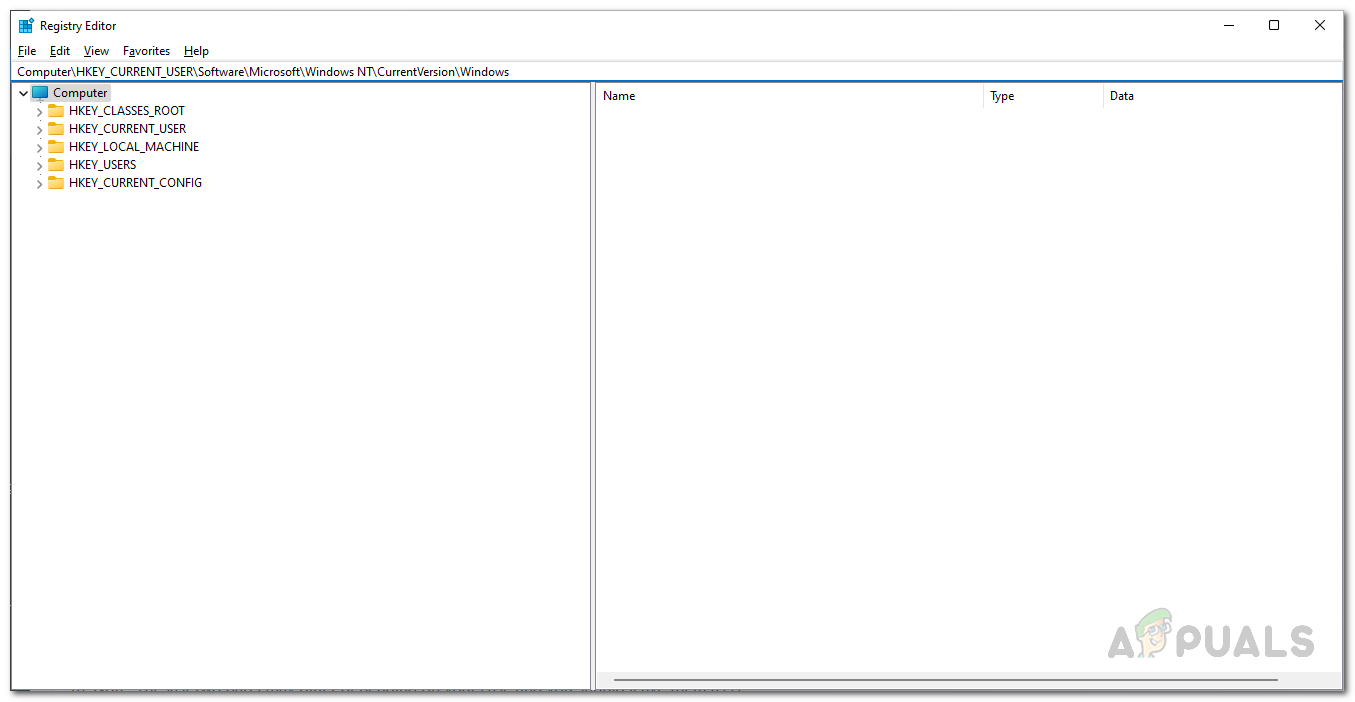
Navigating to Appropriate Path - Once you are there, on the right-hand side, double-click the device key.
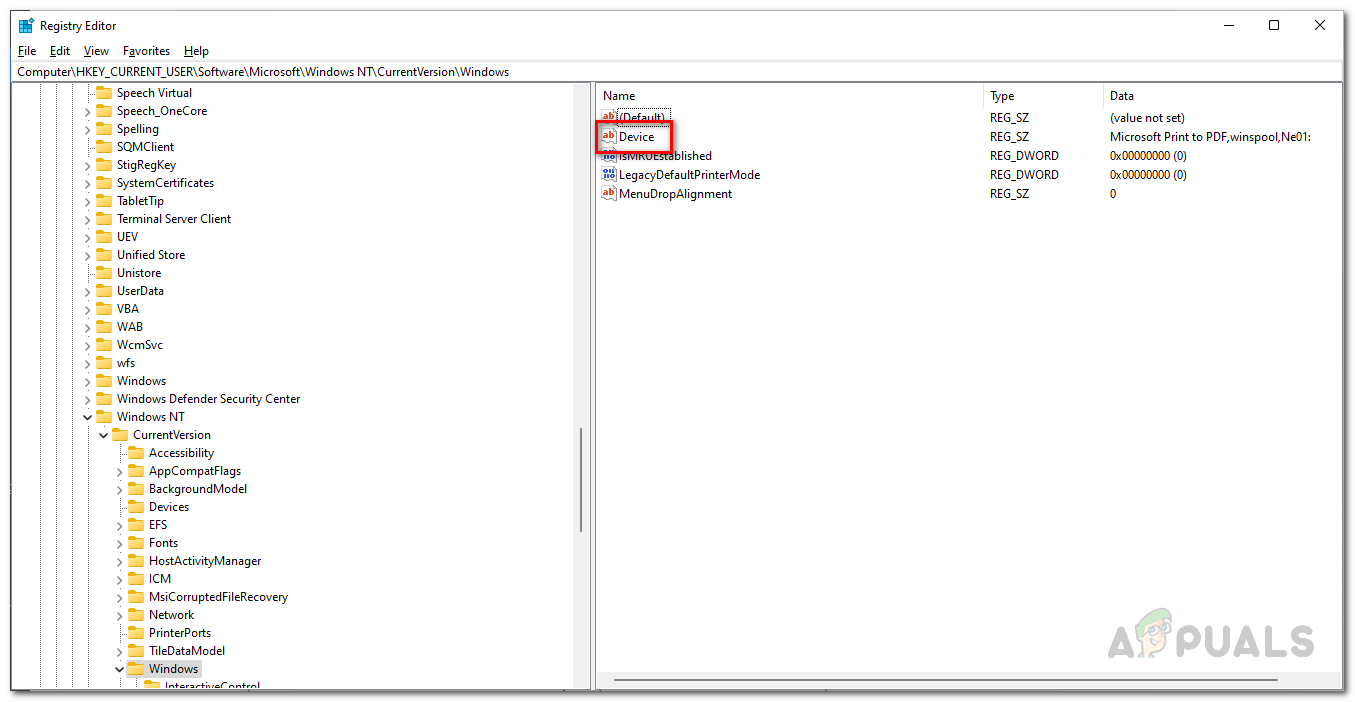
Opening up Device Key - In the dialog box that appears, you will need to change the Value data.
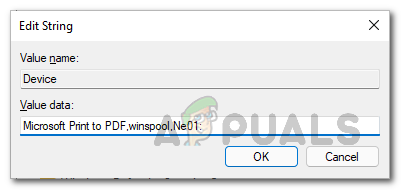
Changing Default Printer - There are three parts to the value data, each separated by a comma, and you will be changing only the first part, which is the name of your printer.
- Thus, change the first part to the name of the printer you wish to make the default.
- Once you are done, click “OK.” It should look something like this:
PrinterNAME,winspool,Ne01:

Changed Default Printer via Registry - Make sure to replace ‘PrinterNAME’ with the actual name of your printer. In addition, the last two parts may differ depending on your case, and you should leave them as is.
- In case you do not know the name of the printer that you wish to make the default, open the Control Panel by searching for it in the Start Menu.
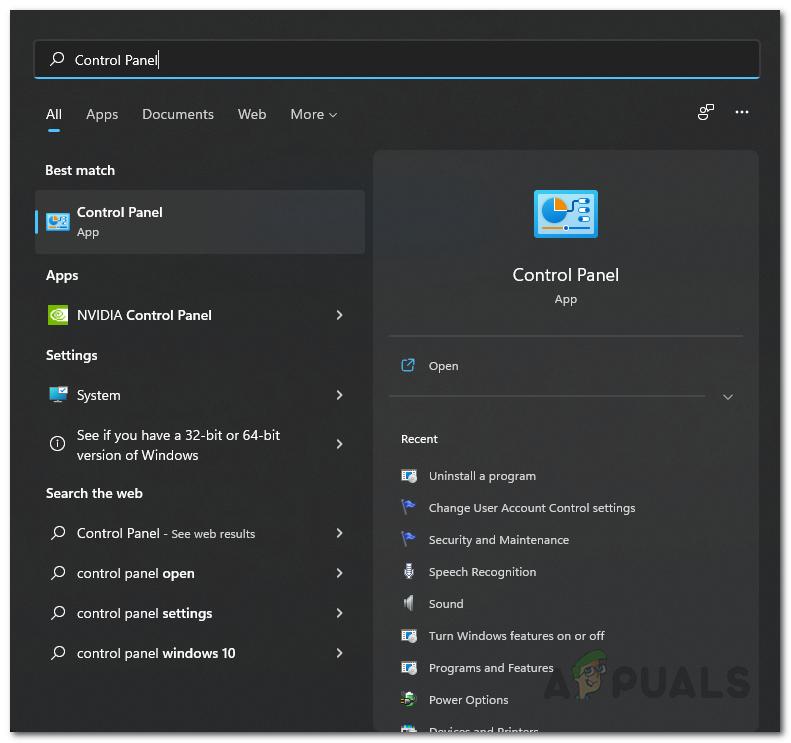
Opening up Control Panel - Then, in the Control Panel window, click on the Hardware and Sound option.
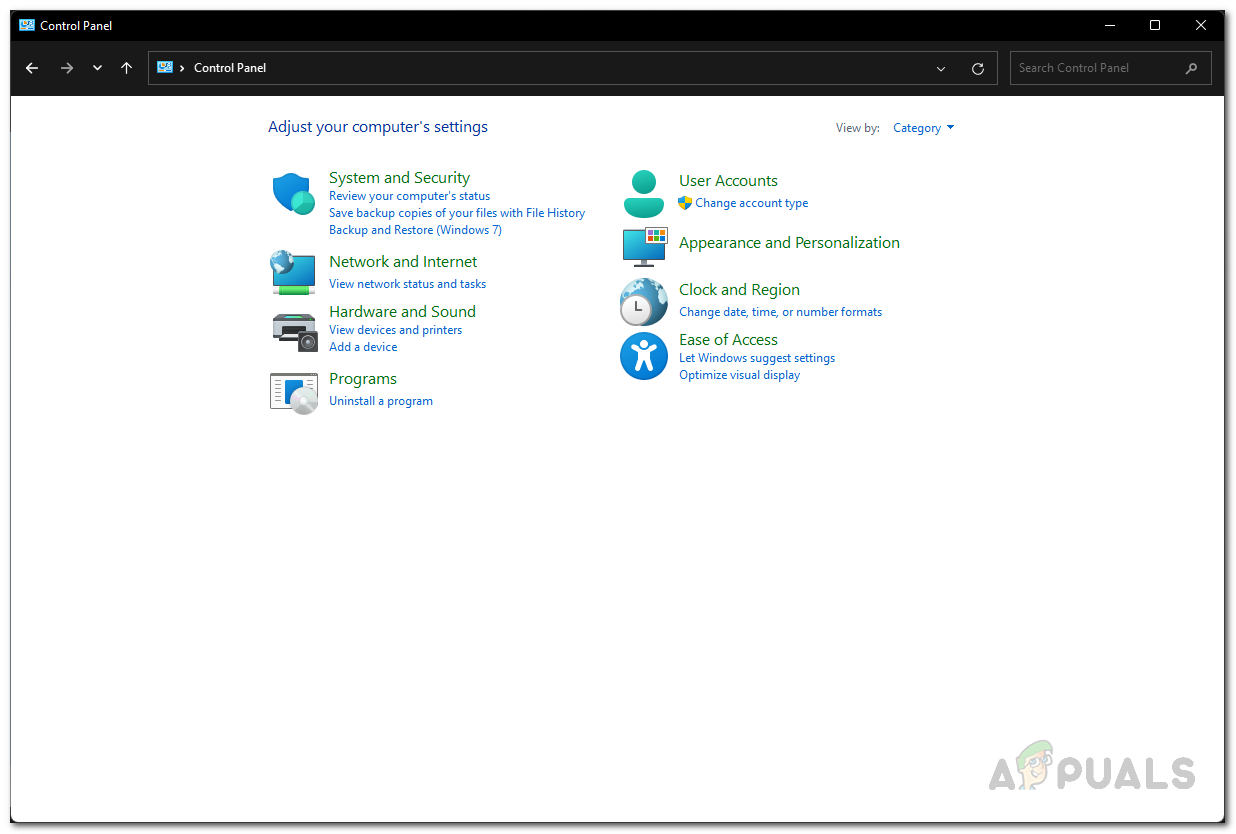
Control Panel - There, click on the “Devices and Printers” option provided.
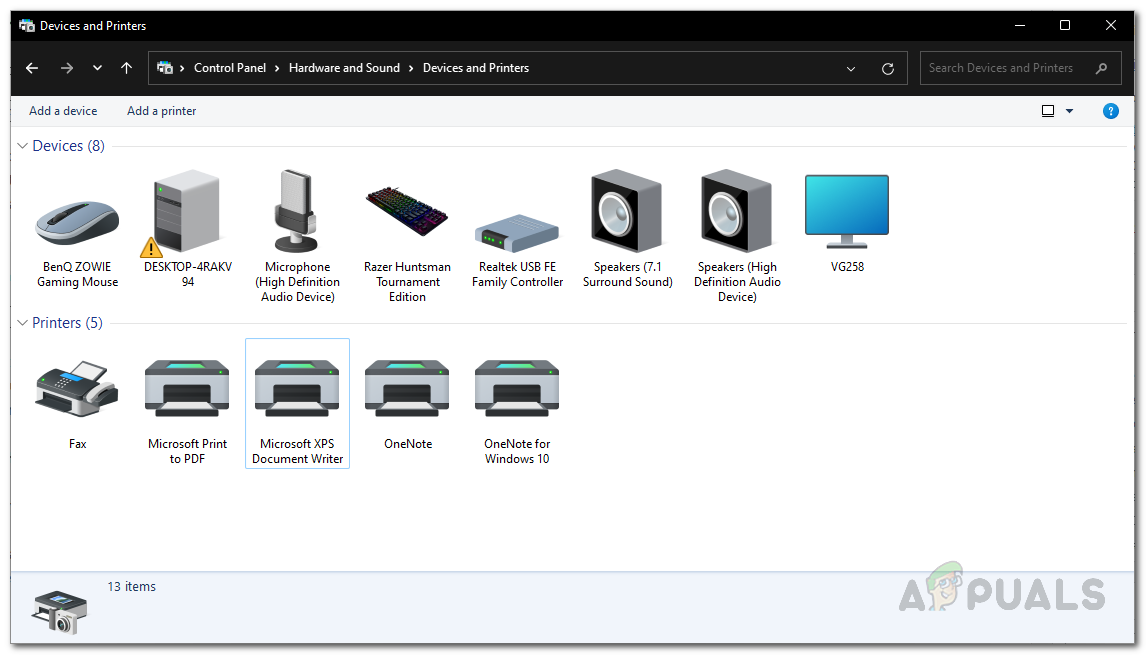
All Devices - Here, you will see all of the devices connected to your computer, including your printer. Provide this name in the Value data box above.
- Once you have finished with that, go ahead and restart your computer for the changes to take effect. After your computer boots up, the problem should be resolved.
Clear the printer’s folder.
If you are facing an issue in a network where a deleted printer keeps reappearing, you can solve the problem by clearing the printer’s folder residing on your computer. These are called ghost printers, and there are a few ways to remove them. One method is to empty the printer’s folder, as mentioned earlier. To accomplish this, you will first need to stop the Print Spooler service. Follow the instructions below to do this:
- First of all, press Windows key + R on your keyboard to open up the Run dialog box.
- Then, in the Run dialog box, type “services.msc” and press the Enter key.
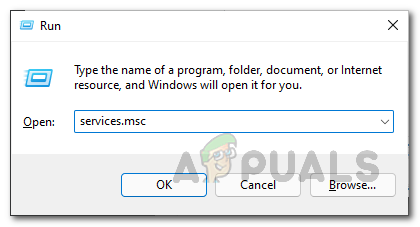
Opening up Services - The Services window will open up, listing all the services available on your system.
- From the list of services, search for the Print Spooler service. To make this task easier, press the “P” key on your keyboard, which will direct you to all the services starting with the specified letter.
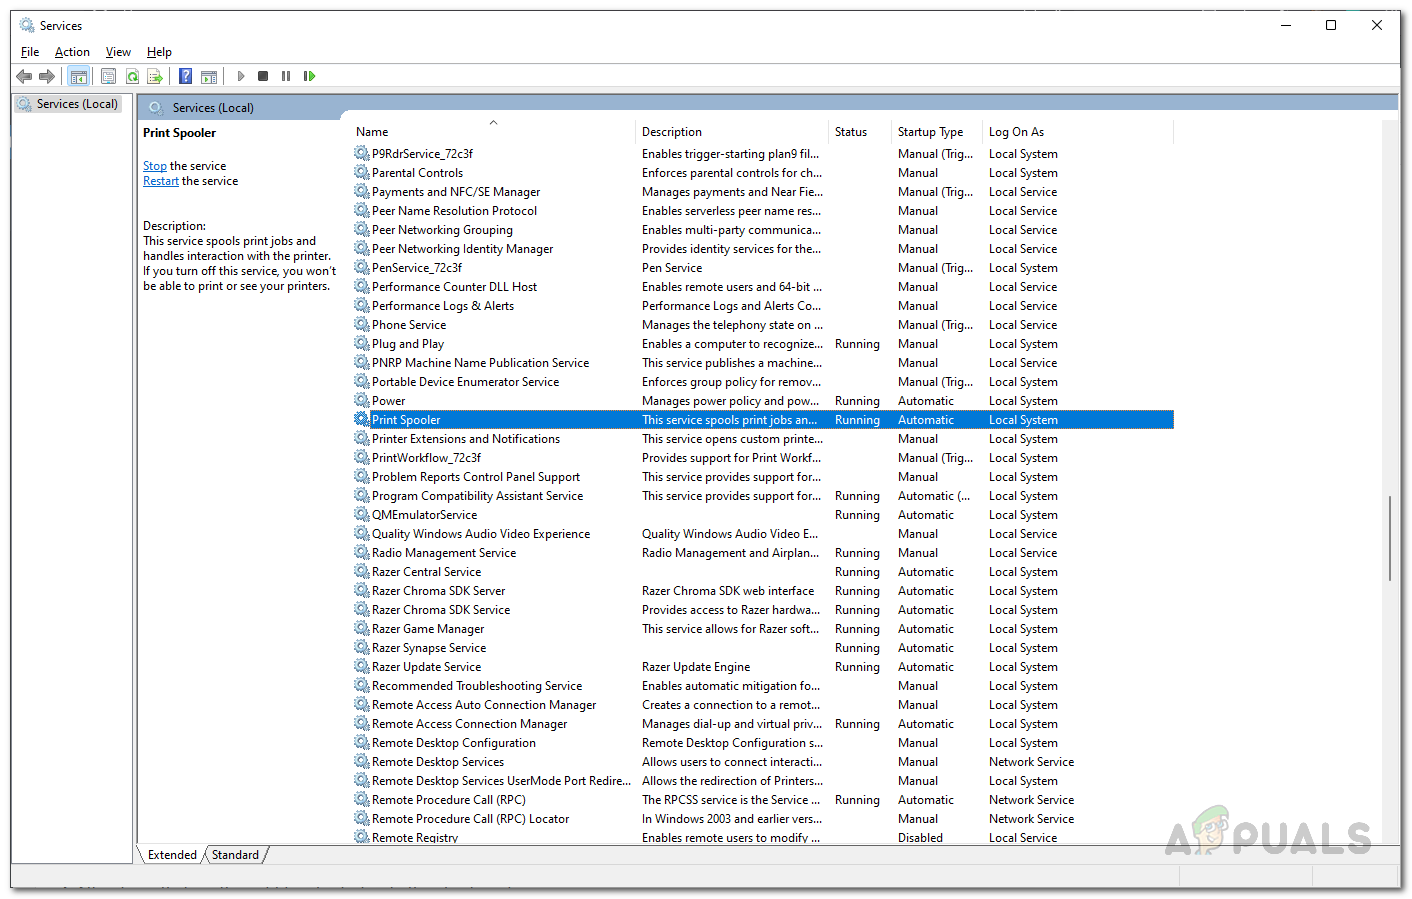
Locating Print Spooler Service - Once you have located the service, right-click on it and, from the drop-down menu, click the Stop button.
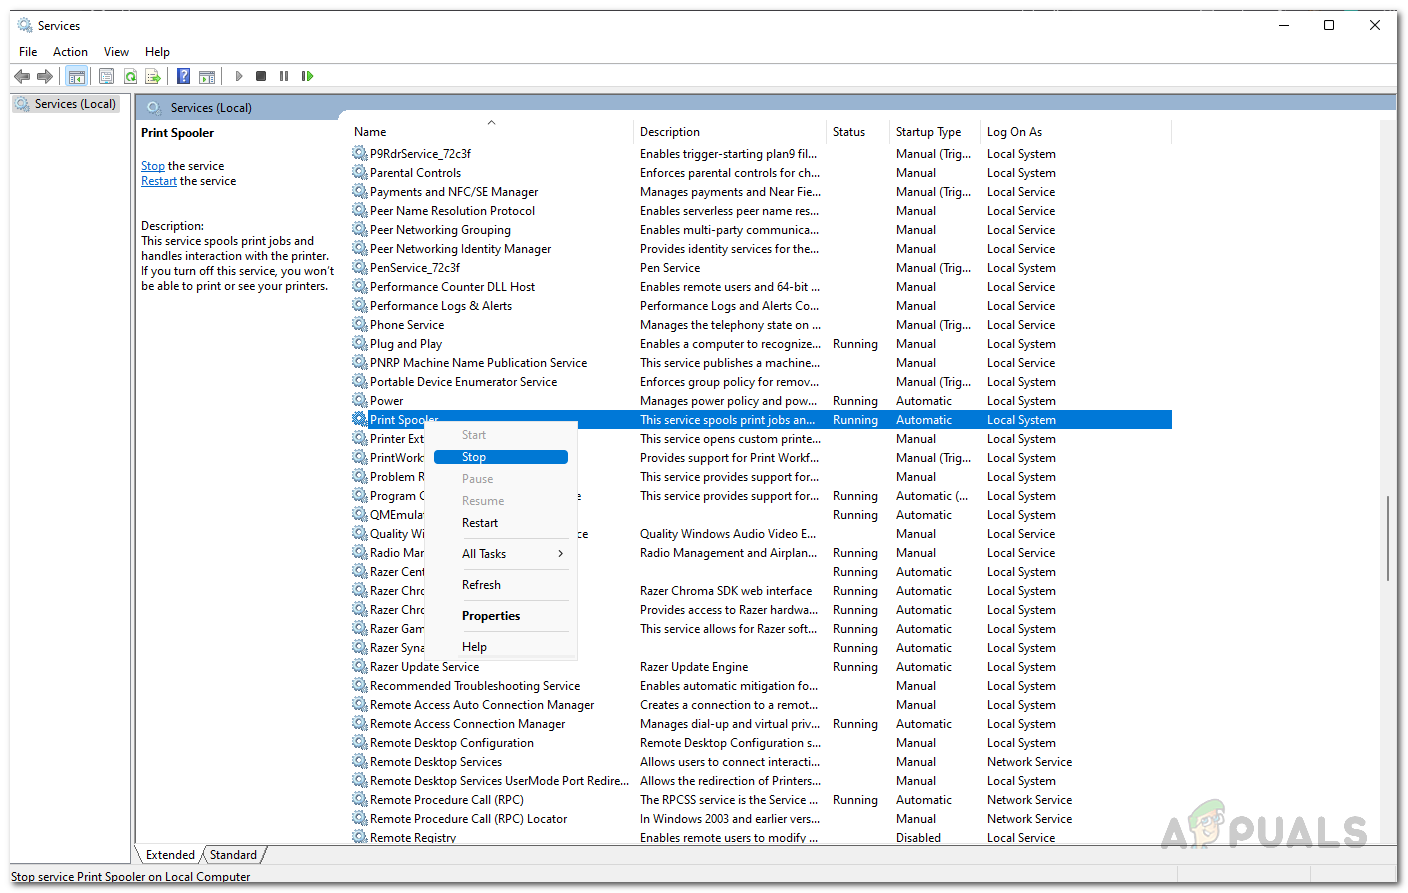
Stopping Print Spooler Service - After doing that, open up Windows Explorer.
- In the address bar, copy and paste the following path:
C:\Windows\System32\spool\PRINTERS
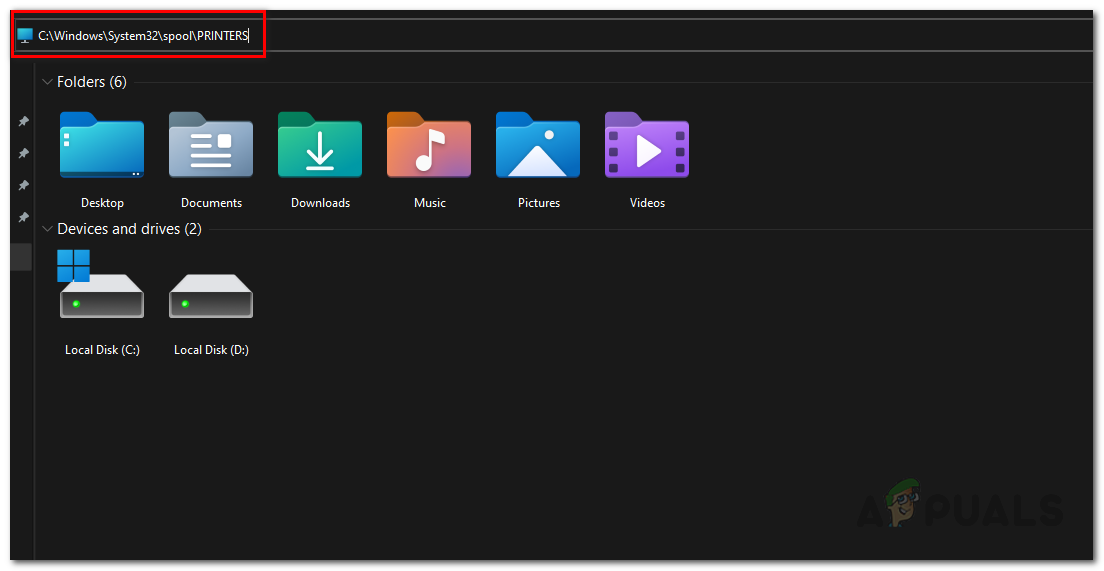
Navigating to Printers Folder - There, delete all the files and folders. Make sure that you have hidden files enabled so that you can clear them out as well.
- Once you have done that, open up the Services window again and start the Print Spooler service. The problem should now be resolved.
Use the Print Management.
As it turns out, another way to get rid of the ghost printer is by using the Print Management utility, which allows you to manage and handle all the printers connected to your computer, including any print servers and more. To use the Print Management utility, follow the instructions provided below:
- First of all, open the Start Menu and search for Print Management. Open it.
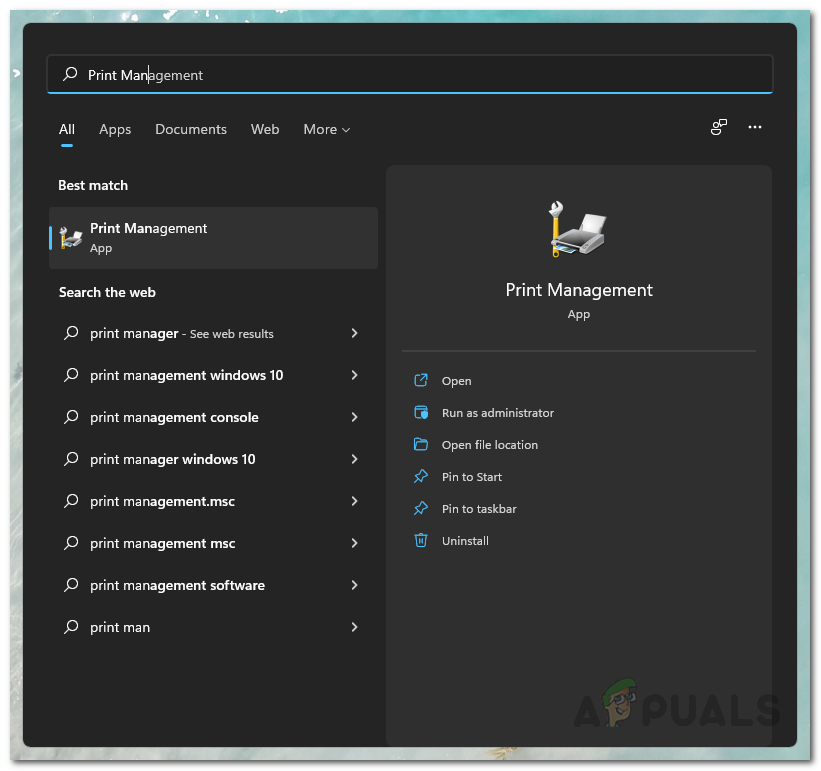
Opening up Print Management - On the left-hand side, expand the Custom Filters list.
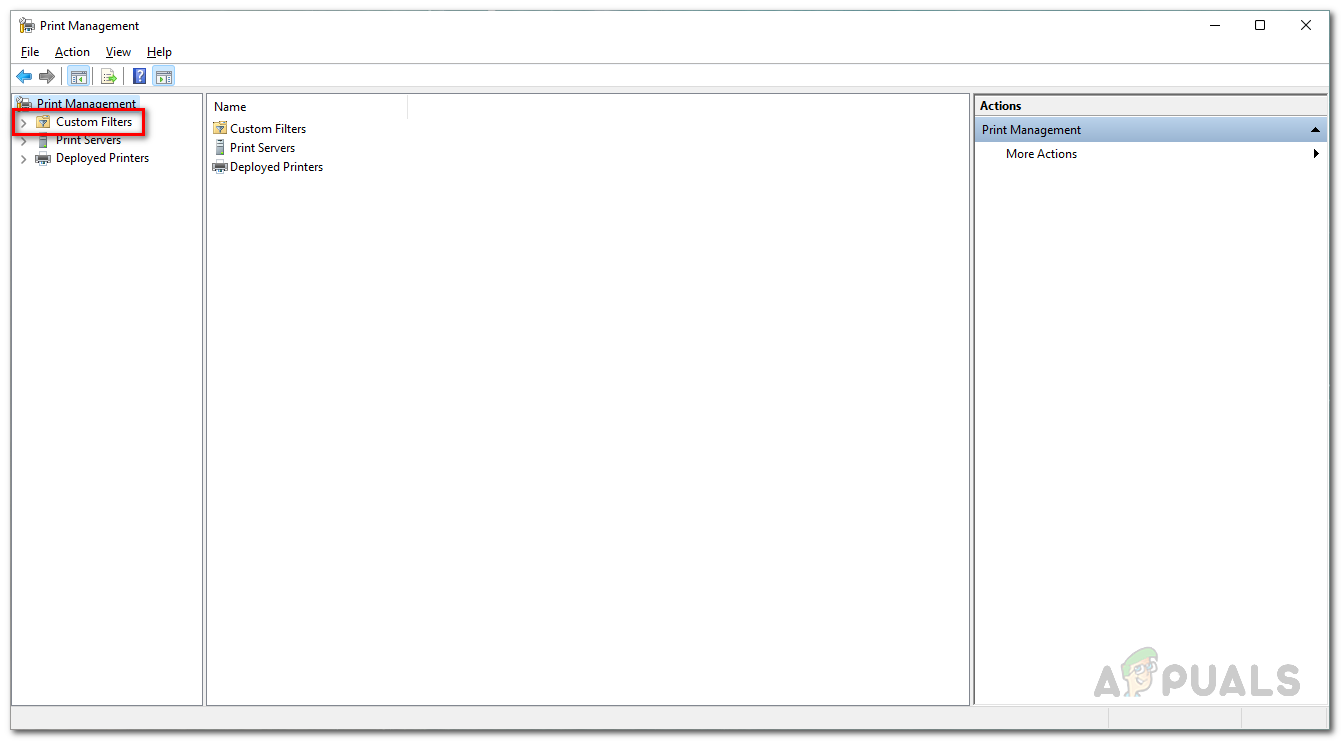
Expanding Custom Filters - Then, click on ‘All Printers.‘
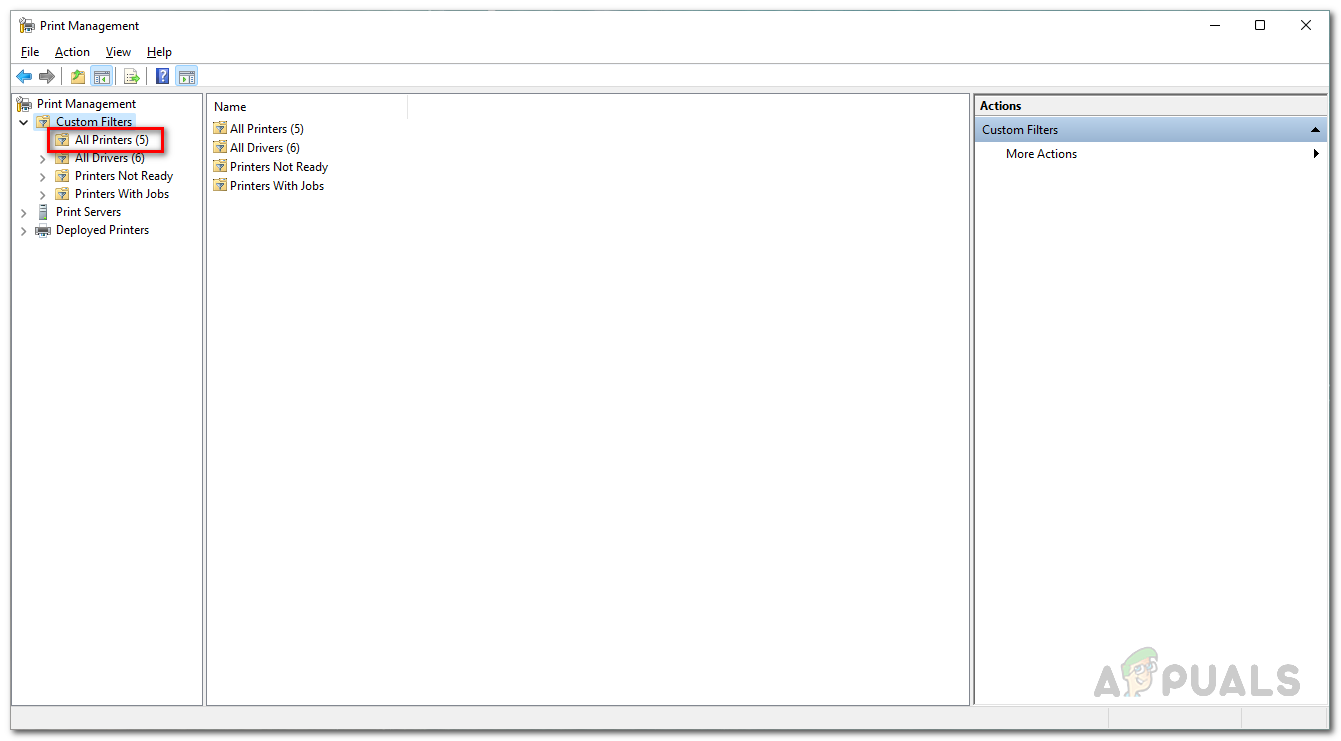
Opening up All Printers - After doing that, locate the ghost printer on the right-hand side.
- Right-click on it, and from the drop-down menu, click the Delete option.
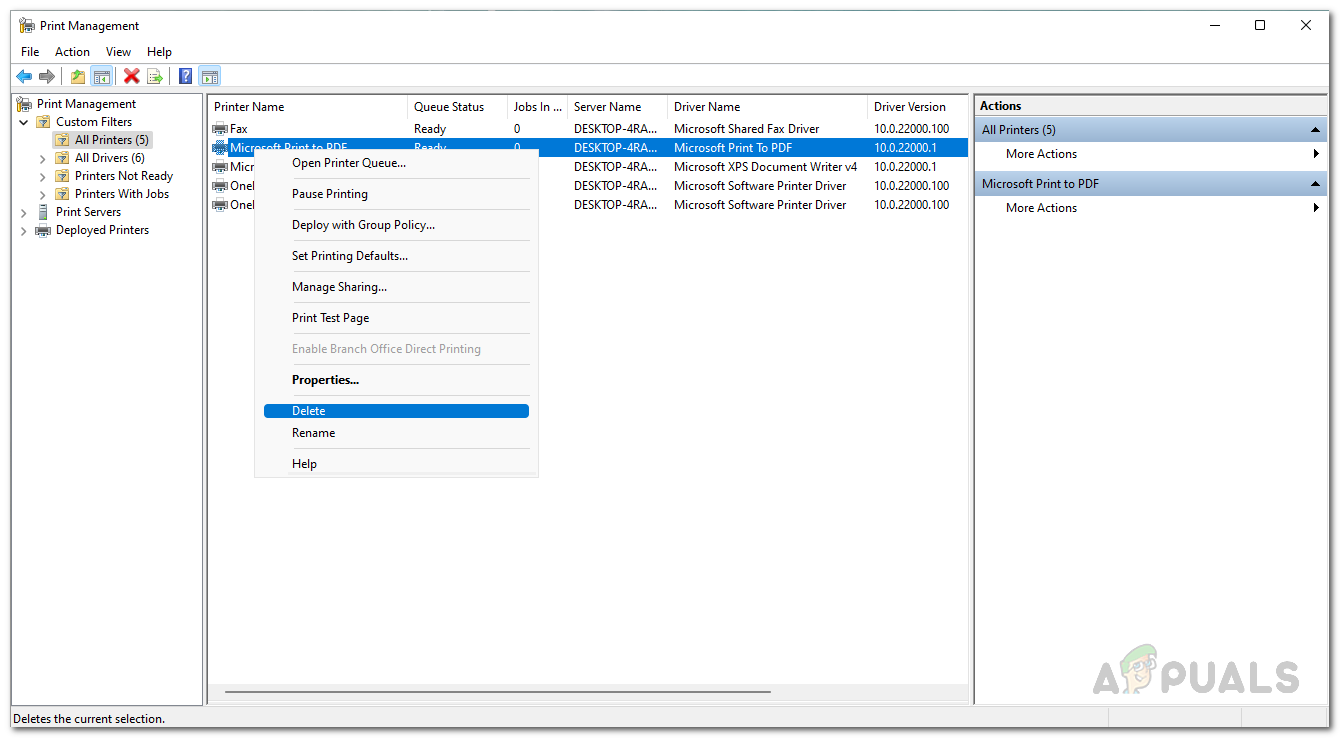
Deleting Ghost Printer - Once you have done that, the ghost printer will no longer appear.