How to Fix DX11 feature level 10.0 is required to run the engine?
The error DX11 feature level 10.0 is required to run the engine appears when the system does not possess the required Direct3D Hardware Feature Level necessary for the game engine. This message indicates that the application engine cannot utilize Direct3D Feature Level version 10.0.

If the latest version of DirectX is installed on the operating system, this error typically suggests that the GPU either does not meet the minimum system requirements or uses outdated driver software. Users will encounter this error when attempting to run games or other applications that require extensive graphical processing.
What is DirectX?
DirectX is a collection of application programming interfaces (APIs) developed by Microsoft for managing tasks related to game programming and multimedia on Microsoft-affiliated platforms. This collection provides DirectX-compatible programs with hardware-accelerated multimedia support.
DirectX enables a program, such as a game or other application, to recognize hardware capabilities and adjust its settings for optimal performance.
Numerous APIs within the DirectX infrastructure are considered fundamental and vital for everything from simple video playback to advanced 3D video games.
DirectX Runtime vs. Direct3D Hardware Feature Level
Many users confuse the DirectX runtime environment with the Direct3D Hardware Feature Level. The DirectX Runtime refers to the version of DirectX that the operating system’s software can handle. On the other hand, the Direct3D Hardware Feature Level indicates the support provided by your video hardware (GPU).
Therefore, having the latest DirectX runtime installed does not guarantee that your hardware can support Direct3D Hardware Feature Level 10.0. Even if your version of Windows is configured to work with the most current DirectX APIs, your GPU may not support the requisite feature levels. This issue is common with older or integrated GPUs.
How to Determine if DirectX is Installed
On Windows 10, DirectX 12.0 Runtime is automatically included with the operating system, assuming that you have updated Windows to the most recent version. However, to support the new DirectX APIs, your GPU card must also be compatible.
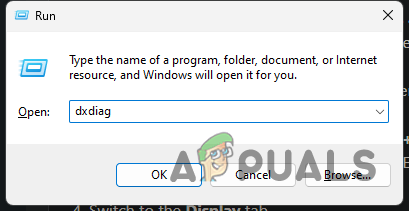
- To check which version of DirectX your operating system supports, run the DirectX Diagnostic Tool (dxdiag). Access this tool in any version of Windows by opening the Run box (Windows key + R), typing dxdiag, and pressing Enter.
- Your DirectX runtime version can be found under System Information on the System tab.

- To determine if your GPU supports the required feature levels, navigate to the Display tab under Drivers, and check which Feature Levels your graphics card supports.

- If you notice that feature level 12_0 (12.0) does not appear among the entries within the DirectX Diagnostic Tool, one of the following issues may be present:
- The graphics card (GPU) is using outdated drivers that need updating. Without drivers that instruct the graphics hardware on utilizing the respective feature level, it will not appear in the DirectX Diagnostic Tool.
- The graphics card does not support Feature Level 10.0. If this is the case, the solution would be to invest in a new GPU.
DirectX is backward compatible, meaning if you have DirectX 12, previous runtime distributions should already exist on your system, which is also valid for DirectX 11 and DirectX 10.
However, certain older games may require outdated DirectX APIs, which have become outdated on Windows 10 and are exclusively available in DirectX 9.0c or earlier versions. You will need to install the particular distribution needed to run such games. While the latest version of DirectX is 12.0, most games still primarily use features that were established with the DirectX 10 runtime.
Fixing the DX11 Feature Level 10.0 is required to run the engine Error
If the DirectX Diagnostic tool indicates that your system supports DirectX 10 runtime or newer and your GPU is compatible with the required Direct3D feature level, you should possess the necessary components to run the application. Nonetheless, if the error persists despite satisfying the requirements, the solutions in this article should help you resolve the issue.
Please proceed with each method sequentially until you find a solution that works for you.
Note: The methods below are appropriate only if you are certain that your GPU supports Feature Level 10.0. Before attempting any fixes, it is recommended that you research your graphics card specifications to verify its support for Direct3D Feature Level 10.0.
1. Run the Application with the Dedicated GPU
On laptops or notebooks that feature both a dedicated GPU and an integrated solution, the system usually decides which GPU to use based on the resource demands of the application engine. This decision can be influenced by a battery-saving utility—if set to battery-saving mode, the system might use the integrated GPU because it consumes less power.
This can be resolved by setting the utility to Performance mode or by removing the software altogether.
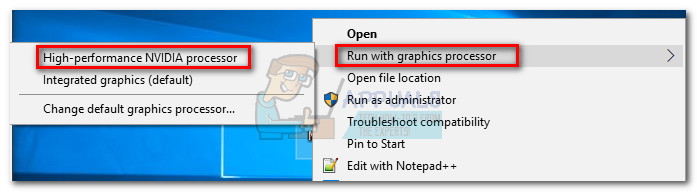
- Alternatively, if you prefer not to uninstall the battery manager, you can prompt your dedicated GPU by right-clicking on the game shortcut and selecting Run with graphics processor. Then, choose your dedicated card and test if the app starts without the error.
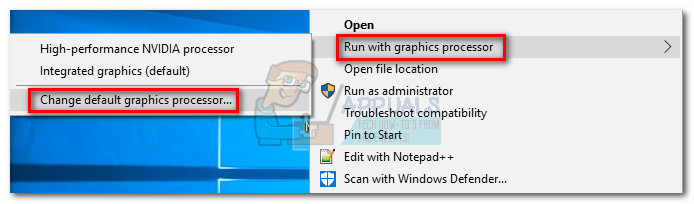
- If the application successfully starts, you can make this a permanent setting for the program by navigating to this option again and clicking Change default graphics processor within your GPU’s Control Panel settings.
2. Update Your Graphics Card Driver
To resolve the error, start by updating your graphics card drivers. While there are multiple methods to do this, the best approach depends on the manufacturer of your video card.
For newer Windows versions, your system should automatically install the necessary software driver for your graphics card. However, even if a driver is provided automatically, it might not be the most recent version. A possible cause for the error could be that your GPU does not recognize how to use Feature Level 10.0 despite being capable of doing so.
You can resolve this by installing the latest appropriate graphics driver. There’s a universal method available, but it may not be as reliable as following the manufacturer’s specific installation instructions.
Installing Graphics Driver via Device Manager
Below, you’ll find the steps for updating your graphics driver via Device Manager. It’s a good starting point, but it is dependant on Windows Update to locate the relevant driver online. If this approach does not update your GPU driver, proceed with the manufacturer-specific guides that follow.
- Press Windows key + R, type devmgmt.msc, and hit Enter to open Device Manager.

- Expand the Display Adapters section. Right-click on the graphics driver and select Update Driver (Update Driver Software).
Note: There may be two entries under Display Adapters, often seen in laptops and notebooks with both integrated and dedicated graphics cards. Update the dedicated card as it is more powerful and suitable for running demanding applications and games. - Choose Search automatically for updated driver software, and allow Windows to search online for drivers. If a newer driver is found, install it and reboot your system when prompted. Should Windows indicate that you have the latest driver, proceed with the following manufacturer-specific guidelines. If a new driver was installed, verify if the error persists when launching the application.
Users with Nvidia Graphics Cards
For those with Nvidia GeForce dedicated graphics cards, there are two methods for updating the drivers. The most convenient option is to download GeForce Experience and allow the software to identify your GPU and install the correct drivers automatically. This tool saves you the effort of manually searching for the latest driver version.
If you’re unable to use GeForce Experience due to compatibility issues with your motherboard, follow the steps below to manually download the latest graphics card driver:
- Browse to the official Nvidia download page (here), select your Product Type, Product Series, and Product. Make sure that you choose the correct Operating System and then click the Search button.
- Download and begin installation of the recommended Nvidia driver.
- Once the installation is finished, reboot your system and check if the issue has been resolved.
Users with ATI Graphics Cards
AMD Radeon Software is the ATI equivalent to Nvidia’s GeForce Experience. You can use this utility to automatically keep your graphics card drivers up to date. Apart from updating your drivers, this software optimizes game settings for an ideal playing experience based on your system’s specifications.
- Go to the official AMD download page (here).
- In the Manually Select Your Driver section, choose your product type, product family, and model. Then, select your operating system and click on Display Results.
Note: For an even easier process, you can also click Download Now under Automatically Detect and Install Your Driver. This option installs an AMD utility that scans your system and applies the latest driver. - After the driver installation completes, restart your computer to see if the error has been corrected.
Users with Integrated Intel Graphics
Most of the time, updating the driver through Device Manager (as described in the first section of this method) should be successful. However, if you encounter difficulties, you can download the driver from Intel’s Download Center (here).

3. Repairing the DirectX Runtime Environment
While DirectX API files rarely become corrupt, it can happen. Unfortunately, uninstalling DirectX effectively is not practical. DirectX runtime 11.3 and 12, included with Windows 10, are maintained through Windows Update, and there is no standalone package for these versions of DirectX.
Nevertheless, you can repair all DirectX files (with the exception of DX12) by utilizing the DirectX End-User Runtime Web Installer and the DirectX Redist (June 2010).
- Begin by downloading the DirectX End-User Runtime Web Installer (here). Right-click the executable and choose Run as administrator to grant the necessary privileges. Then, follow the on-screen instructions to ensure all DirectX 9.0c files are intact.

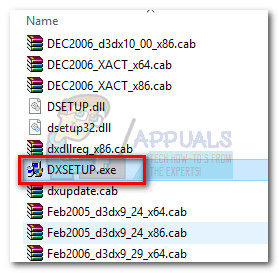
- Next, download the DirectX Redist (June 2010) from this link (here). Extract the DirectX SDK to an accessible location. In the extracted files, run the DXSetup executable and follow the prompts to reinstall the DirectX components.
- Following the installation, restart your computer to determine if the problem has been resolved.