Fix: Destiny Error Code Termite
The abundance of different error codes which may occur while you are playing Destiny or Destiny 2 makes it somewhat difficult for users to assess each problem, especially because of the fact that Bungie has yet to investigate these errors completely.
The Termite error code usually affects users who are playing Destiny on a PC and the error itself usually appears when users need to login to the game client. There are several successful solutions for this problem so make sure you try the all out before giving up. Chances are that Bungie is going to fix it since the error originally started to appear after a new patch.
Solution 1: Use the Scan and Repair Tool
Bungie has informed its users that the best way to solve this problem is to use their Scan and Repair tool which can be accessed from the Battle.net app. Most users who were dealing with this issue reported that the tool actually helped them solve their issue and that is why recommend you try this solution before doing anything else.
- Launch the Battle.net app from where you usually access it on your PC and navigate to the Destiny 2 pane.
- Click on Options and locate the Scan and Repair option.
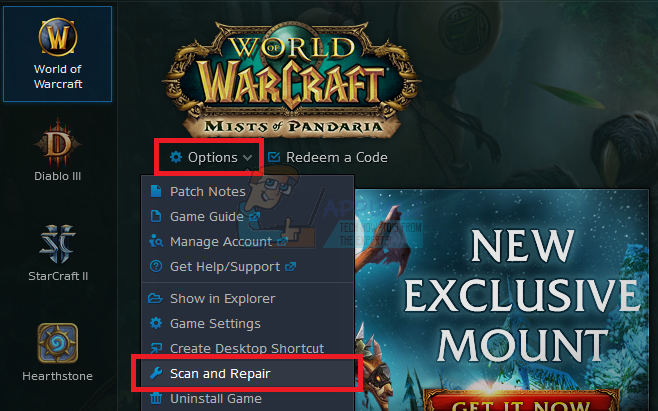
- Click on it and confirm your choice by clicking on Begin Scan.
- It’s quite possible that some files will have to be redownloaded and installed which will occur and the end of the Scan and Repair process.
- After the process is over, you should relaunch Destiny 2 and try again to see if the error code still appears.
Note: If this does not fix your issue, try deleting the Destiny2.exe file and repeating the entire process again. The file is usually located under the “C:\ Program Files \ Destiny 2 \ Destiny 2” folder unless you chose a different folder to store the game in.
Solution 2: Restore Licenses
This option will successfully restore the licenses of all games, add-ons, and DLCs you have under the possession of your PSN account so make sure you try this solution as it’s quite simply and it has actually helped quite a few users deal with their Destiny error codes, especially error code Termite.
- Turn on your PS4 and navigate to the Settings area.
- Click on PlayStation Network >> Account Management >> Restore License.
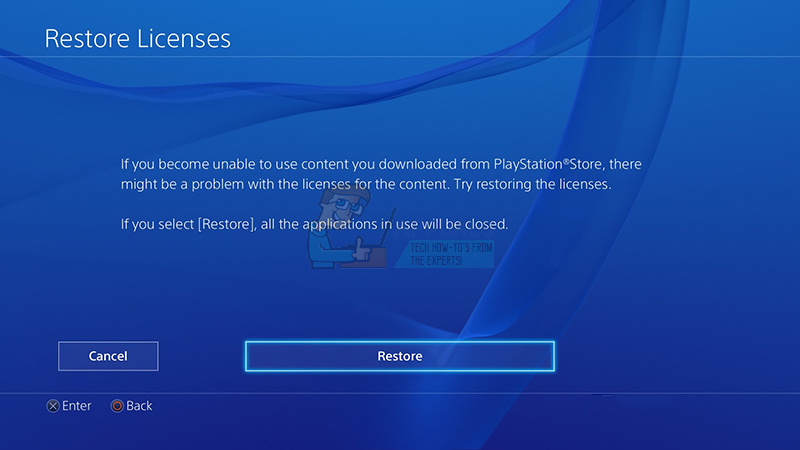
- Check to see if the error code Termite still appears while you enjoy Destiny 2.
Solution 3: Restart Your Console
This solution has helped quite a few people deal with their Termite error code and this solution is quite a general method for fixing almost all Xbox-related issue. Naturally, this method can only be applied to users playing Destiny on Xbox.
However, make sure all of your games are synced online and backed up since this process may end up deleting them from your local Xbox One memory. There are two ways to delete the cache on Xbox One and reset your console completely:
- Press and hold the power button at the front of the Xbox console until it shuts down completely.
- Unplug the power brick from the back of the Xbox. Press and hold the power button on the Xbox several times to make sure there is no remaining power and this will actually clean the cache.
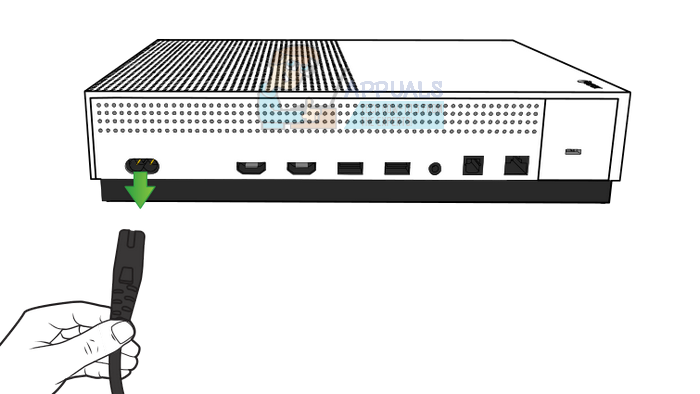
- Plug in the power brick and wait for the light located on the power brick to change its color from white to orange.
- Turn the Xbox back on as you would do normally and check to see if the Termite error code still appears when you start Destiny or Destiny 2.
Alternative for Xbox One:
- Navigate to your Xbox One settings and click on Network >> Advanced Settings.
- Scroll down to Alternate Mac Address option and choose the Clear option which appears.
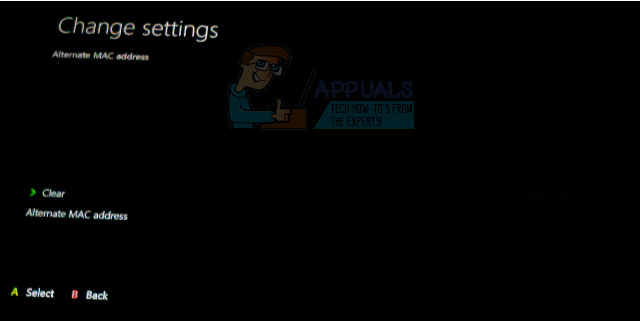
- You will be prompted with a choice to really do this as your console will be restarted. Respond affirmatively and your cache should now be cleared. Open Destiny or Destiny 2 after the console has restarted and check to see if the Termite error code still appears.
If you are using a PlayStation 4 to play Destiny, make sure you follow the instructions below to hard reset your PlayStation 4 since PS4 does not possess an option to clear the cache:
- Completely turn off the PlayStation 4.
- Once the console is completely shut down, unplug the power cord from the back of the console.
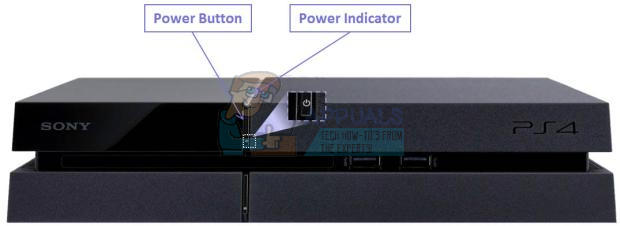
- Let the console stay unplugged for at least a couple of minutes.
- Plug the power cord back into the PS4 and turn it on the way you normally do.
Solution 4: Reinstall the Game
Reinstalling the game usually fixes these types of issues even though the whole problem can sometimes be quite lengthy. Several users have suggested that uninstalling and reinstalling works so make sure you try it out as soon as possible.
Reinstalling the Game on PlayStation 4:
- Turn on the PlayStation 4 system and sign into your PSN profile.
- Press up on the D-pad and navigate to the Settings menu and click on the System Storage Management menu.

- Click on the Applications menu and press the Options button when Destiny is highlighted. Click on Delete >> Select All and press Delete to uninstall the game.
- Select OK to confirm deletion of the selected application and the game will be completely removed from the hard drive.
Clearing the console cache after uninstalling Destiny helps ensure that there are no temporary files stored in the consoles cache that could impact the new installation of Destiny. Here are the recommended steps on clearing the console cache:
- Completely turn off the PlayStation 4.
- Once the console is completely shut down, unplug the power cord from the back of the console.
- Let the console stay unplugged for at least a couple of minutes.
- Plug the power cord back into the PS4 and turn it on the way you normally do.
Reinstalling the game on PS4 can be done using the physical game disc:
- Turn on the PlayStation 4 system and sign into your PSN profile.
- Insert the original game disc you used to install the game in the first place and the installation should begin automatically. You can follow the progress on the progress bar.
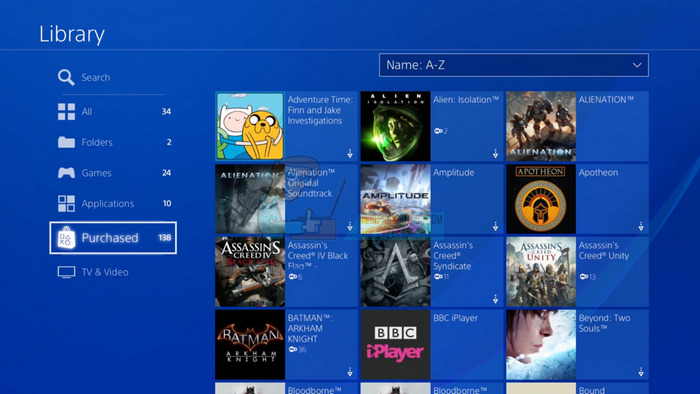
You can also install the game by downloading it using your PlayStation and your Internet connection. It’s recommended to use a wired connection while downloading a game this way.
- Turn on the PlayStation 4 system and sign into your PSN profile.
- Open Library item from the home screen, locate Destiny from the list and select the Download button.
- A progress bar will appear while the game is being installed on the console hard drive
Reinstalling the Game on Xbox One:
- Turn on the Xbox One console and sign into the desired Xbox One profile.
- On the Xbox Home menu window, select My Games and Apps, press games and highlight Destiny.
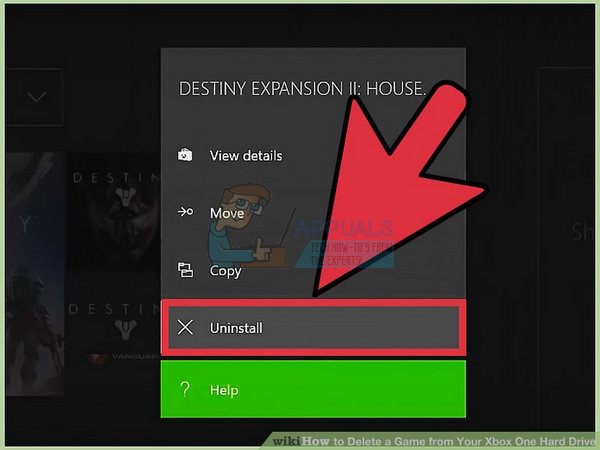
- Tap the Menu button and choose the Manage Game option >> Uninstall All. Click on Uninstall again to confirm your choice on the next screen.
- After a moment, the game will be removed from the hard drive.
Clearing the console cache after deleting Destiny helps ensure that there are no temporary files stored in the cache that could affect the new installation of Destiny. Here are the recommended steps on clearing the console cache:
- Press and hold the power button at the front of the Xbox console until it shuts down completely.
- Unplug the power brick from the back of the Xbox. Press and hold the power button on the Xbox several times to make sure there is no remaining power and this will actually clean the cache.
Reinstalling the game on Xbox One can be done using the physical game disc:
- Turn on the Xbox One console and sign into the desired Xbox One profile.
- Insert the game disc into the disc drive and the installation process should begin automatically. You will be able to follow the progress until the game is installed.
You can also install the game by downloading it using your PlayStation and your Internet connection. It’s recommended to use a wired connection while downloading a game this way.
- Turn on the Xbox One console and sign into the desired Xbox One profile.
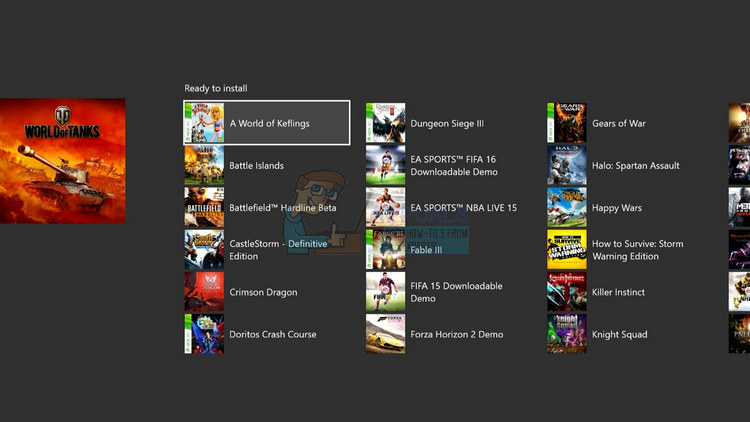
- Navigate to the Ready to Install section of the menu, locate Destiny and select the Install option.
- Download and install progress can be viewed in the Queue section of the menu
- A progress bar will appear while the game is being installed on the console hard drive