Fix: Dell Printer not Printing Black
Digital documents have gained a lot of mileage over paper. However, paper still maintains a certain appeal to how it presents information in a tangible format that can be viewed anywhere without the need of electricity. Printers are therefore available in several different technologies including plotters, dot-matrix, laser printers and inkjet printers. This article will dwell on the Dell inkjet printers and the case where the black ink does not print despite the cartridge having ink.
There has been a complaint on the Dell V515w and the V313w inkjet printers not printing black ink. Despite setting up the Dell inkjet printer and installing the drivers correctly, the printer does not seem to output the black ink. However, the red/magenta yellow and blue/cyan colour cartridges output their colours perfectly. The quality of the print might be low since the black ink is needed to create the perfect mixture for vivid colours. This can be the case with other Dell printers like the V313w, V515w, V715w, P513w and P713W which use the inkjet technology.
Why your printer is not printing black ink
The reason for the black ink not appearing on your page can be caused by several things. One simple reason can be that you are out of black ink. The other reason is that the black ink cartridge is not seating squarely on its slot hence making dispensing the ink difficult. The other reason could be that the slot through which the ink jets out has been clogged. The sticker that protects the mechanism might be still intact or ink might have dried around it or any other sought of clogging preventing ejection of the ink.
One way of troubleshooting is to print a test page from the printer; in the Search box on the taskbar, type Devices and Printers > Touch or click Devices and Printers (Control panel) > Touch and hold or right-click your printer > Touch or click Printer Properties (Be sure to select Printer Properties and not Properties, or you will not see a Print Test Page button) > Under the General tab, Touch or click Print Test Page. If the test page prints successfully then there might be an issue rendering your printout.

If you are sure that your cartridge has ink and you have installed the correct drivers, then follow the steps below to further troubleshoot your printer and bring it back to track. This will work for V313w, V515w, V715w, P513w and P713W Dell Printers as well since they use the same technology and more or less the same features.
Method 1: Reseat your black cartridge
Reseating the cartridge properly will ensure contact with the printing electronics is made properly and hence dispensing the colours. Make sure that the black cartridge is sitting in the black cartridge slot (same to the other colours).
- Open the printer by raising the scanner bed. Press the tab at the back of the black ink cartridge.

- Press the release tab at the back of the ink cartridge to release the cartridge and then pull it out.
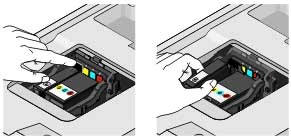
- Reinsert the cartridge and push it down and inwards until it snaps into place then retry printing your page.
Method 2: Clean and align the cartridge
This is not a manual clean as you would imagine. By forcing the ink out of the cartridge using more pressure than a normal print would, any clog on or in the cartridge will be cleared. To clean your cartridge you will need to install the CD software your Dell printer came with. You can also get them by entering your service tag here or specifically for the Dell V515w printer here.
- Click Start.
- Click All Programs or Programs and select the Dell Printers folder then Click ‘Dell Printer Home’.
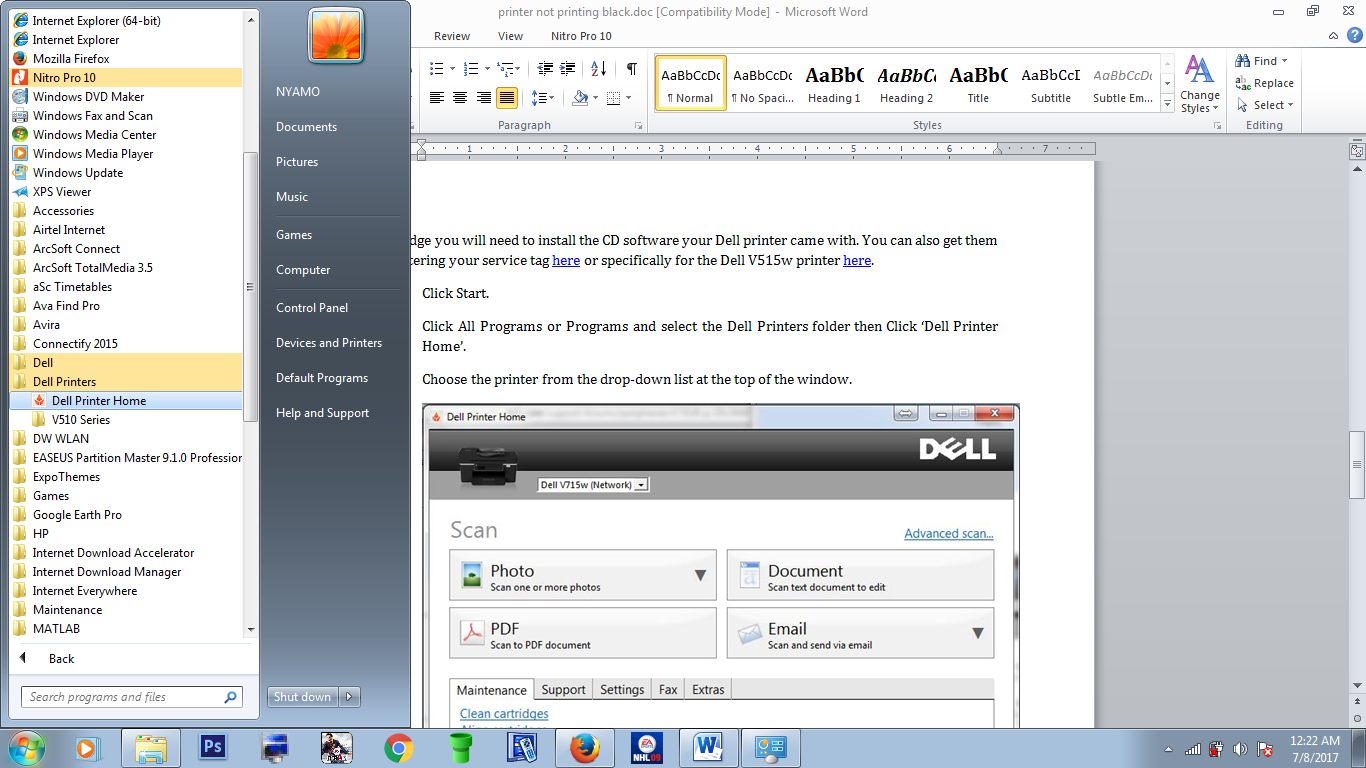
- Choose the printer from the drop-down list at the top of the window.
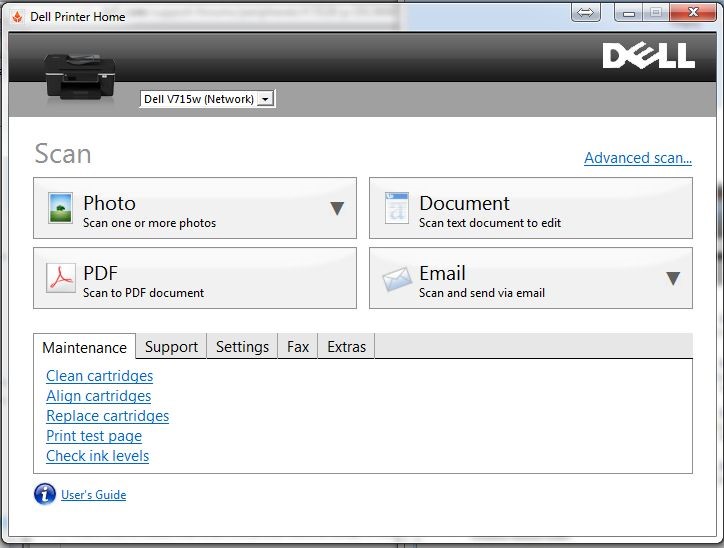
- Click the Maintenance tab and click Deep Clean Cartridges. If necessary run the Deep Clean a second time.
- Click Align Cartridges.
- Now try to print any page and check if issue is resolved.
The Deep Clean process uses a significant amount of ink so it is not recommended to run it more than twice but sometimes it might be necessary. You can also use a soft lint clothe to clean the heads of your cartridge and cartridge slot. The methods mentioned above.