Fix: Currently, This Hardware Device is not Connected to the Computer (Code 45)
Described below is the error message a computer running on the Windows Operating System spits out when it fails to recognize a hardware device connected to it. In most cases, this error message is seen when a hardware device that was previously connected to a Windows computer is disconnected and then connected to it again, at which point the system, for some reason, does not recognize the device anymore. This error can also be seen in the General tab of the Properties of the affected hardware device’s listing in Device Manager.
“Currently, this hardware device is not connected to the computer (Code 45)”
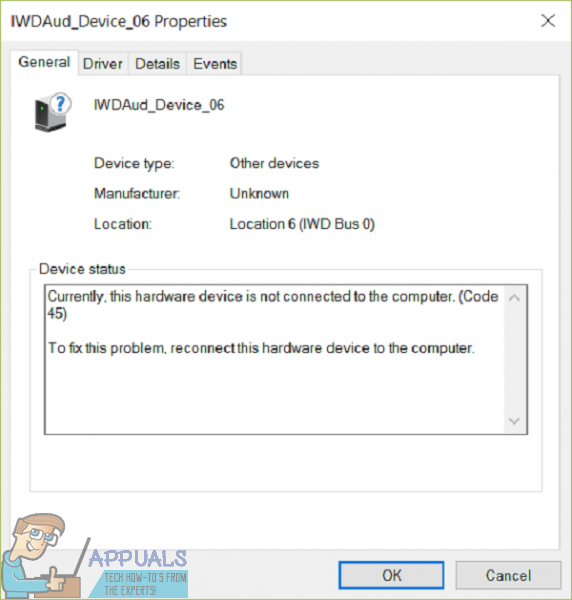
If this error message shows up for a hardware device, that specific hardware device doesn’t work even if it is connected to the affected computer. This can certainly be quite the annoyance. Thankfully, though, the following are some of the most effective solutions that users affected by this problem can use to try and resolve it:
Solution 1: Make sure the physical connection between the device and computer is secure
First and foremost, you need to make sure the physical connection between the affected hardware device and the affected computer is completely secure. The connection needs to be secure and properly seated on both ends, and if ensuring that’s the case is not enough to get rid of this problem, you should move on to trying and fixing it on the software side of things.
Solution 2: Run an SFC scan
The System File Checker utility is a built-in Windows utility designed to scan computers running on the Windows Operating System for corrupted or otherwise damaged system files. If you run an SFC scan and the utility finds damaged system files, it is aptly equipped to either repair the system files or replace them with undamaged, cached versions. Running an SFC scan is another excellent course of action if you’re trying to resolve this specific problem.
Solution 3: Run CHKDSK on your hard drive
CHKDSK is a Windows utility capable of checking for and repairing hard disk corruption. If the damage inflicted on your computer’s hard drive is what is causing this problem for you, running CHKDSK on your hard drive might just be enough to get the job done. To run CHKDSK on your hard drive, you need to:
- Open the Start Menu.
- Search for “cmd“.
- Right-click on the search result titled cmd and click on Run as an administrator to launch an elevated Command Prompt that has administrative privileges.
- Type the following into the elevated Command Prompt and press Enter:
chkdsk /f

- The elevated Command Prompt might inform you that CHKDSK can only run upon a reboot and ask you if you’d like to do that. If it does so, simply type y into the elevated Command Prompt and press Enter to confirm the action, close the elevated Command Prompt and restart the computer.
- Wait for CHKDSK to scan your hard drive and perform any necessary repairs.
When CHKDSK is done working its magic, check to see if the problem has been resolved.
Solution 4: Run the Hardware and Devices troubleshooter
- Open the Start Menu.
- Search for “troubleshooting“.
- Click on the search result titled Troubleshooting.
- Click on Hardware and Sound.
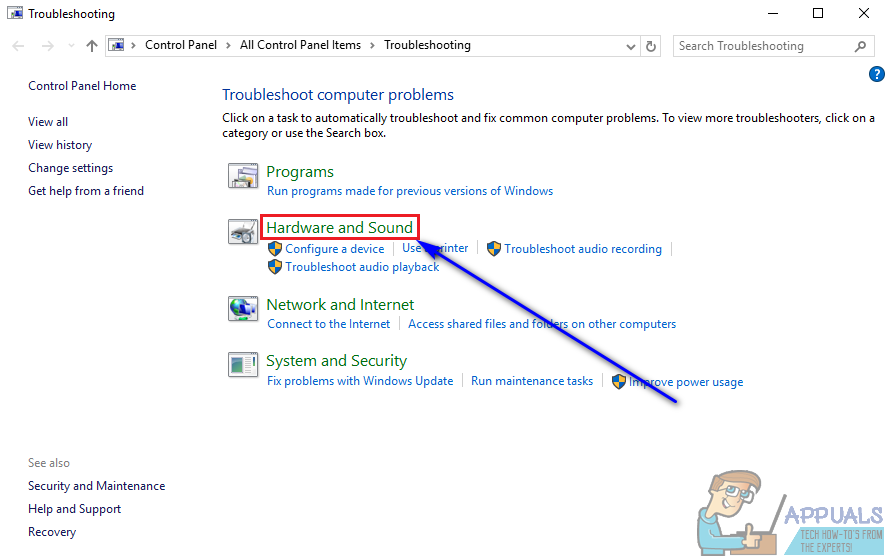
- Click on Hardware and Devices.

- In the troubleshooting wizard, click on Next and follow the onscreen instructions, all the way through to the end of the troubleshooter.
- After going through the entirety of the troubleshooter, check to see whether or not the problem has been resolved.
Solution 5: Update the drivers for the affected device
You can also try to fix this problem by updating the drivers for the hardware device affected by this problem. To make sure the latest available drivers for the affected hardware device are installed on your computer, you need to:
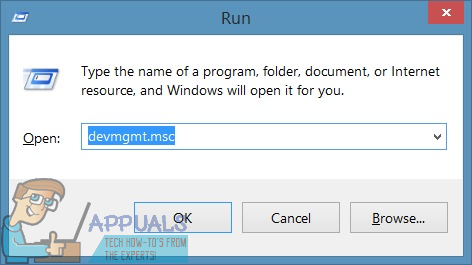
- Press the Windows logo key + R to open a Run dialog.
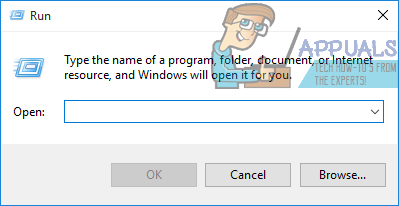
- Type “devmgmt.msc” into the Run dialog and press Enter to open the Device Manager.
- In the Device Manager, double-click on the section which the affected hardware device resides in to expand it.
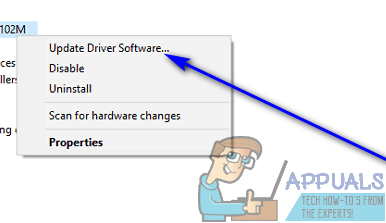
- Locate the affected hardware device, right-click on it and click on “Update Driver Software…” option.
- Click on Search automatically for updated driver software.
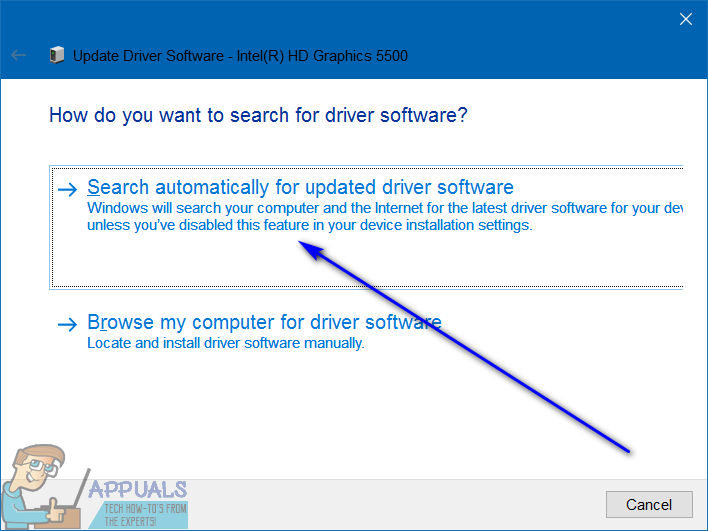
- Wait for Windows to automatically search for available updates for the affected hardware device’s drivers.
- If Windows finds any available updated driver software, it will automatically download and install it and all you’ll have to do is wait for it to do so. If Windows does not find any available updated driver software, however, simply move on to a different solution.
- Once the drivers for the affected hardware device have been updated, close the Device Manager and restart your computer.
- When the computer boots up, check to see if the issue still persists.
Solution 6: Uninstall and then reinstall the drivers for the affected device
Another solution that many Windows users affected by this problem have found to be quite effective is uninstalling and then reinstalling the drivers for the hardware device affected by the problem. Uninstalling and reinstalling the device drivers for a specific hardware device is not only completely safe, even though it may sound a bit frightening, but is also a pretty straightforward process. To use this solution to try and fix this issue for you, you need to:
- Press the Windows logo key + R to open a Run dialog.
- Type “devmgmt.msc” into the Run dialog and press Enter to open the Device Manager.
- In the Device Manager, double-click on the section which the affected hardware device resides in to expand it.
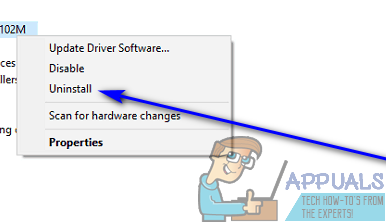
- Locate the affected hardware device, right-click on it and click on Uninstall.
- Click on OK.
- Once the drivers have been uninstalled, close the Device Manager and restart your computer.
- When the computer boots up, download and install the latest available drivers for the affected hardware device from the Downloads section of the official website of the device’s manufacturer.
Solution 7: Check to see if the hardware device is faulty or dead
If absolutely none of the wide array of solutions listed and described above have managed to get rid of this error message for you, the problem might just lie with the affected hardware device itself. If the hardware device in question has become faulty or has died altogether, Windows won’t be able to interface with it, and will instead spit out an error message such as this one. In addition, if the hardware device itself is no longer of any use, noting you do on the software side of things will provide any relief. The recommended course of action, in this case, is to get the hardware device in question checked to see if it really is faulty or dead, and if it turns out that it is, get a replacement for it. Getting a replacement for the affected hardware device should absolutely resolve this problem for you.
Solution 8: Repair PC Registry
Some users have reported that repairing the Windows Registry has proved to be an efficient remedy for this problem. It can simply be repaired just by checking for file corruption in the system. Microsoft’s file system checker can be used to perform this task. It checks for the coherence of the file and fixes any problem if found.
Therefore, in this step, we will be performing an automated repair on our computer that should automatically scan our computer and get rid of any Registry related errors and another device/file corruption issues and get it back to working again. In order to do that:
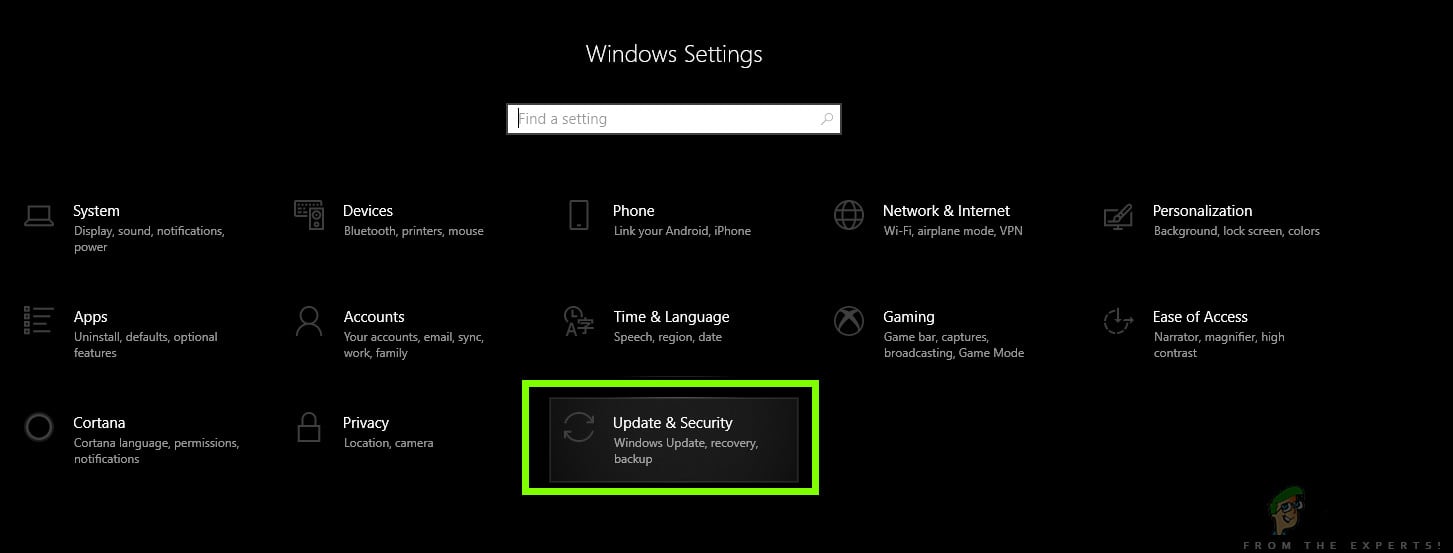
- Press “Windows” + “I” to open the Window Settings.
- In the settings, click on the “Update and Security” option and select the “Recovery” option from the left side.
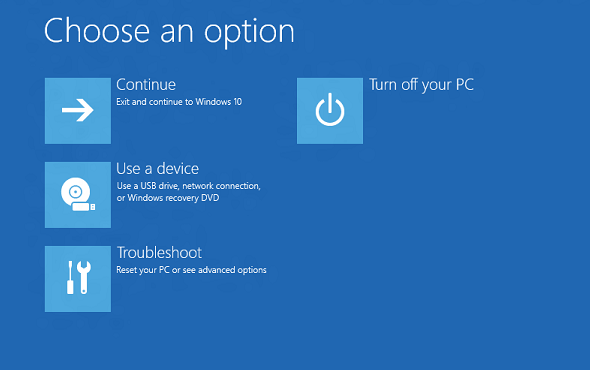
Settings/Updates and Security - In the Recovery option, select the “Advanced Startup” button and then click on the “Restart now” option.
- The computer should now reboot and it should come up to a choose an option screen.
- On this screen, click on the “Troubleshoot” option and then select the “Advanced Options” button.
Troubleshoot - In the Advanced Options screen, select the “Automated Repair” option.
- If the screen prompts you to log in to your computer, enter your credentials, and press the “Login” button.
- The Automated repair should now start repairing your registry and it will start scanning your computer comprehensively therefore, be patient until this process is completed.
- After the automated repair ends, check to see if the issue still persists.
Solution 9: Check for OS Updates
One of the very first things you need to do if you’re affected by this problem and are trying to sort this issue is making sure that Windows is up to date and that any and all available updates for your computer have been installed. In order to do so, you need to:
- Open Windows Update by clicking the Start button in the lower-left corner. In the search box, type Update, and then, in the list of results, click either “Windows Update” or “Check for updates” option.
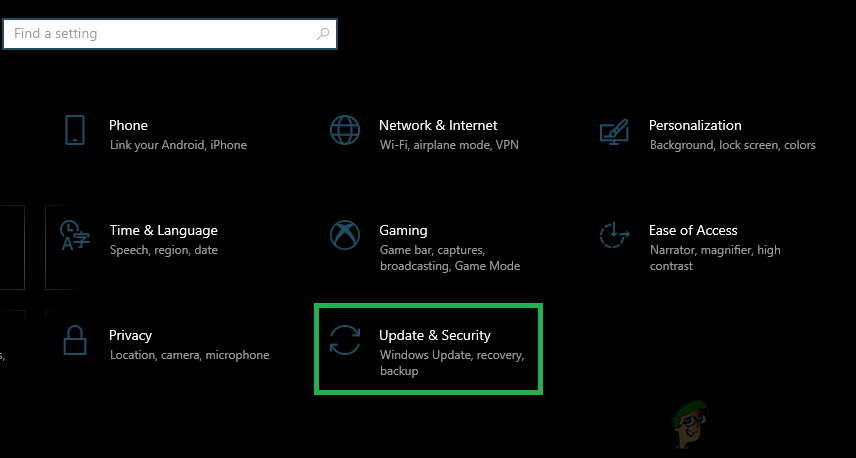
- Alternatively, press “Windows” + “I” to open the windows settings.
- In the settings, click on the “Update and Security” option and from the left side, select the “Windows Update” button.
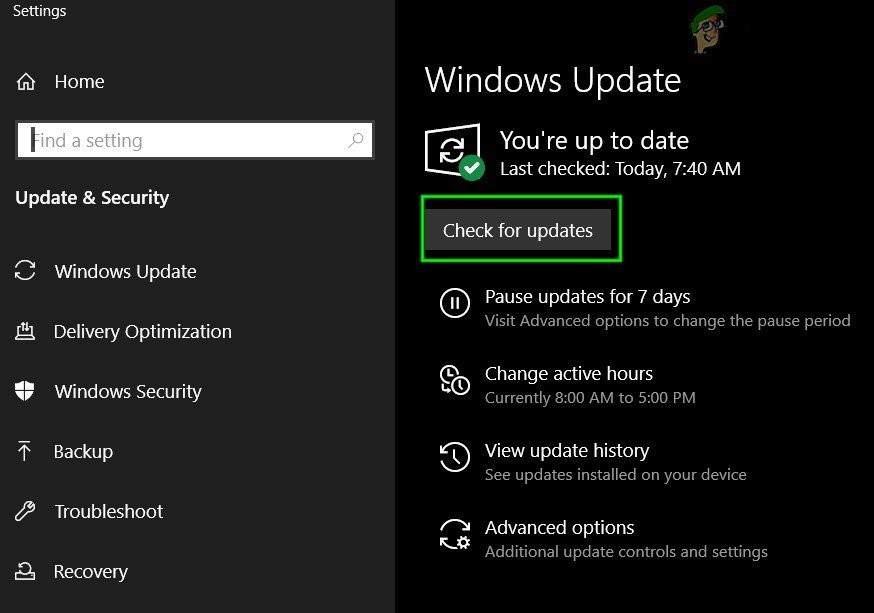
Clicking on the “Update and Security” option - Click the “Check for updates” button and then wait while Windows looks for the latest updates for your computer
Check For Updates in Windows Update - If you see a message telling you that important updates are available, or telling you to review important updates, click the message to view and select the important updates to download or install
- In the list, click the important updates for more information. Select the checkboxes for any updates that you want to install and click on the Install updates option.
- The system should now automatically start installing updates on your computer.
- Check to see if by installing the latest updates, you are able to fix this issue.
Solution 10: Update Realtek Sound Driver
It is possible in some cases, that this error is being triggered on your computer because you haven’t properly installed the Realtek Sound Driver and that is missing the latest updates. Therefore, in this step, we will be installing this driver manually from the app management window.
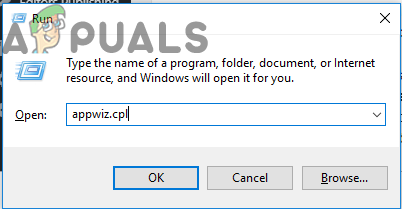
- Press “Windows” + “R” to open the Run prompt.
- Inside the Run prompt, type in “Appwiz.cpl” and press “Enter” to open the application management window.
- In the list of installed applications on your computer, right-click on the Realtek application and select the “Uninstall” option to remove it from your computer.
Typing in “appwiz.cpl” in the Run prompt - Follow through with the on-screen instructions to completely remove the application from your computer.
- Again, press “Windows” + “R” to open Run, type in “Devmgmt.msc” and press “Enter” to launch the device management panel.
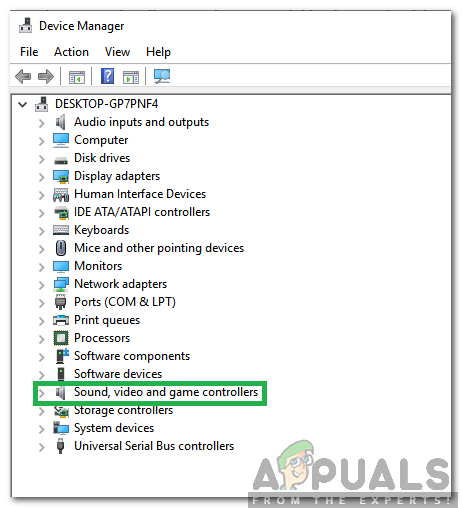
- Inside this panel, double click on the “Sound, Video, and game Controllers” dropdown to expand it and right-click on the “Realtek Drivers”.
Double clicking on the “Sound, Video and Game Controllers” option - Click on the “Update Drivers” option from the list to queue a driver update for the Realtek Drivers.
- There should be two different options displayed on the screen, select the “Browse my Computer for Driver Software” to install the drivers from the local Windows Files.
- On the next screen, click on the “Let me Pick from a list of Available drivers” and a list will appear containing the Realtek driver and the Microsoft generic driver.
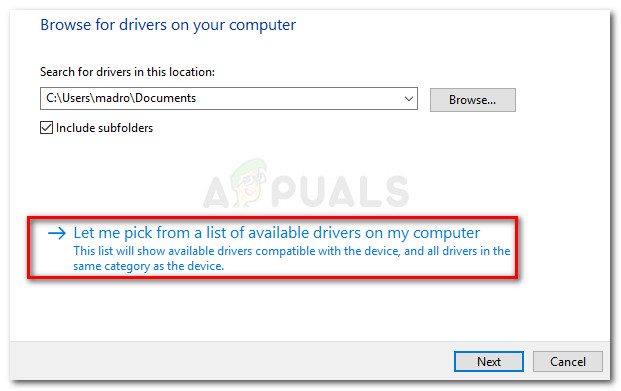
Let me pick from a list of available drivers - Select the Microsoft driver (High Definition Audio Device) and OK. You will get a warning about compatibility but ignore it.
- This will start to install the generic Microsoft driver on your computer.
- After installing that driver, go the following path on your computer.
C:\Program Files\Realtek\Audio\HDA
- Right-click on a blank spot inside this folder and click on the “Properties” option.
- In the next window, click on the “Security” tab and then select the “Edit” button to be able to edit permissions.
- Select “SYSTEM” from the “Group or user names” list and then in the “Permissions for System” list, check the “Deny” box for the “Full Control” option.

Checking the “Deny” option for the Full Control entry in System - This should deny full control to the driver and it is known to fix this issue on many users’ computers.
- Select “Apply” to save your changes and then click on “OK” to get out of the window.
- Check to see if doing so has fixed the issue on your computer.