Fix: ASUS AURA not Working
ASUS motherboards have RBG features that are pretty much common in all of the high-end motherboards out there. They provide customizable behavior of the RGB lights on your motherboard and even let you sync other LED strips attached to it.
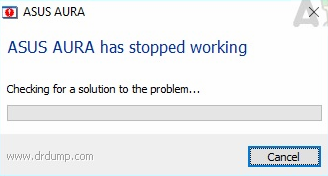
ASUS also has a software named AURA which allows users to personalize their RGB lights and set them according to their own preference. There are a number of different preset modes already present with new ones easier to add. Since its initial release, there have been many reports by users that their AURA software doesn’t work as expected. It either does not open or gets into a not responding state.
What causes ASUS AURA not to Work?
Since this application is tied to the controls on the motherboard, there are several reasons why your AURA application might not work. Some of the reasons are but not limited to:
- Installation files: We saw numerous reports from users that the installation files of the AURA software either got corrupt or became unusable.
- Installation path: It seems that the installation path for the AURA software needs to be kept the default one otherwise the software fails to load.
- Conflict from other Lighting software: It is a well-known fact that other lighting software such as software of Corsair etc. cause issues and conflict with ASUS AURA.
- Strip plugged in incorrectly: The strip you are using might not be plugged in properly onto the motherboard. This will in effect not connect your LEDs and hence cause problems.
- AURA version: There might also be the possibility that the version of AURA software might not be compatible with your hardware.
- Fast Startup: Fast startup helps in booting your operating system real quick but it is also known to clash with AURA.
Before we move on to the solutions, make sure that your motherboard is not physically damaged including the RGB pins on it. Also, make sure that you are logged in as an administrator.
Solution 1: Disabling Fast Startup
The Fast Startup feature in Windows is meant to reduce the boot time whenever you start your computer up again. It stores the initial configuration of your computer when it is shutting down so when it boots again, it quickly fetches the system state and boots up without consuming much time. It tries to give a feel of an ‘SSD’ when in reality you have an HDD. We will try disabling this feature and see if this does the trick.
- Press Windows + R and type “control panel” in the box and press Enter to open the control panel.
- Once in the control panel, select Large icons and click on Power Options.
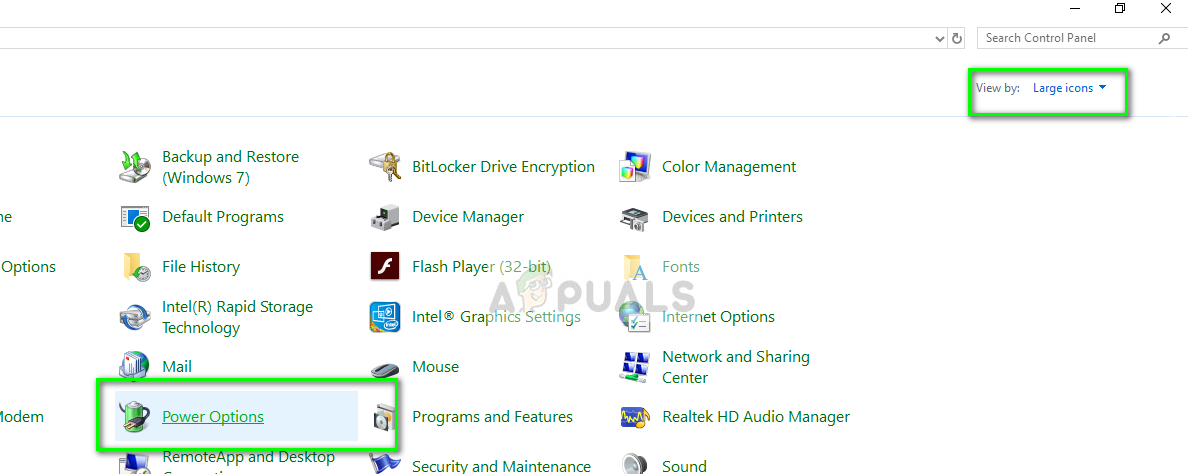
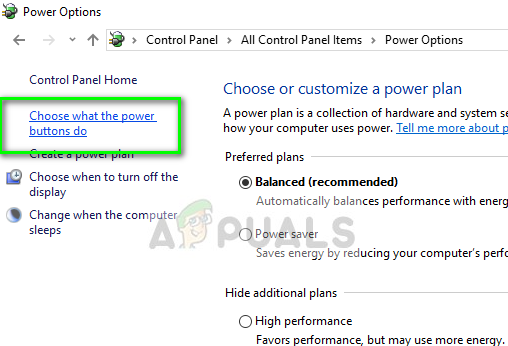
- Once in the Power Options, click on “Choose what the power buttons do” present at the left side of the screen.
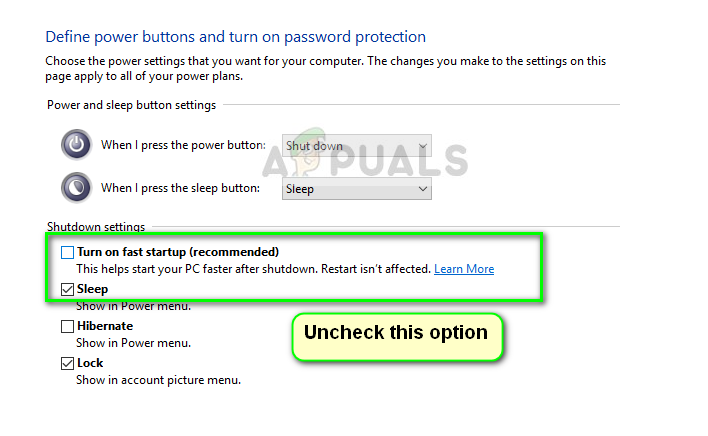
- Now you will see an option that requires administrative privileges named “Change Settings that are currently unavailable”. Click it.
- Now head to the bottom of the screen and uncheck the box which says “Turn on fast startup”. Save changes and exit.
- Restart your computer properly and check if you can launch AURA without any issues.
Solution 2: Reinstalling ASUS AURA
If the fast startup isn’t the culprit of your AURA software not working, we can try completely uninstalling AURA and then replacing it with a newer version. Installation files get corrupt all the time along with some temporary data of the user in the form of configurations. We will use AURA Uninstaller too to make sure that there are no remnants.
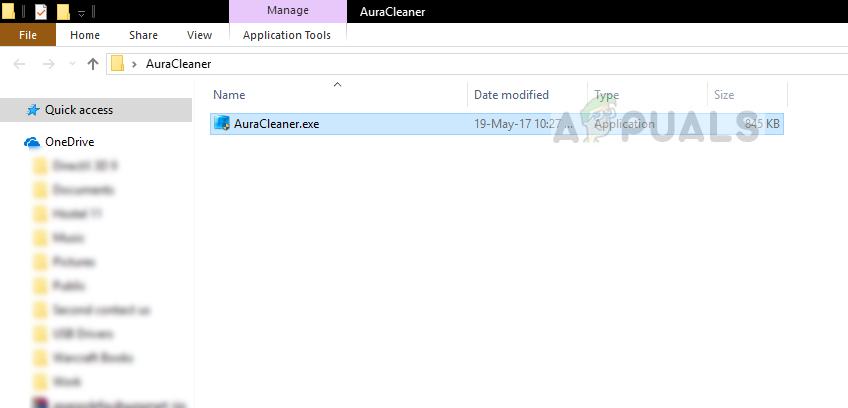
- Download the Uninstallation Utility from (here) and save it to an accessible location on your computer.
- Now right-click on the executable and select Run as administrator. ASUS AURA will now be removed from your computer along with all its temporary files.
Note: You will require your account to have administrative privileges for this.
- Shut down your computer properly. Now take out the power cables from the CPU and make sure every peripheral is plugged out. Now keep pressing the power button for around 30 seconds. Now, wait for 5 – 10 minutes before connecting everything back and proceeding with the solution.
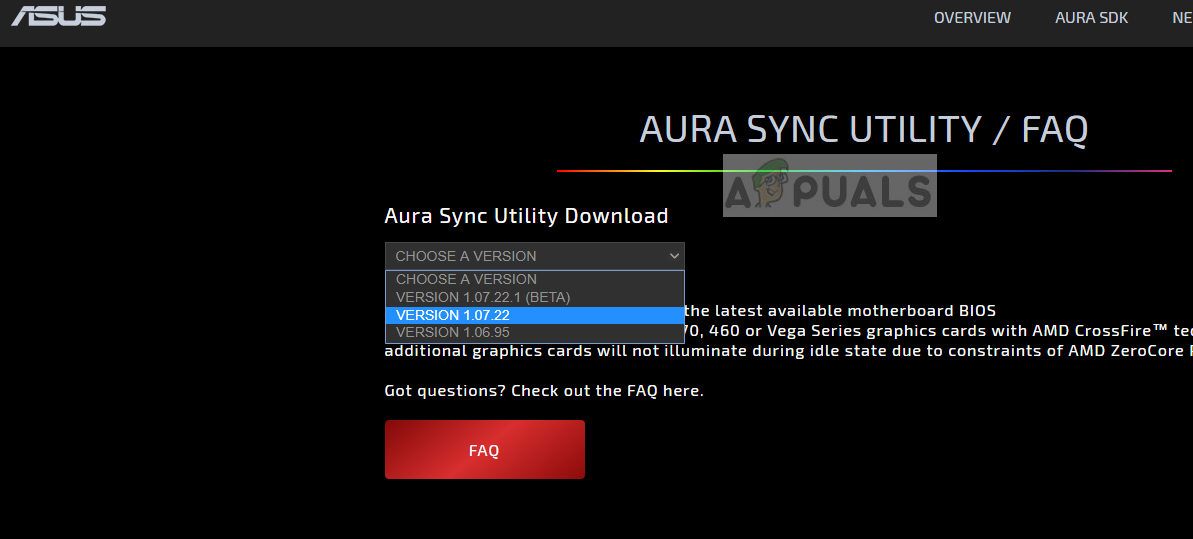
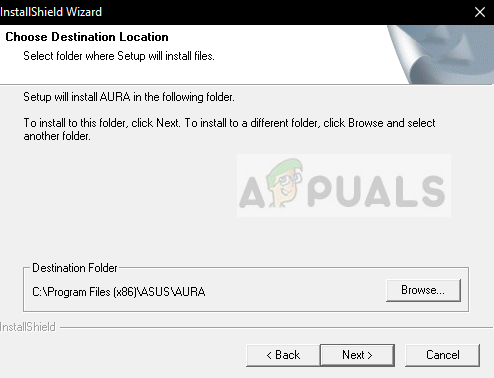
- Now navigate to the ASUS AURA official website and download the application to an accessible location.
- Now launch the executable and install AURA application on your computer. Make sure that you do not change the default installation directory on your computer. There were several cases where changing the installation directory rendered the installation useless.
- After the installation, restart your computer properly and launch AURA. Check if the issue is solved.
Note: If the latest version doesn’t work on your computer, you can always go ahead and install an older version.
Solution 3: Checking RGB Headers
The majority of the users reading this article would most probably be using the additional LED on their rigs. These LED’s get connected to the LED headers present on the ASUS motherboard. There are mostly two connectors which are connected to the strips (these strips include LED strips as well as RGB fan strips). If you are not connecting the RGB strips properly into the headers, you will not see any LED’s glowing and it may give an illusion that AURA is not working.
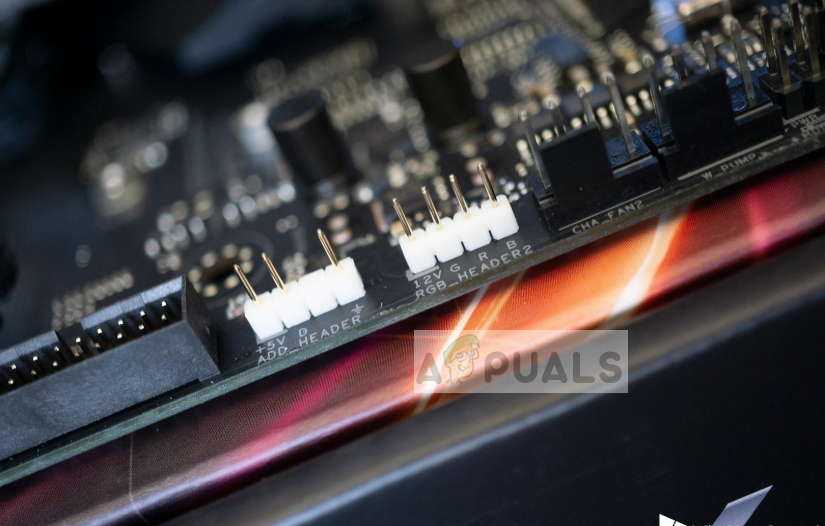
Make sure that the strips are properly connected to the headers. There is a certain way you have to connect the connectors into the headers. Also, don’t exert physical force for it may damage the headers.
Solution 4: Uninstalling other RGB Software
AURA is known to conflict with other RGB software installed on your computer which may include software from Corsair, Cooler master, etc. Since all these software uses the same primary components, there might be a race condition where each module competes for the use of an external resource.
Press Windows + R, type “appwiz.cpl” in the dialogue box and press Enter. Once in the application manager, right-click on any additional lighting software installed on your computer and uninstall it. Restart your computer after performing these actions and check if the issue is resolved.