How to Create and Run a Virtual Machine With Hyper-V
Hyper-V is a virtual machine feature built into Windows. It was originally part of the Windows 2008 server but was integrated into desktop starting with Windows 8. Hyper-V allows you to create virtual machines without installing additional software.
This feature is available readily in Windows 10 Pro, Enterprise, and Education editions. It is not available in Windows 10 Home edition. We will guide you step by step on how to activate Hyper-V and create a virtual machine on your computer.
Step 1: Setting up Hyper-V
Hyper-V isn’t installed on your OS by default. It is already present in additional features in Windows. We will enable Hyper-V by checking some checkboxes and proceed with the activation.
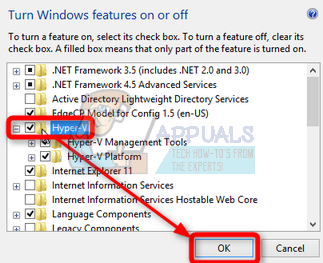
- Press Windows + S to launch the search bar. Type “Windows features” in the dialogue box. Open the first result which comes forth.
- Locate Hyper-V from the list of items. Check it and ensure that all subcategories are also checked by pressing the “+” icon beside Hyper-V.

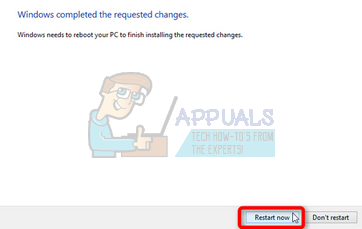
- After Windows is done installing Hyper-V on your machine, it will prompt for a restart. Press “Restart Now”.
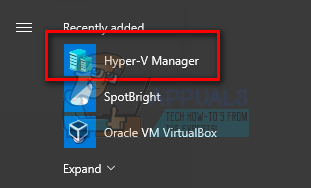
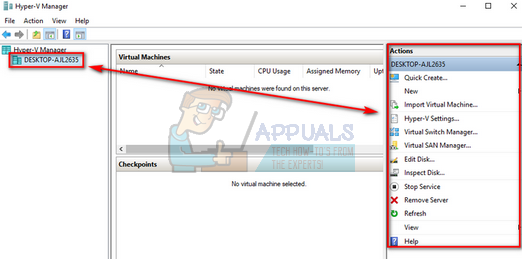
- Once your computer has restarted, press Windows + S and type “Hyper-V Manager”. Open the first result which comes forth. If you don’t find any relevant results, look at the “Recently added” tab and open Hyper-V Manager.
Note: If you receive an error stating “Hypervisor not running” when you open the application, open the command prompt as administrator run the following command. Reboot your PC after the command executes.
bcdedit /set hypervisorlaunchtype auto
- Hyper-V will automatically connect to your host and show the menu on the right pane. Click the name of your computer at the left side of the pane.
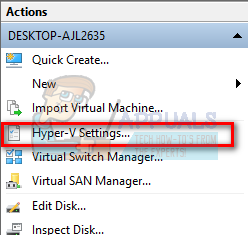
- If you want to change the location where your Hyper-V machine is located, click on Hyper-V Settings present at the right navigation pane.
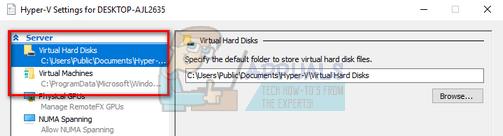
The top two entries will contain the location information. Select the option and press Browse to navigate the directory of interest. You should select a location where there is plenty of memory for you to load your virtual machine or save the data.
Step 2: Creating a Virtual Switch
If we want to give the virtual machine access to the internet, we need to create a virtual switch first. It is a bridge between the virtual network adapter on the virtual machine and the physical network adapter on the host computer. The Hyper-V virtual machine has no way to connect to the internet without this virtual switch.
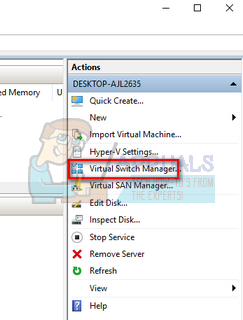
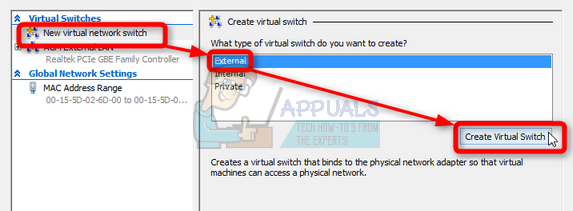
- Select the option of “Virtual Switch Manager” present at the right navigation pane.
- When the manager pops up, select “New virtual network switch” from the left navigation pane, click “External” and then click the “Create Virtual Switch” as seen in the screenshot below.
- Now Hyper-V will prompt you to name this virtual switch. Name the switch according to your choice. Select External network, click on the drop-down below it and select the host network adapter you wish to use. Press Ok when you are done making changes.

- Windows will prompt for confirmation before creating the switch. Press Yes.
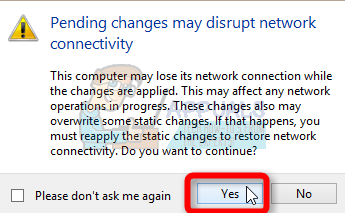
Note: For a virtual machine to connect to the internet, it has to use the virtual switch which in turn must be connected to a working host network adapter (also connected to the internet). For example, if we assign host WiFi network adapter to the virtual switch but it isn’t connected to the internet or is disabled, the virtual machine will not be able to connect to the internet. Furthermore, when Hyper-V is enabled and one or more virtual switches are created, the host system uses these switches to connect to the internet instead of the regular host network adapters. It is perfectly normal so don’t remove these virtual switches from your internet settings.
Step 3: Creating a Virtual Machine
Now we are ready to create our virtual machine. Although Hyper-V was designed to run Windows OS, sometimes other operating systems such as Linux also works perfectly.
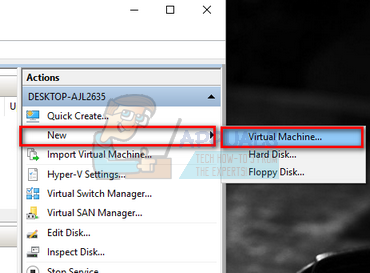
- Select New > Virtual Machine using the right navigation pane on Hyper-V.
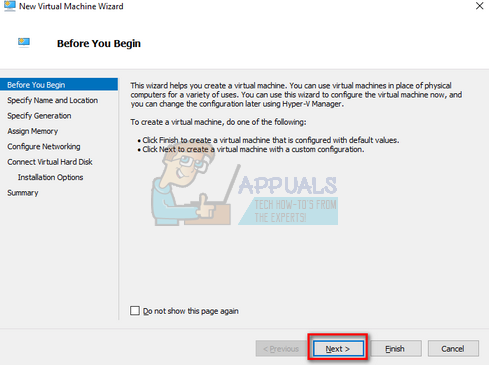
- A wizard will launch to guide you through all the steps. Press Next when the first page pops up.
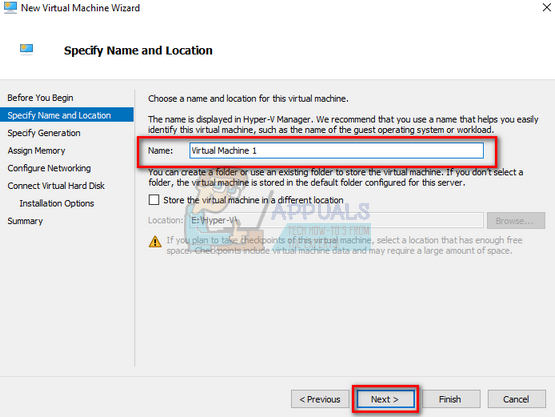
- Name your virtual machine by typing in the Name dialogue box. If you want to store your virtual machine to other location than the default one, check the box “Store the virtual machine in a different location” and then browse the directory. Click Next when you are done making changes.
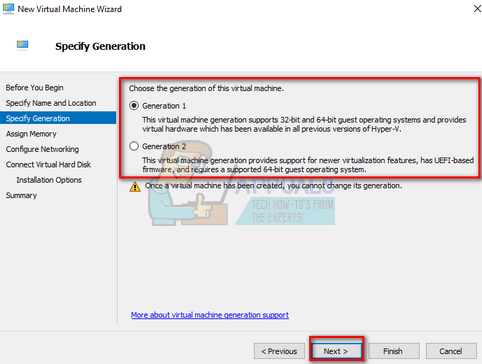
- Now will be required to choose the generation of your virtual machine. Generation 2 (UEFI/GPT) should be chosen for 64 bit Windows 8 or for later versions. For all other guest systems, you should select Generation 1 (BIOS/MBR).
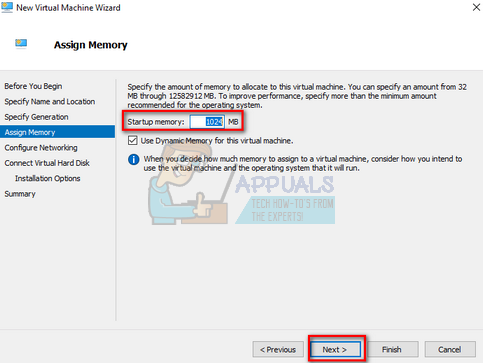
- The RAM which is assigned to the Virtual Machine is taken from your Host Computer. If you assign 1 GB to the VM, your host computer will be missing 1 GB from its total memory.
If you have 2 GB on your host computer, you should allocate more than 512 MB to the VM. If you have 4 GB on your host computer, you should allocate more than 1 GB to the VM.
Also, select the option “Use Dynamic Memory for this virtual machine”. This lets your Hyper-V to be flexible by only using the amount of RAM needed at a given time. When the virtual machine starts up, it uses all of the allocated RAM. Later on when only a portion of the total is needed, it releases the free RAM back to the host (getting again more when required).
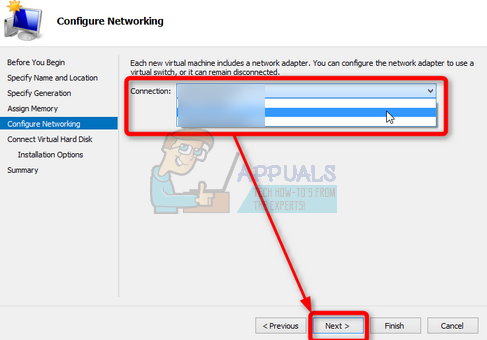
- Now select existing virtual switch (which we made in step 2) and click Next to proceed with the setup.
- Now you will be required to allocate the size of your virtual hard disk. If you want to test an operating system and not install any applications or do any heavy work, 20 GB is enough. The more memory you allocate, the more applications you can install on your virtual machine.

Note: By default, Hyper-V uses dynamically expanding VHD. If you create a VHD of 100 GB and only use 20 GB, Hyper-V will only use 20 GB. What size actually means is your virtual machine’s hard drive has the permission to expand up to 100 GB (which we allocated in this example). So the more applications you install or the more data you store, your VHD will increase in size proportionally.
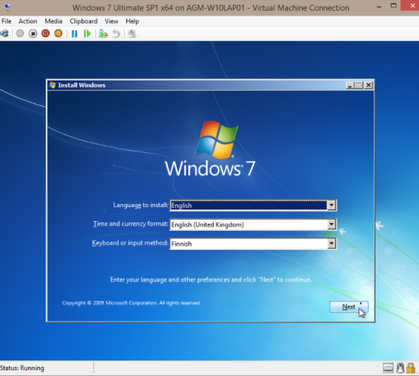
- Select the install media for your virtual machine. If you want to install from a bootable CD/DVD, check the box which states it. You can also install the operating system using an iso image already saved on your computer.

- Now Hyper-V will provide you with a summary of all the settings of your virtual machine. Review them carefully and feel free to change any discrepancy by clicking the Previous button.

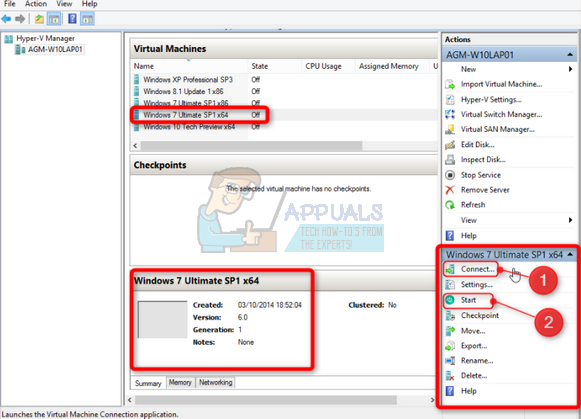
- Once you have created the virtual machine successfully, select “Connect” and wait until the VM window opens. Then press “Start” to launch your virtual machine.
- Now the VM will be up and running. You can use it like you would any operating system in its default state.