5 Best Open-Air PC Cases For Your Dream Build
When it comes to putting together a new Gaming PC, there are a lot of components to pay attention to. In the midst of all this, it’s easy to forget about one component when you are worrying about saving up for something else. With all that said, never underestimate the importance of a great case for your rig. If you are an enthusiast builder, this is something worth paying even more attention to.
A great PC case can provide incredible airflow, and even enhance the overall look and aesthetics of a system. Nothing does this better than an Open-Air PC case. As the name implies, these cases give you a clear view of all components, and the case is open from all sides. It’s all about how one utilizes the uniqueness of these cases, as they can take your rig to the next level.
Open-air cases are a good option for experienced builders. They are also the best options for both air cooling and even a custom watercooling loop. But some novices are already worried about leaving their side panel open, so is an open-air case a safe option?
The answer depends on how enthusiastic you are about making your rig look unique. An open-air case will require more attention, but it definitely pays off in the end. Enough talk, let’s have a look at the best open-air PC cases.
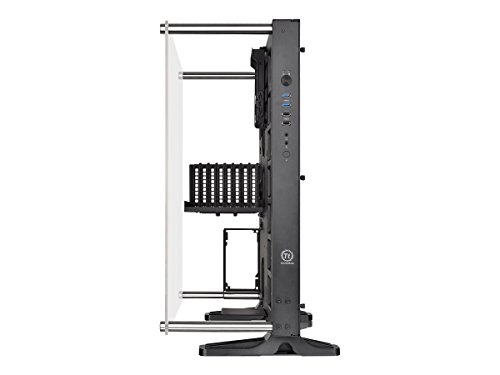
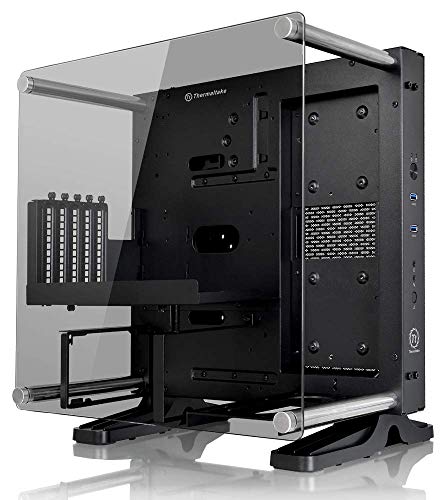
1. Thermaltake Core P5 Open-Air Gaming Case
Best Overall
Pros
- Premium fit and finish
- Minimal and Sleek aesthetic
- Included VESA mount
- Great for watercooling
Cons
- Very few cable routing holes
Form Factor: Full Tower/ATX | Fan mounts: 4 | Storage Expansion Bays: 4 | I/O Ports: 2 x USB 3.0, 2 x USB 2.0, Audio in/out, Power button, Reset button | Weight: 12.2kg
 Check Price
The Thermaltake Core P5 TG is by far the most ambitious take on an open-air case. It is the perfect blend of premium design, well thought out layout, and customization. This is an enthusiast builder’s dream come true. Coincidentally, it’s also one of the best cases on the market for building a full custom loop. All of that thanks to the genius design.
Assembling an open-air PC case isn’t easy, but Thermaltake tried to alleviate that pain. The main chassis is the first thing you’ll see after opening the box. Surrounding it are all the mountable trays and accessories. Brackets for the PSU and expansion slots, mounting gear for a custom loop, and even a PCIe ribbon cable are all included.
A VESA mount is included at the back, which is great for mounting it on the wall. You can also use the sturdy feet included in the box if you aren’t feeling that ambitious. The motherboard tray is quite standard, and it is very similar to a regular case. However, you can add in a vertical PCIe bracket for the GPU, or even flip the whole motherboard to 90 degrees.
On the outside, one side is completely solid and has no ports. The ports, power button, audio jack, and a Thermaltake logo are all located on the right side. The hard drive and SSDs trays are located at the back. A hard drive cage is also included. You can also install a 480mm radiator.
Overall this is an excellent case. It can benefit from a few more cable routing holes, but that’s not much to complain about.
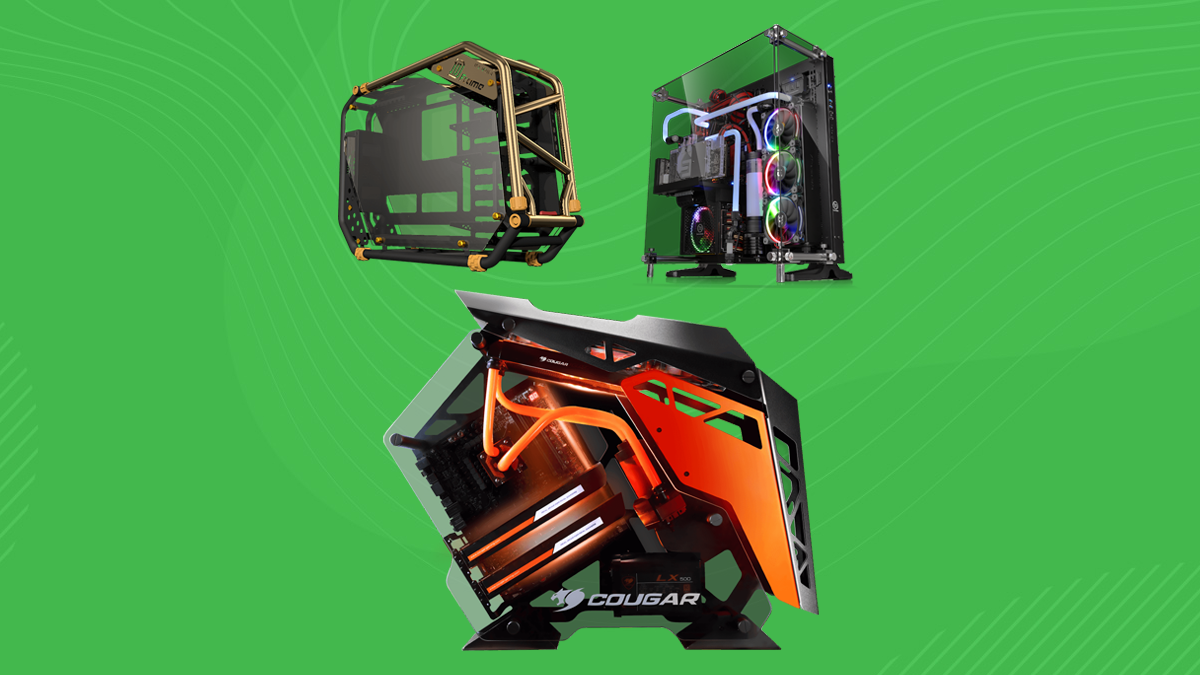
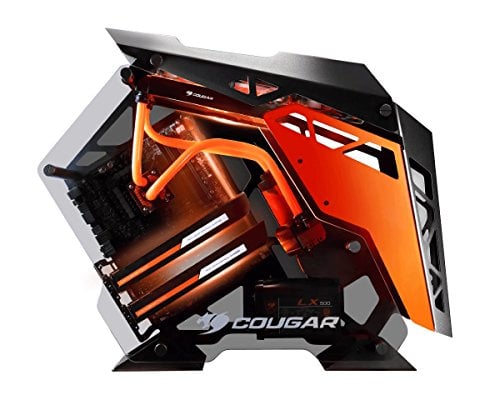
2. Cougar Conquer ATX Gaming Case
Flashiest Design
Pros
- Extremely eye-catching
- Sturdy build quality
- Watercooling support
- Lots of customization
Cons
- Definitely not for everyone
Form Factor: Mid Tower/ATX | Fan mounts: 5 | Storage Expansion Bays: 7 | I/O Ports: 2 x USB 3.0, Audio in/out, Power button, Reset button | Weight: 14kg
This is a case that immediately catches the eye of anyone who sees it. Arguably, this is the flashiest looking case on this list. Nothing screams standing out quite like the Cougar Conquer Gaming case. This is one of those cases that you’ll either love or hate. So, if you love the design already, let’s see what else this case has to offer.
For a case this expensive, build quality should be exceptional. Fortunately, the Cougar Conquer lives up to this expectation. Each side has quite thick and heavy tempered glass. The aluminum bars stand out from the central frame, which is also entirely aluminum. It is important to keep in mind that the case will be unassembled when you get it. So you’ll have to put it together on your own.
The bottom feet are quite wide and provide some form of stability. When it is completely assembled, there is little to no wobble. Knocking it over is not an easy feat either. The look and aesthetics are subjective. If you’re a fan of the angled design and sharp metal, this will immediately please you. The top panel has a hinge, which is quite unique. Unscrew it and you can lift it up.
You can mount a 360mm radiator at the top or a 240mm at the front. Although, if you are thinking of watercooling in any form, be sure to plan your loop ahead of time. The case isn’t perfect as it’s hard to put together and there is a chance it could get damaged in shipping. Apart from that, this is one of the most eye-catching cases ever made.
3. Streacom ST-BC1 Open Benchtable
For Hardware Enthusiasts
Pros
- Ideal for reviewers
- Rigid industrial design
- Extremely Versatile
Cons
- Prone to dust collection
- Not practical for the average person

Form Factor: Test-Bench/ATX | Fan mounts: 2 (Included radiator brackets) | Storage Expansion Bays: 2 | I/O Ports: N/A | Weight: 1.82kg
We’re switching things up a bit with our third case on this list. While technically it is a test bench more than a case, it is worth keeping an eye out for. There are plenty of enthusiasts out there who swap components out a lot. For those people, an open-air test bench can be a very viable option. They are technically open-air cases, but with more room for modifications.
The Streacom BC1 Open Benchtable is the best option out there. The BC1 is vastly different from most open-air cases. It arrives in a slim metal cardboard box. It uses a single piece of anodized aluminum for the construction. There is something about the industrial look that is aesthetically pleasing.
It also happens to be quite portable, which is helpful for modders and reviewers on the move. Building on this test bench is actually quite easy. You’ll have to attach the feet first, but that’s as simple as screwing them into the sides. Motherboard standoffs are included, and just about any motherboard will work.
The CPU backplate can be easily accessed, as the motherboard will sit slightly above the main chassis. This is a clever design, no doubt. The PSU attaches to the bottom right, and you will need three screws to attach it securely. Your hard drives and SSDs attach vertically to the left side of the test bench. Cables are easy to manage, as you can tuck them neatly at the bottom.
Unfortunately, there are obvious downsides here. With a completely open system like this, the components are prone to collect dust. Apart from that, the average person might not benefit much from this case.
4. Thermaltake Core P1 Tempered Glass Edition
Unbeatable Value
Pros
- Competitive pricing
- Solid construction
- Watercooling support
Cons
- Poor quality riser cable
- Diffiicult to build in for beginners
Form Factor: Mid-tower/Mini ITX | Fan mounts: 2 | Storage Expansion Bays: 3 | I/O Ports: 2 x USB 3.0, Audio in/out, Power button, Reset button | Weight: 9.5kg
Think of the Thermaltake Core P1 as the younger brother of the Core P5. It is the Mini-ITX variant of the Core P5 and shares mostly the same design language. Of course, some sacrifices are necessary to make a smaller version. Fortunately enough, it retains most of the redeemable qualities of a bigger case, with a few minor drawbacks.
As I just mentioned, the Core P1 still utilizes the same minimal and unique design from the Core P series lineup. It is an open-air case with sturdy metal construction. The main aluminum chassis feels rigid, and you’ll feel confident when building inside of it.
Speaking of which, building in this chassis is a bit tougher due to the smaller size. However, if you’ve ever built in an ITX case before, you’ll do fine. Just remember that this was made for modders, not for an inexperienced builder. There is enough space to work around along with great cable management routes. You can even house a full custom water-cooled loop, which isn’t always easy in an ITX case.
However, there are a few downsides that might hold you back. The motherboard spacers screws are a bit wobbly and don’t instill a lot of confidence. Also, certain radiators can be difficult to mount as the space for the rad is not that wide. The included riser cable for the GPU isn’t that great either. With all that said, it’s not a bad case for the price and definitely stands out in that category.
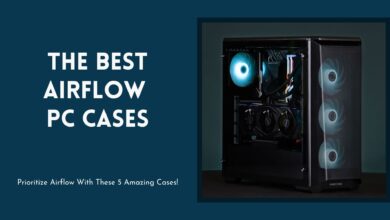
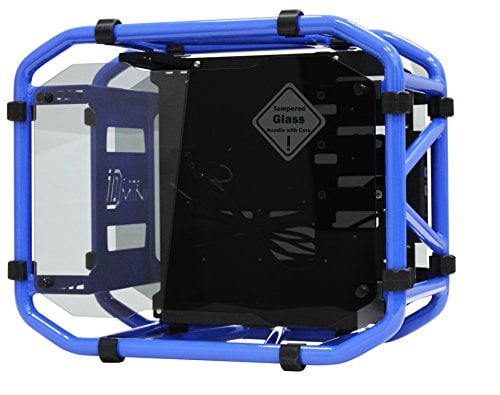
5. InWin D Frame Mini
The Ultimate Showpiece
Pros
- Stands out from the crowd
- Lots of versatility
- Separate PSU shroud
Cons
- Difficult cable management
- Not practical
- Very Expensive
Form Factor: Mid-tower/Mini-ITX | Fan mounts: 2 | Storage Expansion Bays: 5 | I/O Ports: 2 x USB 3.0, Audio in/out, Power button, Reset button | Weight: 7.22kg
A lot of expensive cases on the market can end up looking extremely similar. Most of them are large boxes of metal with a tempered glass side panel on the side. While this trend is minimal and sleek, it’s hard to make your rig stand out when compared with thousands of others out there. If you are the sort of person who cares about that, have a look at the InWin D Frame Mini.
The D Frame Mini is unlike anything we’ve seen before, and the same is probably true for most people. This completely open-air chassis uses “motorcycle tubes” for the construction. The octagon shape is supported by rigid metal tubes, which gives the case its own separate identity. If we didn’t tell you it was a PC case and showed it to you completely empty, you’d have a hard time guessing what it is.
Depending on how you set it down, the motherboard can either be placed horizontally or vertically. To be completely honest, placing it down so the motherboard is flipped looks more natural. The GPU can also be mounted vertically this way. The power supply is behind that in a separate compartment, and a 240mm radiator can go at the bottom.
The backside is completely open, hence cable management will be quite the chore. The case is also quite massive, despite the “Mini” in the name. It also happens to be extremely expensive, which is expected since this is more of a showcase chassis. The InWin D Frame Mini is not practical, but it does its job of standing out, at the sacrifice of your wallet.