BEST FIX: High CPU Usage By TiWorker.exe
“TiWorker is a WMI (Windows Modules Installer) Worker Process related to Windows Update. Usually, the error occurs after an update has run. In this fix, I will list five methods that you can use to attempt to stop TiWorker from consuming your CPU.
If a process is utilizing the entire CPU or a portion of it, then it can slow down the computer and the performance of apps running on it. It can also overheat the CPU since it constantly utilizes all available threads to process the requests by the process, which in this case is TiWorker.exe.
Method 1: Run System Maintenance.
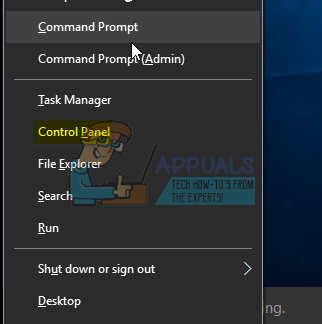
Hold the Windows key and press X. Choose Control Panel.
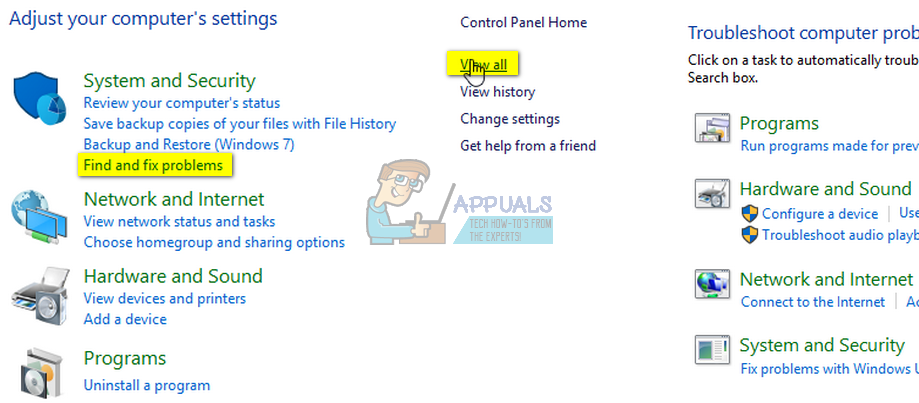
Choose “Find and Fix Problems” and then click “View All” from the left pane.
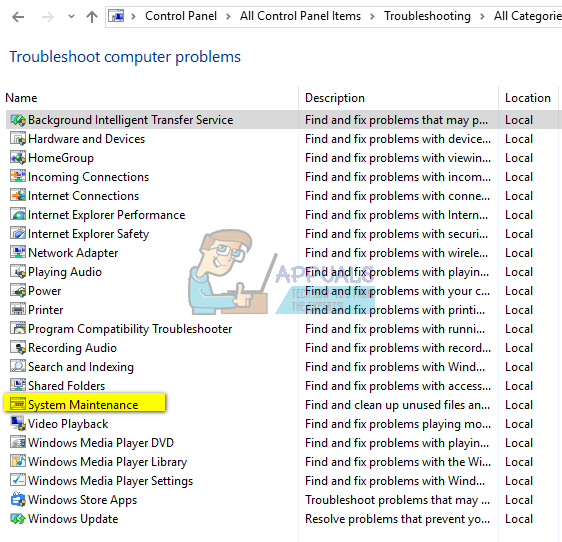
Choose ‘System Maintenance‘ and click ‘Next.’
Let the troubleshooter run. After it has finished, check to see if the problem has been resolved or not.

Method 2: Run Windows Update.
On a Windows 8/8.1 system, check for updates manually and install them.
Again, hold the Windows Key and press X, then choose Control Panel.

Click or tap ‘Windows Updates,’ and from the left pane, click on ‘Check for Updates.’

On a Windows 10 computer, press the Windows key + A, then choose All Settings. Select Windows Updates from the left pane, and click Check for Updates.

Method 3: Perform a Clean Boot of Your System.
For clean booting your PC, please refer to this post: Clean Boot.
Method 4: Whitelist “msmpeng.exe” and then restart Windows Update.
This issue can also be caused when your Windows Update is being blocked by your Windows Defender, or another antivirus program that you have installed on your computer. This can lead to a conflict, resulting in corrupted Windows Update files and spikes of high resource usage. To fix this, we will need to whitelist “msmpeng.exe” in the antivirus. Follow the steps shown below:
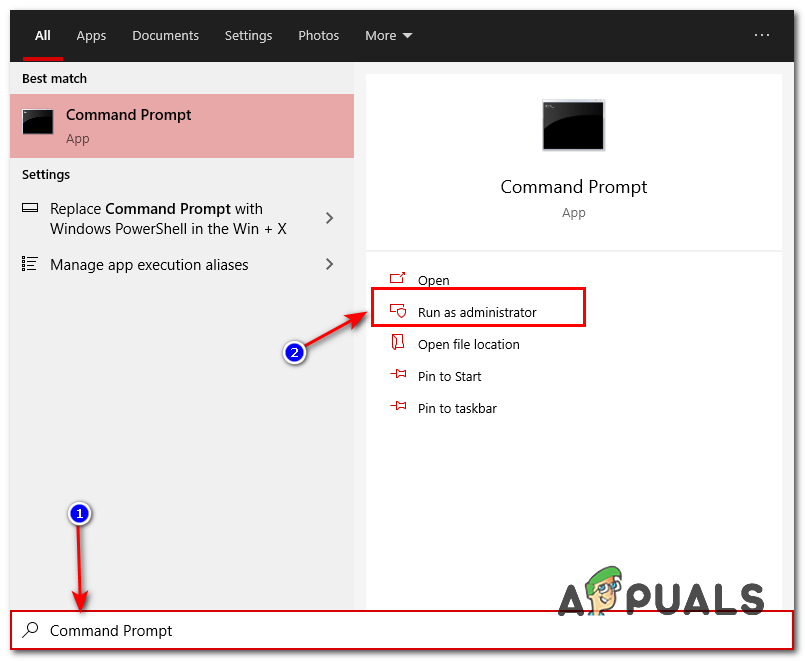
- First of all, search for Command Prompt and run it as an administrator.
Opening Command Prompt - Once the Command Prompt is opened, type the following command and then press Enter: “In PowerShell, run the command ‘Add-MpPreference -ExclusionProcess “msmpeng.exe”‘.
- This should exclude the process from your Windows Defender (if you have any third-party antivirus, please whitelist this process manually).
- Now, we will have to restart our Windows Update services and clear the old Windows data.
- Open the Command Prompt as an administrator once more, and type the following commands one by one:
net stop bits

net stop wuauserv

net stop appidsvc

net stop cryptsvc

Ren %systemroot%\SoftwareDistribution SoftwareDistribution.bak

Ren %systemroot%\system32\catroot2 catroot2.bak

net start bits

net start wuauserv

net start appidsvc

net start cryptsvc
- Restart your computer and check to see if the issue persists.
Method 5: Run the System File Checker.
Run System File Checker. Hold the Windows key and press W, then type “cmd” in the search box.
Right-click on ‘cmd‘ and select ‘Run as Administrator.’

You will get a black command prompt as shown above.
In this command prompt window, type sfc /scannow and hit Enter.
This will take 30 to 50 minutes. After it finishes, you will receive one of the two messages:
a) Windows Resource Protection did not find any integrity violations. (No further action is needed if this is the message you receive).
b)Windows Resource Protection found corrupt files (etc.). If you get a long message with starting lines such as ‘Windows Resource Protection found corrupt files,’ then, in the same command prompt window, type and run the following command:

Dism /Online /Cleanup-Image /RestoreHealth
You will be notified on your screen after the clean-up operation has completed. Reboot your PC and then test.
Some users have also reported high CPU usage issues with the system and compressed memory. If you spot the system and compressed memory consuming too much of your CPU, then check out the System and Compressed Memory Guide.