Fix: Contact the administrator to obtain permission
Windows has a security pattern that doesn’t allow users other than the Administrator to make changes to certain files within the Windows directory. One must have permission in order to perform these tasks. Administrative privilege is crucial within Windows, as it protects the computer from external threats.
Sometimes, users seem to find issues with permissions inside Windows. Although they are logged in as administrators, they find it difficult to save files in their Documents, Pictures, OneDrive, and other folders. The error message pops up while copying files to these specific folders, stating, “You don’t have permission to save in this location. Contact the administrator to obtain permission.” It seems as though only read-only mode is enabled, with no write mode to allow users to make changes to folders. This is quite frustrating, as they cannot access these folders. Therefore, in this guide, we will be addressing and fixing this permission issue that restricts access.
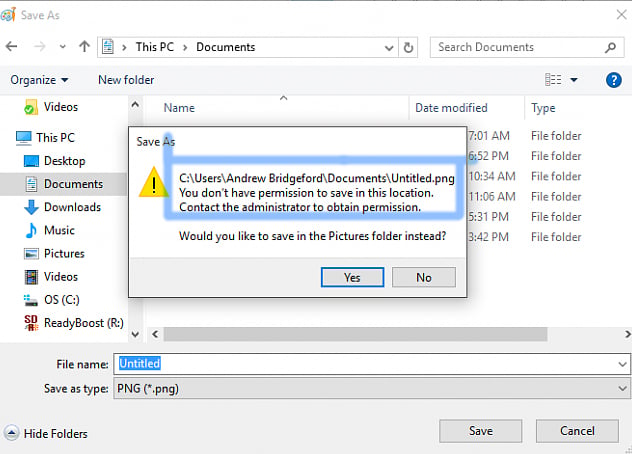
Reason behind the permission issue:
In the majority of cases, this problem is caused by OneDrive creating permission-related issues. It alters the permissions, thereby causing trouble.
Solution to Fix the Permission Issue:
To fix the permission issue, first, you will be required to disable OneDrive at Windows startup. You will also need to change your ownership by tweaking some settings. All of these steps will be discussed in this guide.
Disabling OneDrive during Windows startup:
1. The first thing you need to do is disable OneDrive at startup. You can accomplish this by opening the Task Manager. To open the Task Manager, right-click on the Start menu icon and select it from the list. Once it is opened, navigate to the Startup tab located at the top.
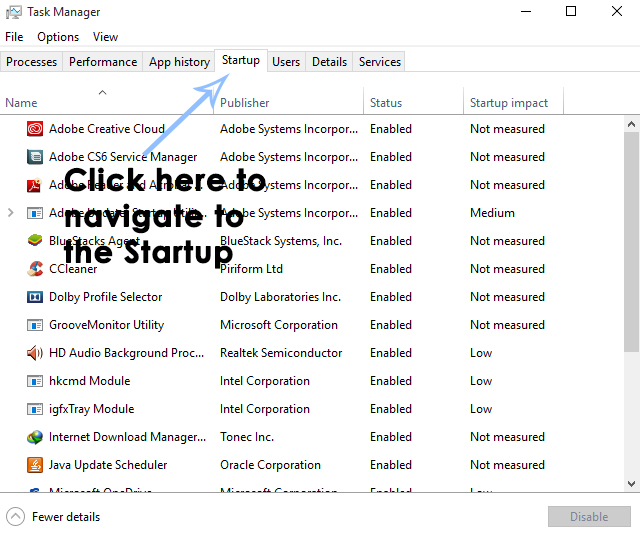
2. Inside the Startup tab, search for Microsoft OneDrive in the list, right-click on it, and select Disable. This will disable OneDrive during Windows startup. Restart the computer and proceed with the following steps to resolve permission issues.

Tweaking Some Settings to Gain Full Control of the System:
1. Right-click on the folder where you are experiencing permission issues. Select ‘Properties‘ and navigate to the ‘Security‘ tab at the top. Within the ‘Security’ tab, click on the ‘Advanced‘ button located at the bottom.

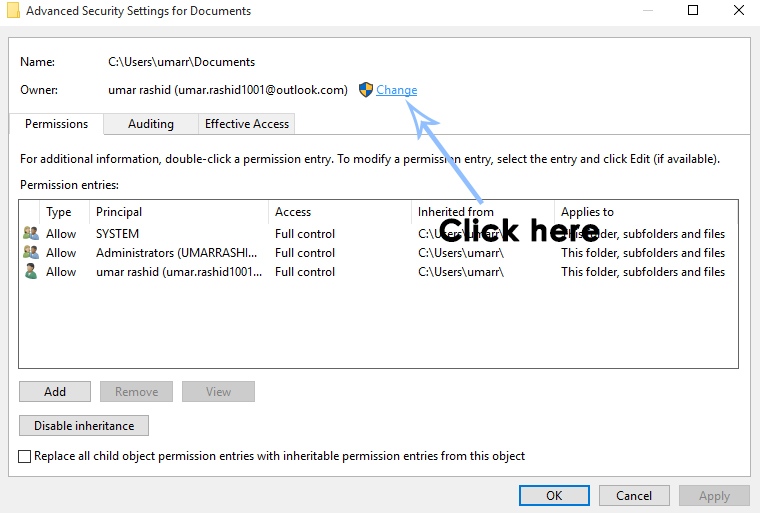
2. After opening the Advanced panel, click on the “Change” link (with a shield icon on the left) next to Owner.
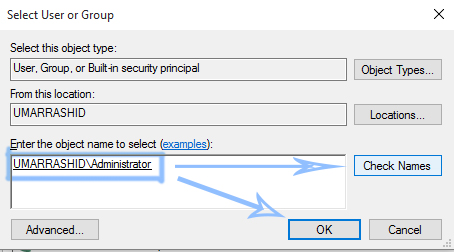
3. In the dialog that appears next, enter the object name in the text field, followed by clicking the ‘Check Names‘ button, as shown in the picture below. If you find it difficult, click on the ‘Advanced…‘ button at the bottom left and select the name from the list. Then, click ‘OK‘.
4. After performing the above task, a new checkbox labeled ‘Replace owner on subcontainers and objects‘ will appear under the Owner. Check this box, as well as the one at the bottom left. Ensure that you have full control by viewing it within the Permission entries. Click ‘Apply‘ and ‘OK‘ buttons, respectively. Refer to the image below for further illustration.
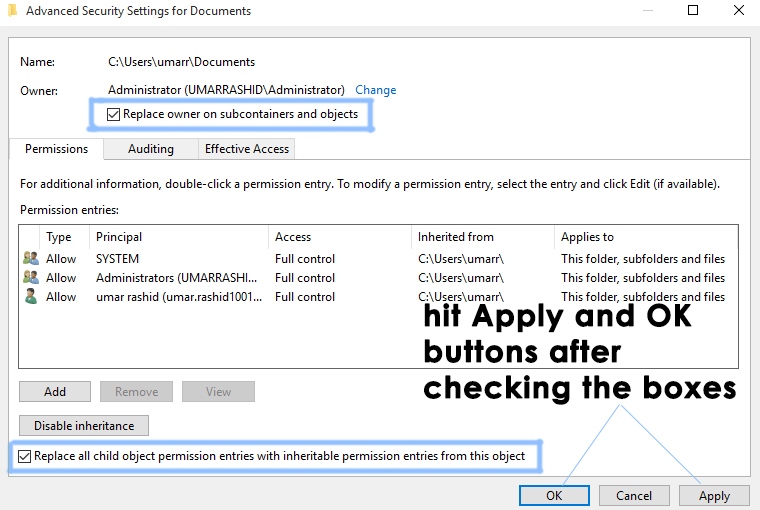
5. Repeat the entire procedure for all the folders with which you are experiencing permission issues. Ultimately, you will have full control of the system, and the permission issue will be resolved.