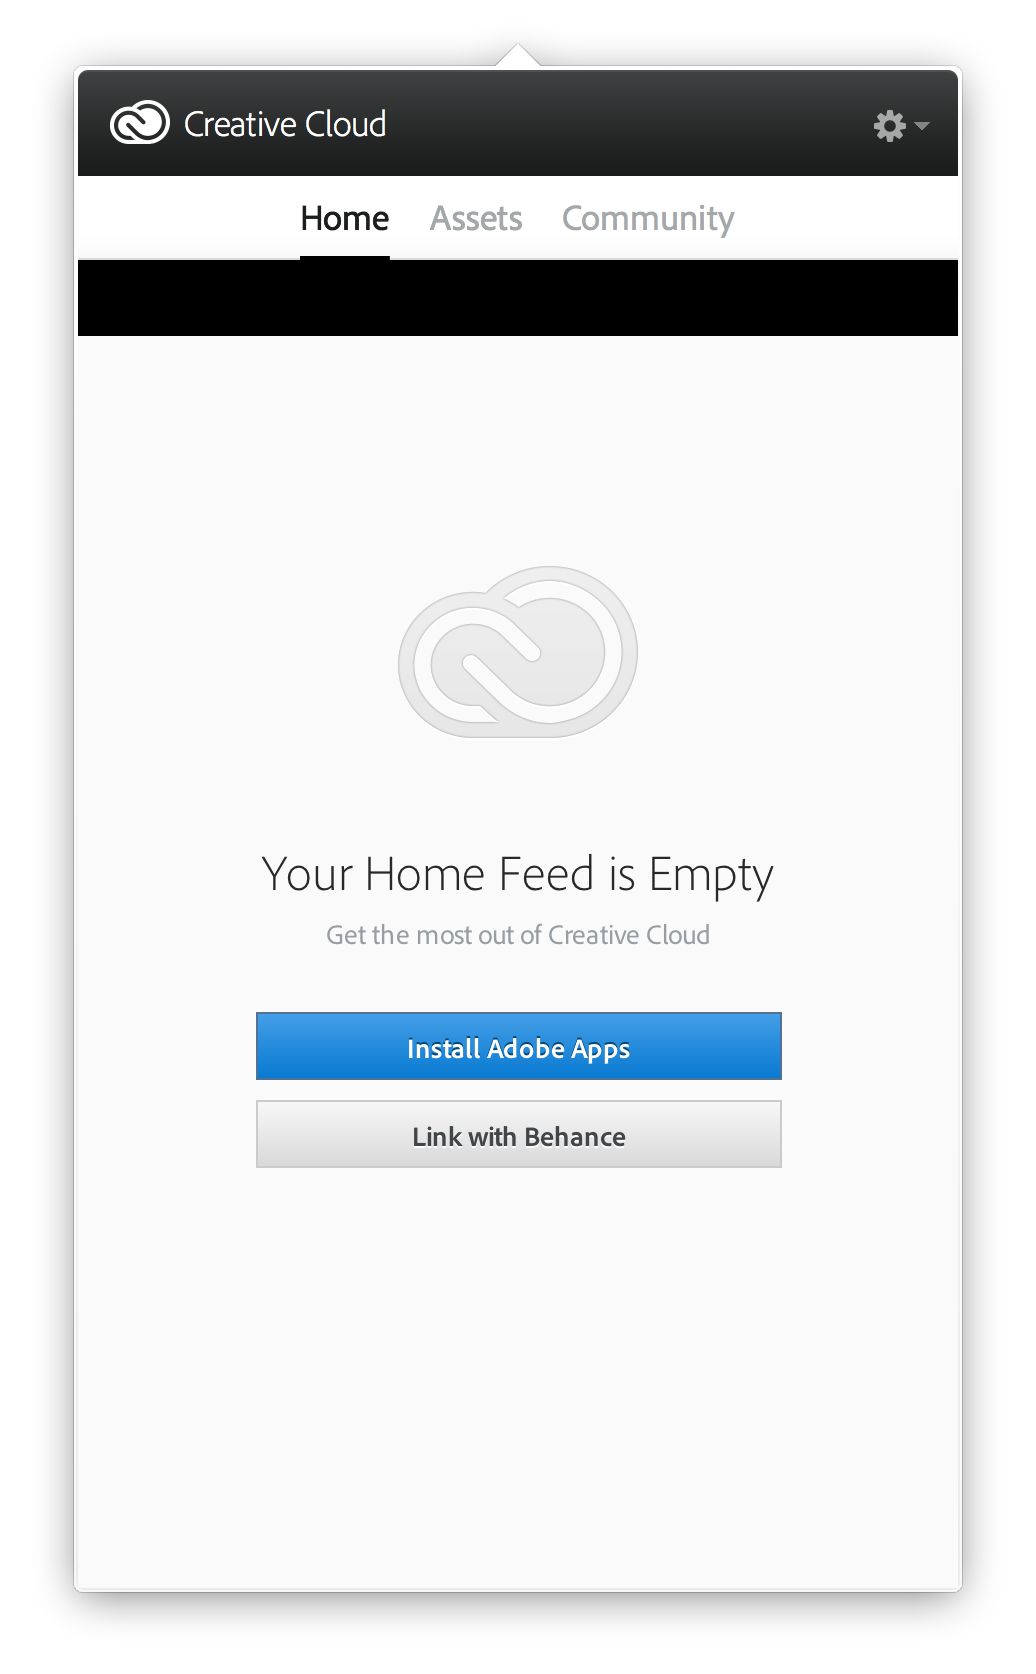
Restore the Missing Apps Tab from Adobe Creative Cloud
The apps tab in Adobe Creative Cloud’s desktop application goes missing in two cases; either you are logged in using credentials from your organization or you are using the desktop application as a private user. In the latter, there are a number of causes which bring about this error message including issues like corrupt XML files, incorrect configurations set, incomplete OBE data, and bad installation of the application etc.
There is an official page created by Adobe itself to target this problem but the hints listed there don’t seem to work. In this article, we will target both scenarios as listed above.
What causes ‘Apps tab not to show’ in Adobe Creative Cloud?
The causes which bring about this particular issue are mostly software related and don’t have anything to do with your computer’s hardware as compared to other related Creative Cloud issues. Some of them are but not limited to:
- Corrupt XML File: Adobe uses an XML file to store all the settings related to its operations and other configurations as well. If the very XML file is corrupt or has bad values set, the desktop application will fail to display any applications.
- Incomplete Application Data: Application data folder present in the creative cloud installation folder consists of all the application data parameters used in the operation of Creative cloud. This folder usually gets corrupt when you move the application from one place to another. Refreshing it might solve the problem instantly.
- Administrative restriction: If you are using an administrator account in your Creative Cloud application, it is possible that the administration itself has restricted the access of applications in Creative Cloud. Changing the permissions from the administrative panel might solve the problem instantly.
- Outdated Creative Cloud Installation: Last but not the least, if your creative cloud’s installation itself is corrupt or has missing files/folders, the application will not function properly and bring about errors like the one under discussion. Reinstalling the entire application will solve the issue.
Before we move on with the solutions, make sure that you have an active internet connection and are logged in as an administrator on your computer. Also, you should have your Adobe Creative Cloud’s credentials at hand as well.
Note: You should also consider creating a system restore point if something goes wrong and also copy the contents of Creative Cloud to another location so you can always back up whenever needed.
How to Restore Apps Tab in Adobe Creative Cloud Application?
1. Changing the XML Config File
The very first troubleshooting step which we will perform will involve changing the XML file present in the installation of Adobe Creative Cloud application. XML files are used by applications all around to save their settings. Whenever the application is launched, it first fetches the XML file and after loading the settings, the application launched. There are some specific settings in the XML file which seem to affect the missing tab. In this solution, we will change those:
- Close all Adobe related applications and end all Adobe tasks as well.
- Press Windows + E to launch the Windows Explorer and navigate to the following address inside your Creative Cloud installation folder:
/Library/Application Support/Adobe/OOBE/Configs/ServiceConfig.xml
- Now, open the ‘xml’ file using any text editor (Atom or Notepad++).
- Now, change the False value to True.
- Save changes and exit. Restart your computer completely and launch Creative Cloud. Check if the issue is resolved.
2. Replacing ServiceConfig with a Fresh Copy
If the above method doesn’t work, we can try completely replacing the XML file. Here, we are assuming that the issue is only limited to the ServiceConfig.XML and all other modules are working properly. If this is the case, this solution will bring back the Apps tab in your Creative Cloud. If not, we will have to resort to complete reinstallation of the application as explained later on.
- Press Windows + E and navigate to the following address (this is the same which we navigated to in the previous solution).
/Library/Application Support/Adobe/OOBE/Configs/ServiceConfig.xml
- Now, copy xml to an accessible location as backup in case we need to replace it again.
- Now, delete the configuration file from your computer completely. Restart the system and launch Adobe Creative Cloud again.
- The application will automatically notice that the file is missing and it will download a fresh copy from the internet and replace it here.
3. Contacting your Administrator (for Accounts linked with an Organization)
If you are using credentials which belong to an organization or which an organization assigned to you, there are chances that they haven’t unlocked the feature of Apps in your Creative Cloud access. This is a very common scenario amongst offices.
If the administrator confirms that the organization has revoked access to its users of accessing the Applications in Creative Cloud, there is nothing you can do except log into the system as an individual user with your credentials (you would still have to buy the subscription if you haven’t purchased it in your account.
4. Reinstalling Adobe Creative Cloud
If none of the above methods work, there is a high chance that your very installation of the application is corrupt or incomplete. Because of this, the Cloud platform fails to pick up the installations of Adobe products (such as Lightroom or Photoshop). Here, we have to completely remove Creative Cloud from your computer and install it again after downloading all the files again.
Note: You can copy/paste the Adobe Installation folder to another location or storage device so you can always restore an earlier copy if required in the future.
- Press Windows + R, type “appwiz.cpl” in the dialogue box and press Enter.
- Once in the application manager, search for Adobe Creative Cloud. Right-click on it and select Uninstall.

Uninstalling Adobe Creative Cloud - After the Wizard guides you through the process, restart your computer and wait for 2-3 minutes before you turn it on again.
- Navigate to the official website of Adobe and install the latest version of Creative Cloud. Once you have installed it, the Cloud will either automatically start downloading your products by itself or you would have to select what to download.
Solution 5: Contacting Support
If none of the above methods work and you think that this is a glitch with your account, you can contact Adobe Support and tell them about your problem. One way to make sure that this is associated with your account and not your computer is logging in another Adobe Creative Cloud user and checking if the applications tab is visible to him.

You can contact or make a ticket at Adobe’s official contact page. Make sure to mention your serial number and your product key if asked.